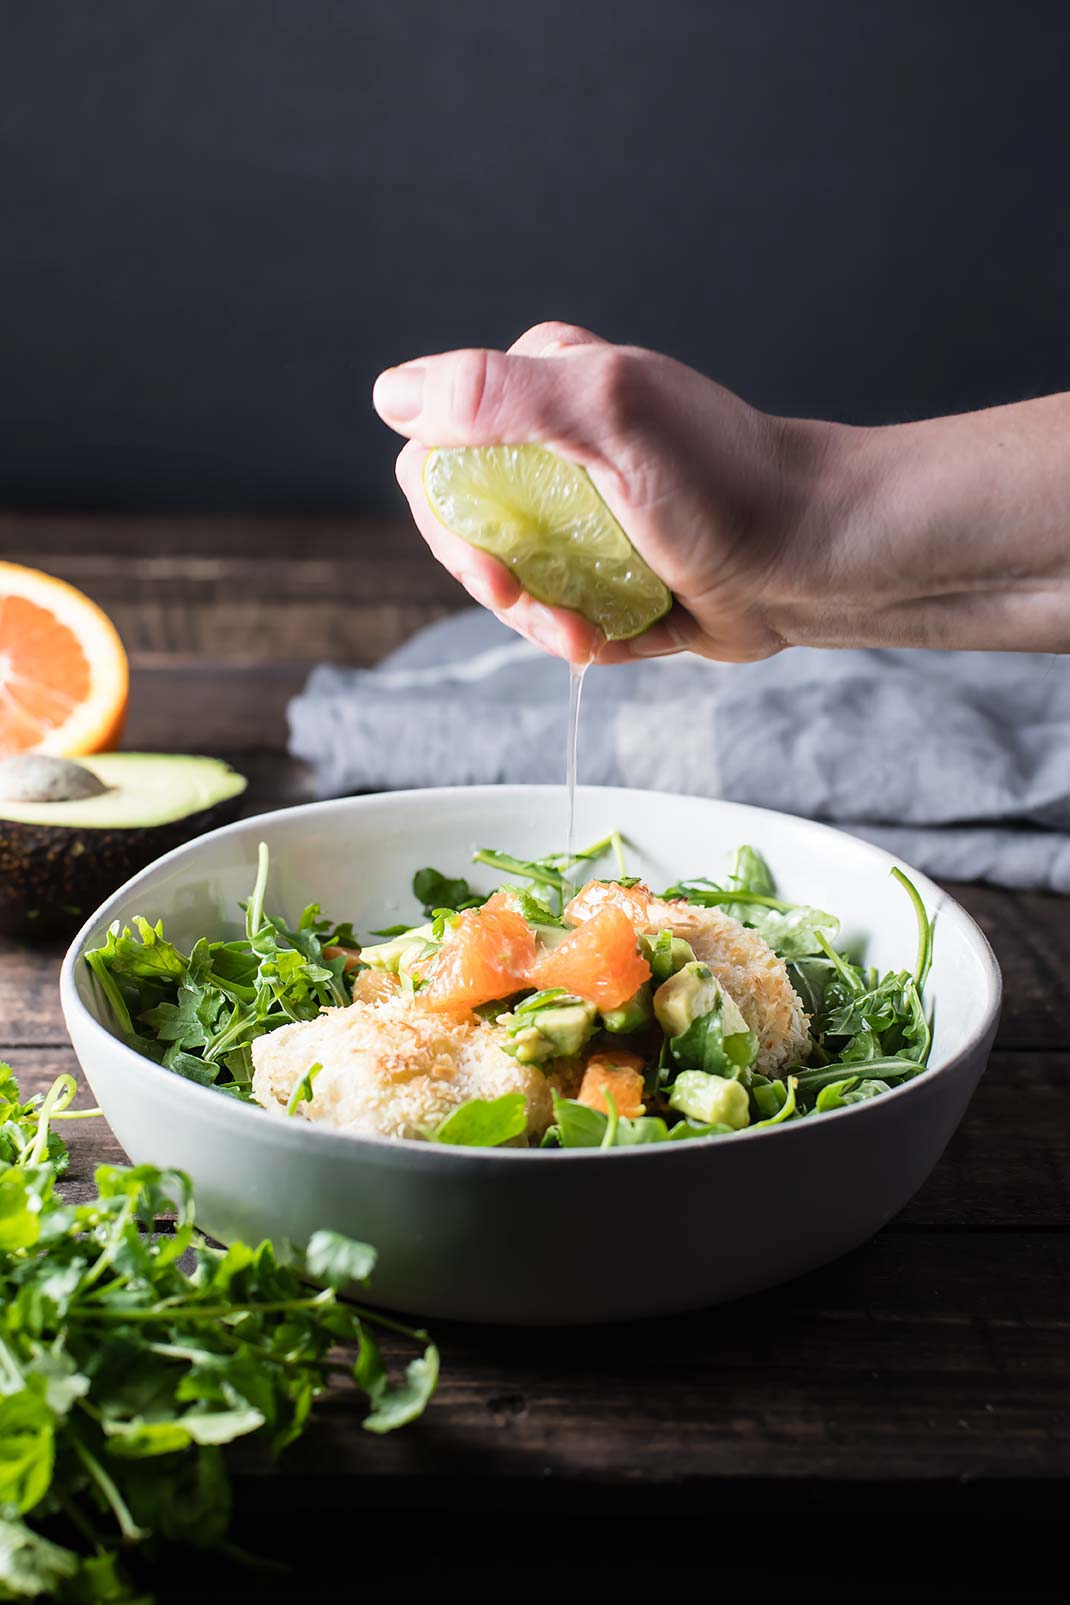
Coconut Crusted Mahi-Mahi with Cara Cara Orange Salsa

Coconut Crusted Mahi Mahi with Cara Cara Orange Salsa

There are days I plan dinner from the moment I wake up. The way the ingredients will feel as I chop them, the way they all come together, and the way they'll taste when finally on my fork. And then there are the days when I have no plan at all. On our drive home Oliver asks, "What’s for dinner?" and it catches me by surprise as if I didn’t know dinner was happening that day. I find this happens the most when I’m busy, the days I have the least time to day dream about recipes.

These are always the days I can’t fit a grocery run in. Instead, I focus on one ingredient that I know we have. In this case, it was frozen mahi-mahi fillets. Then, with mahi-mahi as the muse, I brainstorm recipes. Fish tacos? But we don’t have tortillas. Or salsa. Or cheese. Fish curry? When was the last time I bought coconut milk? Coconut. I have coconut, I thought as I remembered the pink bag of coconut buried with other baking supplies in the pantry.

Coconut Crusted Mahi Mahi with Cara Cara Orange Salsa

This is how the pieces fall together. Sometimes it’s a disaster. Other times it’s happy coincidence, like it was meant to be. Like it had been planned. That’s how I first discovered this meal. A win; happy coincidence. I have since made this quite a few times—even planned on making it several times after the one happy coincidence.

The toasted coconut on the outside gives the flaky fish a crispy finish, and while you could probably use whatever fruit salsa you want, the citrus from the cara cara oranges cuts through the fish and coconut, balancing out the dish. Avocado brings it all together (like avocado so often does).

The other wonderful thing about mahi-mahi is that it cooks quite fast — just 10-12 minutes in the oven. And while the oven is doing it’s thing, you can be prepping the salsa. SO while this dinner has an “ooh, wow, pretty” effect on the eyes it’s really not going to take you much time to through together.

Coconut Crusted Mahi Mahi with Cara Cara Orange Salsa

Coconut Crusted Mahi-Mahi with Cara Cara Orange Salsa

Published March 20, 2018 by

Serves: 4   |    Total Time: 20 minutes


Ingredients:

  • 4 four-ounce fillets mahi-mahi (if frozen, thaw first)
  • 1/2 cup gluten-free flour (try cassava flour, or cup-for-cup gluten-free flour mix)
  • 1/4 teaspoon salt
  • 1/2 cup desiccated shredded coconut
  • 1 egg

  • For the salsa:
  • 2 cara cara oranges
  • 1 avocado
  • Juice of 1 lime
  • 1 jalapeño, minced
  • 1/4 cup cilantro, minced

Directions:

  1. Preheat the oven to 400°F. Line a baking sheet with parchment. Set pan aside.
  2. Place three bowls on the counter. In the first, whisk flour and salt. In the second, whisk egg until yellow and frothy. In the last, place the coconut.
  3. Coat one fish fillet at a time: first, dip it in the flour, coating all sides. Shake off access. Now, place the fillet in the egg, coating each side in egg and then letting excess drip off. Finally, place the fish in the coconut, flipping it over to coat each side. Now, place fillet on prepared baking sheet.
  4. Repeat step three until each fillet is coated. Then, bake fish for 10-12 minutes, until it is flakey and opaque (check thickest fillet with a fork).
  5. While the fish cooks, prep the salsa: segment oranges (here is a good way to do that). Dice segmented oranges, and place in small mixing bowl. Dice the avocado, and add it to the bowl along with the minced jalapeño and cilantro, and the lime juice. Stir.
  6. To serve: place fish on serving plates (I served over a bed of arugula, for more greens) and spoon salsa over top.

Brussels Sprout & Mushroom Stir Fry

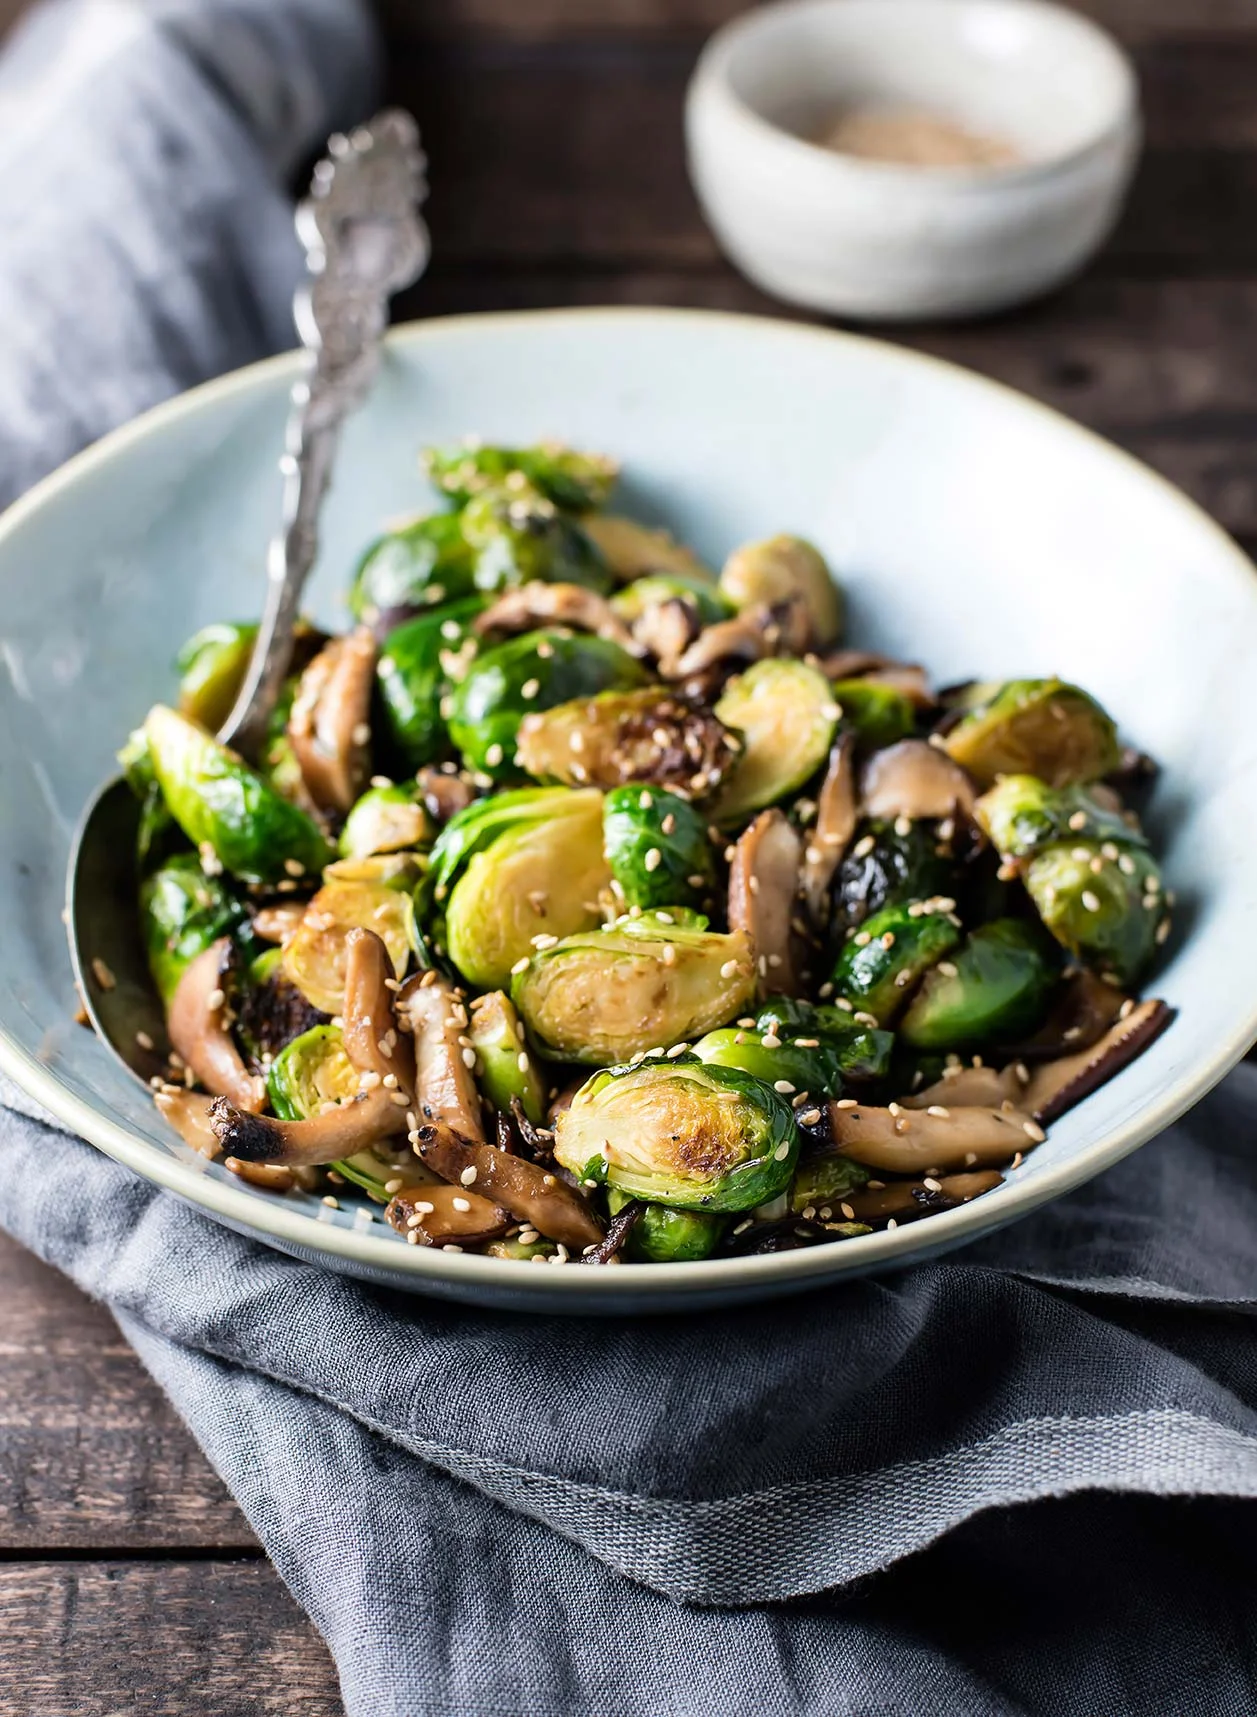
Brussels Sprout & Mushroom Sesame Stir Fry

Part of me hates going to Costco: to lines, the people, the hustle and bustle. But part of me loves it: the fridge full of organic veggies when we get home, frozen wild fish fillets that I can cook into fish tacos all month long, and giant jars of peanut butter (always). 

Brussels sprouts and mushrooms are two things I almost never leave Costco without. As far as vegetables go, they stay good in the fridge for a while, and we always go through them all. Costco trips mean recipes like this: Brussels Sprouts and Mushroom Sesame Stir Fry.

Brussels Sprout & Mushroom Sesame Stir Fry

Toasted sesame oil is one of my favorite condiments because it’s depth of flavor adds so much to any Asian-style dish! Along with a drizzle of soy sauce and a spoonful of maple syrup? That’s where the magic happens. It’s a sweet, savory, nutty combination that goes with just about anything.

I use shiitake mushrooms in this recipe because they work well in recipes that have Asian flavors (like soy and sesame). If you can’t find shiitake mushrooms, baby portobellos will work just fine!

After you’ve made this recipe with brussels sprouts, you might find that the sauce is extremely adaptable — you could do this same exact thing with broccoli or zucchini.

Brussels Sprout & Mushroom Sesame Stir Fry

Brussels Sprout & Mushroom Sesame Stir Fry

Published March 15, 2018 by

Serves: 4   |    Total Time: 20 minutes


Ingredients:

  • 2 cups brussels sprouts, halved
  • 2 cups mushrooms, sliced (I used shiitake but cremini mushrooms also work well)
  • 1 tablespoon coconut oil 
  • 1 tablespoon minced garlic
  • 2 tablespoons soy sauce 
  • 1 tablespoon maple syrup
  • 1 tablespoon toasted sesame oil
  • 1-2 tablespoon sesame seeds 

Directions:

  1. Heat oil in a wok or skillet over medium heat until it glistens. Add mushrooms and brussels sprouts to the pan, stirring briefly.
  2. Allow veggies to cook for 10 minutes, stirring ocassionally. Mushrooms should begin to soften and brussels should start to brown just on the edges. Add minced garlic to the pan, and cook for 3 more minutes, stirring every minute or so.
  3. Drizzle soy sauce, maple syrup, and sesame oil into pan and stir. Cook for 3 more minutes. Add sesame seeds to taste, and remove from heat. Serve hot!

3 Comments

One Pan Paleo Chicken Cacciatore

Camera Update: I got my new camera in mail yesterday! I’m over the moon. I’ll be returning to the regular posting scheduling shortly, now what I can shoot! 

Now... on to this delicious dish! 

I’ve been on a re-working streak: revisiting old favorites from the blog and taking new pictures (like this Chicken & Sweet Potato Curry, or this Lemony Garden Vegetable & Chicken Soup). It takes some of the mind-work out of the equation, leaving me to only do the creative pieces: photography, a bit of writing, quite a lot of eating. 

This one-pan chicken cacciatore is one of those revisited recipes. I originally made this recipe when I was in the middle of finals for grad school. It feels like a lifetime ago. At the time, exams, essays, and textbooks took up such a large part of my life it was hard to believe it could be any other way. In retrospect that was a short lived moment in my journey, one that I even forget about most of the time. All the better, as my experience with grad school was unremarkable. 

One Pan Paleo Chicken Cacciatore

When I first published this recipe I had said, "I need meals that are simple, quick, and take a minimal amount of brain work.” But I was also looking for ways to express myself creatively, something multiple choice tests didn’t allow. It's that creative need that comes through in this recipe, inspired by a single night out at Pasta Jay’s on Pearl Street. 

I remember—not the exact dish I had eaten at Pasta Jay’s- but the thoughts that ran through my head when I ate the leftovers out of a cardboard to-go box the next day. The dish awed me, to be honest. I had never had anything but pasta-laden dishes from Italian restaurants before (to be expected), but this dish had no pasta, and was the best thing I’d eaten that month. 

Making cacciatore is a bit of a production: if you really want to impress people, you’ll need to get fresh basil, and there are a few things you’ll need to chop. Oh, but it’s worth it. Since I’m usually making this on a weeknight, after running errands or getting a workout in, I try to chop everything ahead of time (in the morning, or the night before). I’ll even measure out the spices and put them in a bowl, so that when evening rolls around I don’t even have to think. Just put things in the pot (I use a blue Le Creuset Braiser for meals like this) and remember to stir occasionally! 

One Pan Paleo Chicken Cacciatore

One Pan Paleo Chicken Cacciatore

Published February 27, 2018 by

Serves: 4   |    Total Time: 60 minutes


Ingredients:

  • 1 pound bone-in chicken thighs (boneless and skinless is fine too, just reduce cooking time - cook thighs until internal temperature reaches 185°F)
  • 1 teaspoon coconut oil
  • 1/2 medium white onion, sliced
  • 3 cloves garlic, minced
  • 2 bell peppers, sliced in strips (choose a variety of colors: yellow, red, or green)
  • 1/4 cup red wine, such a Pinot Noir or Sirah
  • 2 14.5-ounce cans of crushed tomatoes
  • 1/2 cup canned artichoke hearts, drained and quartered 
  • 1 teaspoon balsamic vinegar
  • 1/4 cup fresh basil leaves, sliced chiffonade style style, plus more for garnish
  • 1/2 teaspoon red pepper flakes 
  • 1/2 teaspoon dried oregano 
  • 1/2 teaspoon dried thyme 
  • 1/4 teaspoon salt
  • 1/4 teaspoon ground black pepper
  • Optional for serving: grated Parmesan Reggiano cheese, red pepper flakes, extra basil leaves

Directions:

  1. Heat the coconut oil over medium-high heat in a large skillet (I use my 5-qt Le Creuset Braiser, though a 13 to 15 inch skillet would work as well). Once the oil glistens, place chicken thighs skin-side down in the pan. Sear the chicken for 3 minutes, then flip them over and continue to cook chicken for 5 more minutes.
  2. After 5 minutes, place the onions, garlic, and peppers in pan. Cook, stirring occasionally, until the onions are translucent. Add the wine, and scrape the pan with a wooden spoon. Bring to a simmer.
  3. Pour in the tomatoes, and stir in the artichoke hearts, balsamic vinegar, basil, thyme, red pepper flakes, oregano, salt and pepper.
  4. Bring back up to simmer, and place lid on pan. Cook, for 20-30 more minutes, until an instant read thermometer reads 185°F when inserted into the center of the thickest thigh.
  5. Remove from heat, and serve on plates or in bowls. Garnish with grated parmesan, red pepper flakes, and/or extra basil.
  6. Tip: try serving this over spiralized zucchini or spaghetti squash for a grain-free pasta option.