Soy Ginger Salmon with Rice & Broccoli

Soy Ginger Salmon with Rice & Broccoli

Warm days are coming. And boy, do we need it. Because while many of us are still practicing stay-at-home or safer-at-home, the outdoors are a welcome breath of literal fresh air. Why not take advantage of the sunny days to come and also cook outside? And if you can—if you also have a picnic table, or even just an accommodating step, eat outside, too.

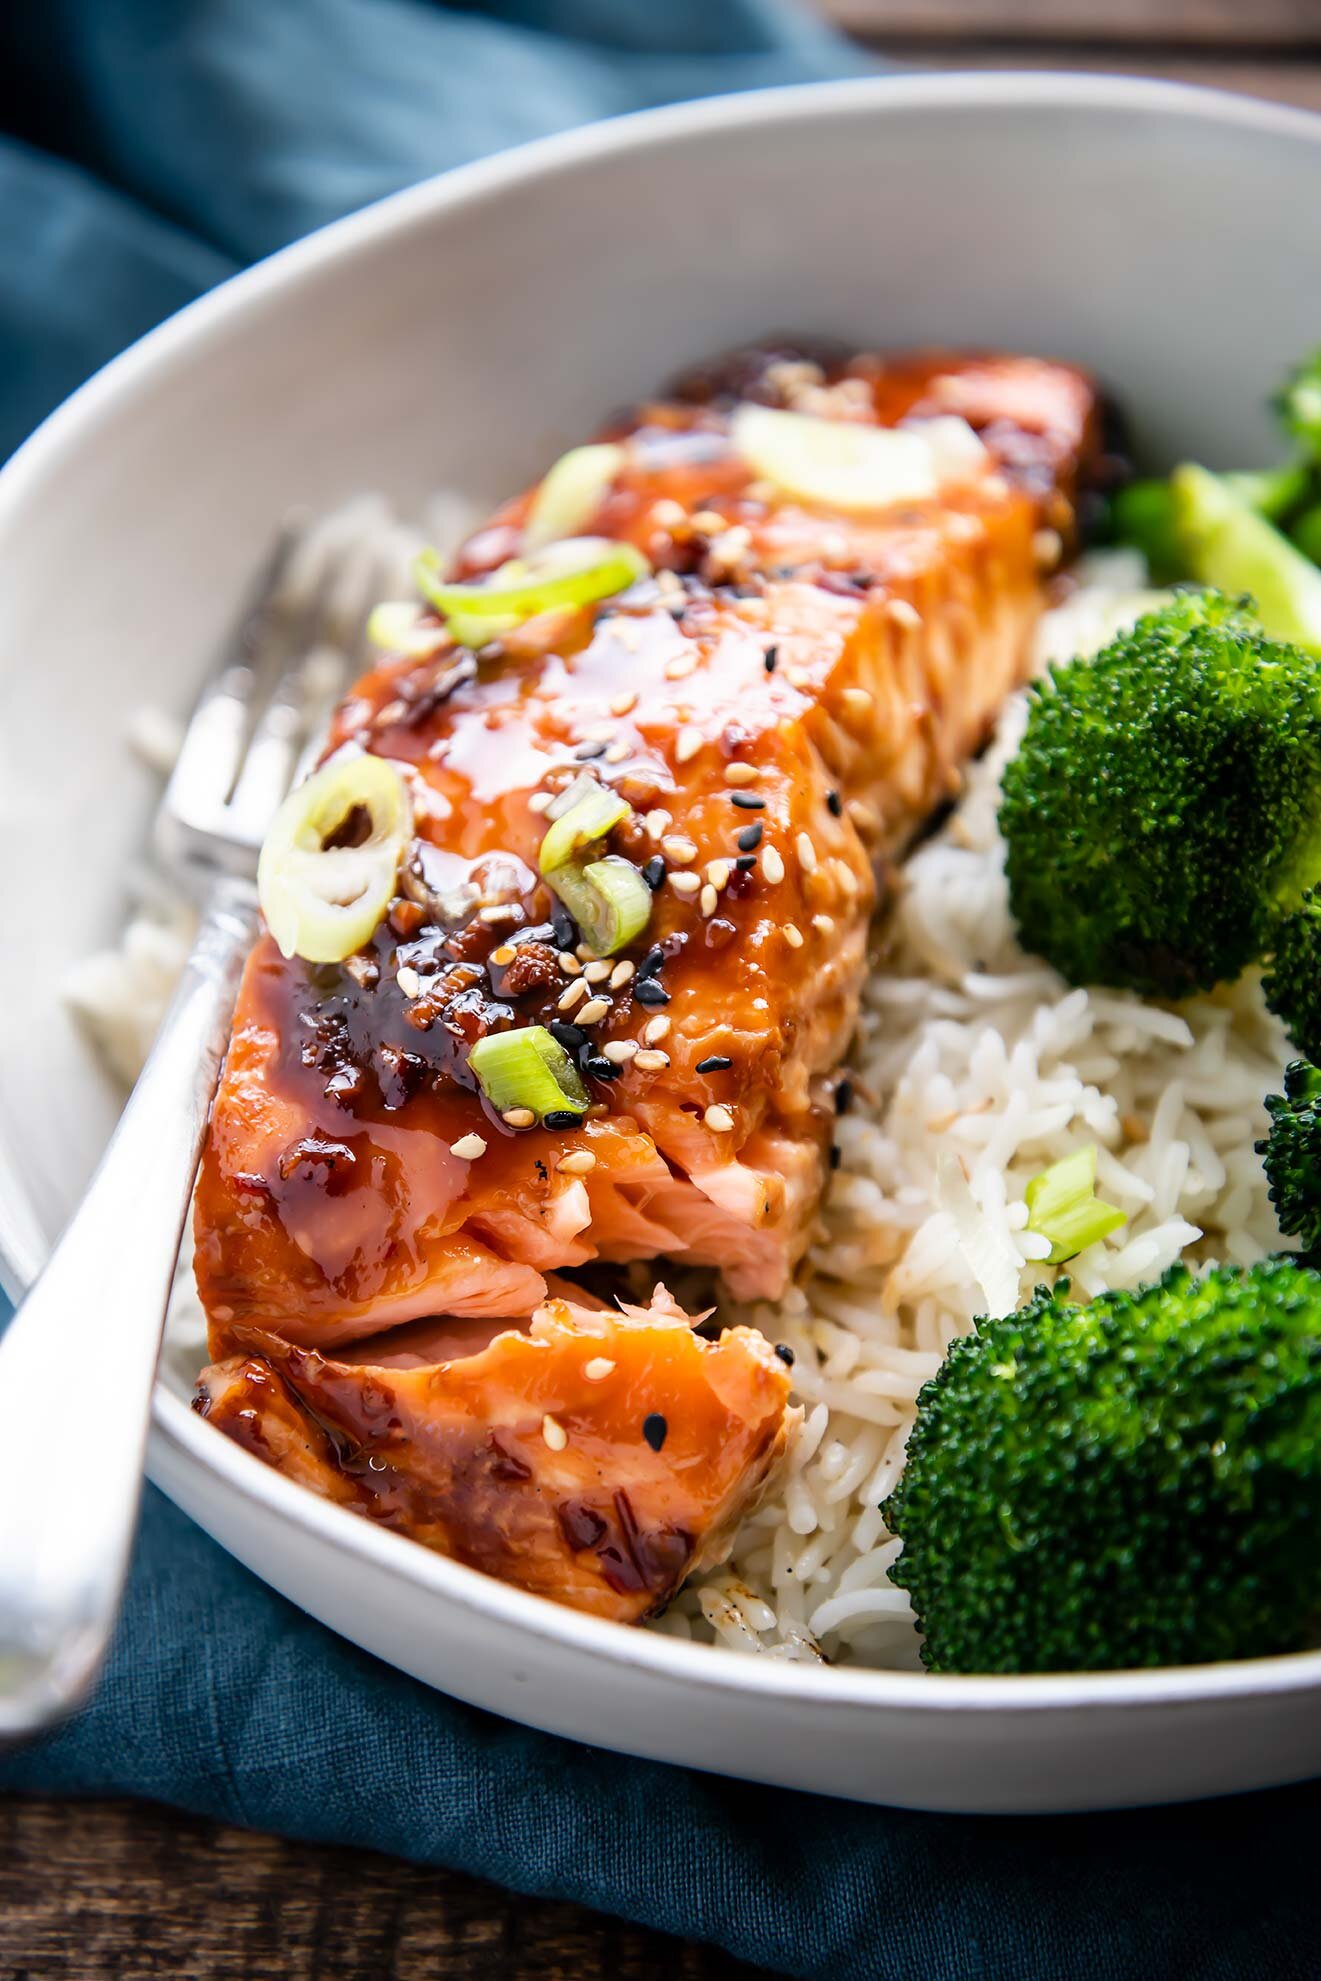
This salmon: smothered in a salty-umami-sweet-sticky sauce, is served over rice with a side of grilled broccoli. It couldn’t be more simple. But a good fillet of salmon doesn’t need much to shine, and this sauce—well, you’ll want to make some extra. Drizzle it over the broccoli for an extra pop of flavor there, too.

Soy Ginger Salmon with Rice & Broccoli

Soy Ginger Salmon with Rice & Broccoli

Published May 12, 2020 by

Serves: 4   |    Active Time: 30 minutes


Ingredients:

  • 1/4 cup soy sauce
  • 2 tablespoon maple syrup
  • 1/2 teaspoon corn starch
  • 1 teaspoon Sriracha
  • 1 clove garlic, finely grated (on a microplane)
  • 4 quarter-sized sliced of fresh ginger
  • 4 four-ounce pieces of salmon
  • 1 head of broccoli, roughly chopped into large pieces
  • 2 tablespoons cooking oil, such as avocado or olive
  • Generous pinch of salt
  • 2-3 cups rice, cooked
  • 3 green onions, sliced
  • 2 toasted sesame seeds

  • Directions:

    1. In a small sauce pan, whisk together soy sauce, maple syrup, corn starch, Sriracha, and finely grated garlic. Place on stove over medium heat. Add ginger coins, and bring to a simmer. As the sauce bubbles, it will thicken. Cook sauce, stirring frequently, until it is thick enough to coat the back of a spoon well. Remove from heat, and use a fork or spoon to remove and discard the ginger coins.
    2. Heat grill to about 450°F.
    3. While grill heats, toss the broccoli with the cooking oil to coat, and season with a generous pinch of salt.
    4. Use a brush to coat the top of the salmon with about half of the soy sauce mixture. Using tongs, place salmon on pre-heated grill, skin-side down, along with broccoli
    5. Turn flame down to medium, and close lid, cooking the salmon for 6-8 minutes.
    6. Using tongs, turn broccoli to the second side. Then, brush the salmon with remaining soy sauce mixture, and close grill lid again, cooking for another 4-5 minutes, or until internal temperature of salmon reaches 130°F, easily flakes, and is opaque in the center. Transfer to a plate and allow to rest for 1-2 minutes.
    7. While the salmon and broccoli cook, prepare rice according to your preferences.
    8. Divide rice among serving plates. Top with salmon and broccoli. Sprinkle with sesame seeds and green onions. Serve.

    1 Comment

    Roasted Trout with Lemon & Rosemary

    Pan Roasted Trout with Lemon & Rosemary

    My first (and maybe my last?) fishing pole was a Mickey Mouse fishing pole.

    With a conviction to teach his daughter where food came from, my dad took me fishing when I was young. I remember catching a fish just once, but remember at least several meals while camping that my dad had caught on a hook.

    In Colorado our fishing access is limited to creeks and reservoirs (there are a few lakes, but they are tiny, some would call them ponds). It seems it is always trout, though I really know nothing about fishing, so I could be wrong. But what I know is that many a meal was served to me as a kid, where a whole trout was seasoned and roasted. I struggled to learned how to separate the meat from the bones in one fell swoop, usually picking them out one by one. 

    I know that seeing the whole fish is off putting to some— I don’t blame you. But to me, it’s part of the experience. It says something about that dish; makes it feel “more,” like maybe your dad caught the fish himself.

    Pan Roasted Trout with Lemon & Rosemary
    Pan Roasted Trout with Lemon & Rosemary

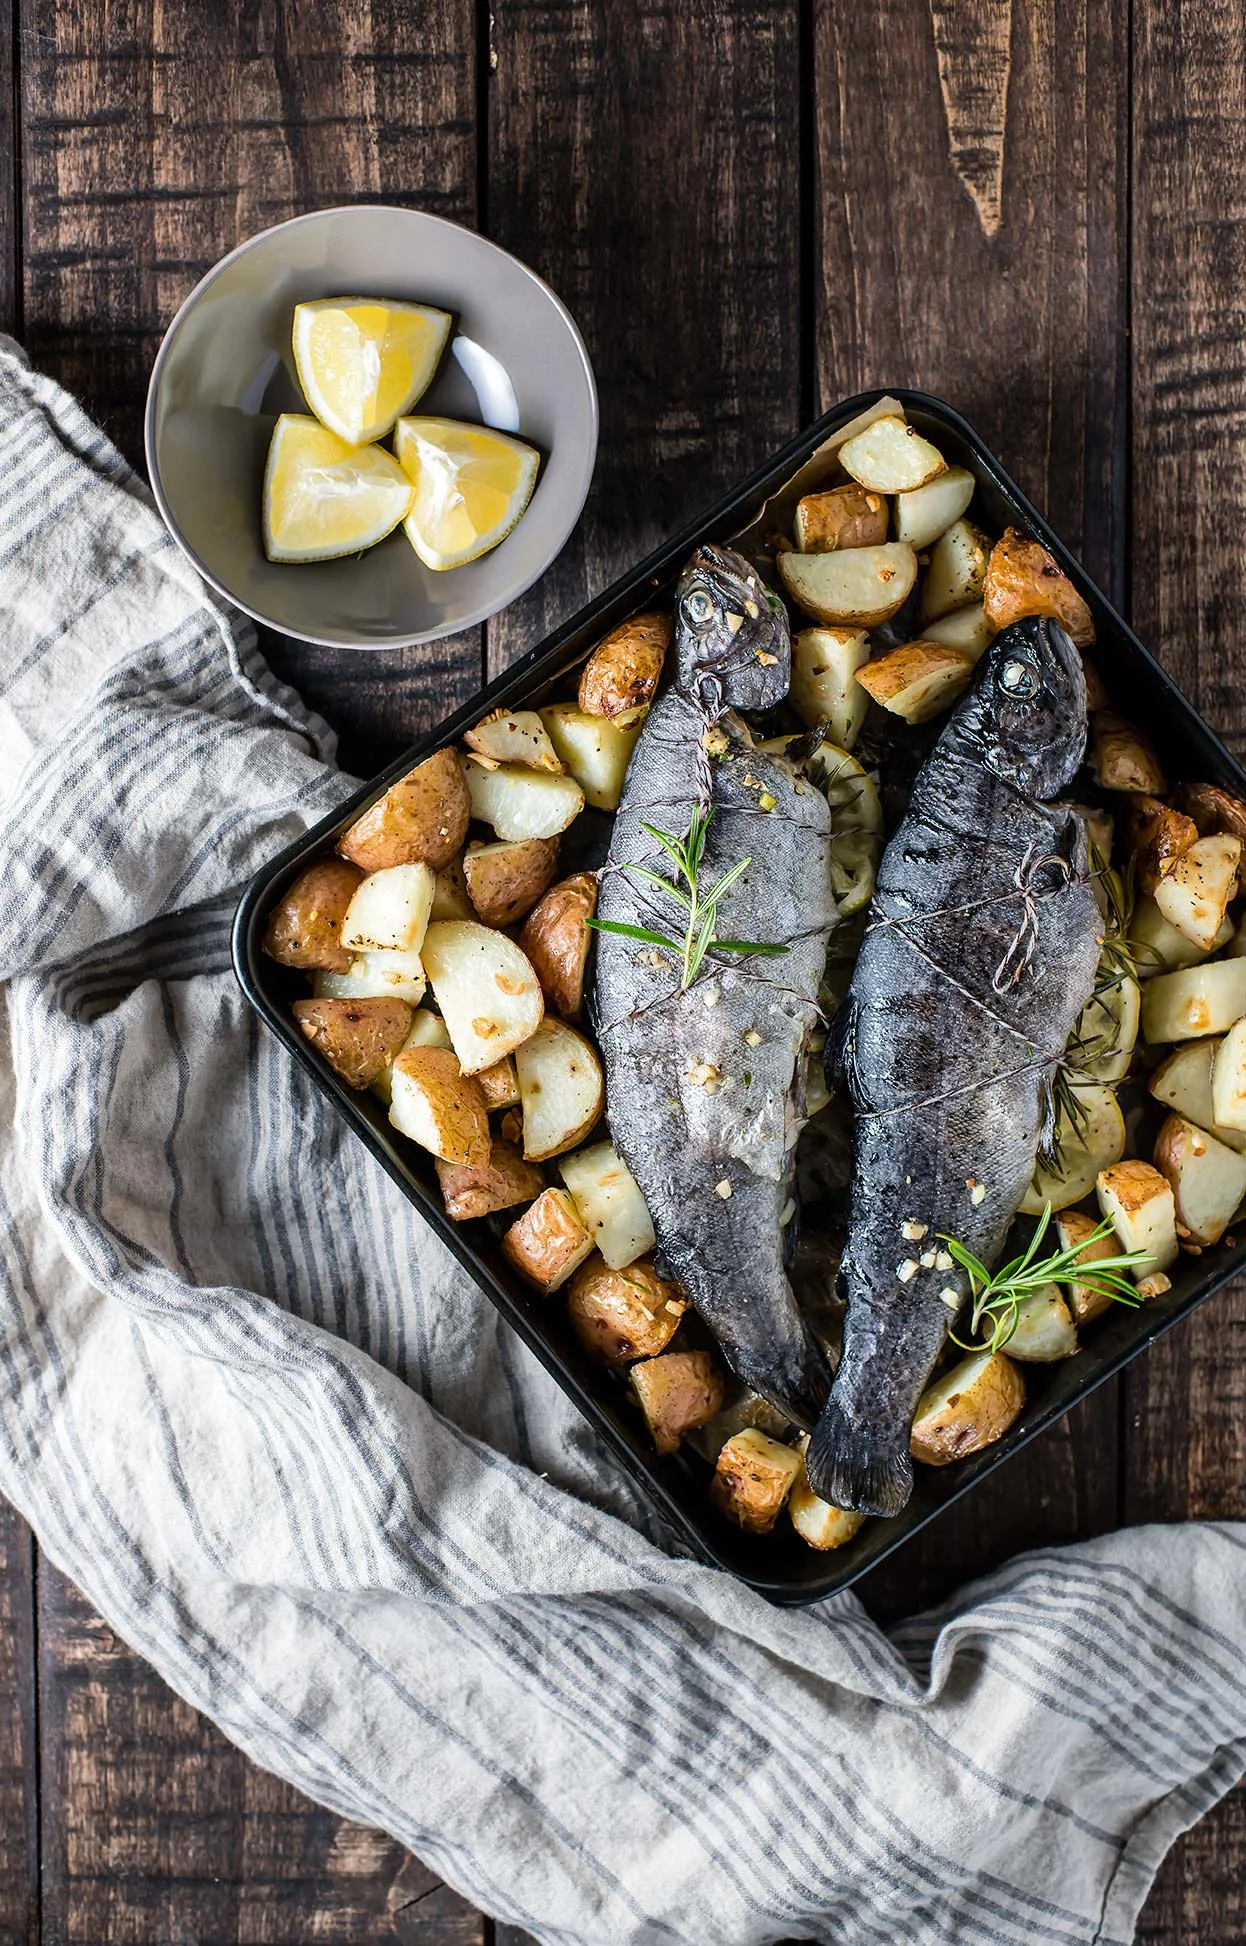
    Fresh, trout can have a quite mild flavor. It’s meat is flakey and delicate, and pairs well with a spritz of lemon, a side of potatoes, and fresh herbs. 

    It feels like a hallmark of summer to me: a sign that the creeks are gushing and full of life, a part of camping season, and best enjoyed with other fresh summer finds, like rosemary. 

    Pan Roasted Trout with Lemon & Rosemary

    Roasted Trout with Lemon & Rosemary

    Published June 26, 2018 by

    Yields: 2-4   |    Active Time: 45 minutes


    Ingredients:

  • 2 whole trout, dedressed 
  • 1 lemon, sliced
  • 1/4 teaspoon ground pepper
  • 2 springs rosemary 
  • 2 tablespoons avocado oil
  • 3 cups diced red potatoes
  • 2 cloves garlic, minced

  • Directions:

    1. Preheat oven to 400°F. Toss diced potatoes and minced garlic in olive oil. Spread out on a sheet pan, and sprinkle with half of the salt and pepper. Then, bake for 30 minutes, until potatoes are just starting to turn golden on the outside.
    2. Meanwhile, season each fish with the remaining salt & pepper. Then, place half of the lemon slices and 1 sprig of rosemary in the cavity of each fish. If desired, tie the fish closed with twine.
    3. After the potatoes have cooked for 30 minutes, push them to either side of the baking sheet to make room for the fish. Place each fish on the pan, and return pan to oven for 20 minutes, or until meat is opaque and easily flakes when pricked with a fork. Potatoes should also be tender all the way through when pricked with a fork. Serve hot.

    3 Comments

    Coconut Crusted Mahi-Mahi with Cara Cara Orange Salsa

    Coconut Crusted Mahi Mahi with Cara Cara Orange Salsa

    There are days I plan dinner from the moment I wake up. The way the ingredients will feel as I chop them, the way they all come together, and the way they'll taste when finally on my fork. And then there are the days when I have no plan at all. On our drive home Oliver asks, "What’s for dinner?" and it catches me by surprise as if I didn’t know dinner was happening that day. I find this happens the most when I’m busy, the days I have the least time to day dream about recipes.

    These are always the days I can’t fit a grocery run in. Instead, I focus on one ingredient that I know we have. In this case, it was frozen mahi-mahi fillets. Then, with mahi-mahi as the muse, I brainstorm recipes. Fish tacos? But we don’t have tortillas. Or salsa. Or cheese. Fish curry? When was the last time I bought coconut milk? Coconut. I have coconut, I thought as I remembered the pink bag of coconut buried with other baking supplies in the pantry.

    Coconut Crusted Mahi Mahi with Cara Cara Orange Salsa
    Coconut Crusted Mahi Mahi with Cara Cara Orange Salsa

    This is how the pieces fall together. Sometimes it’s a disaster. Other times it’s happy coincidence, like it was meant to be. Like it had been planned. That’s how I first discovered this meal. A win; happy coincidence. I have since made this quite a few times—even planned on making it several times after the one happy coincidence.

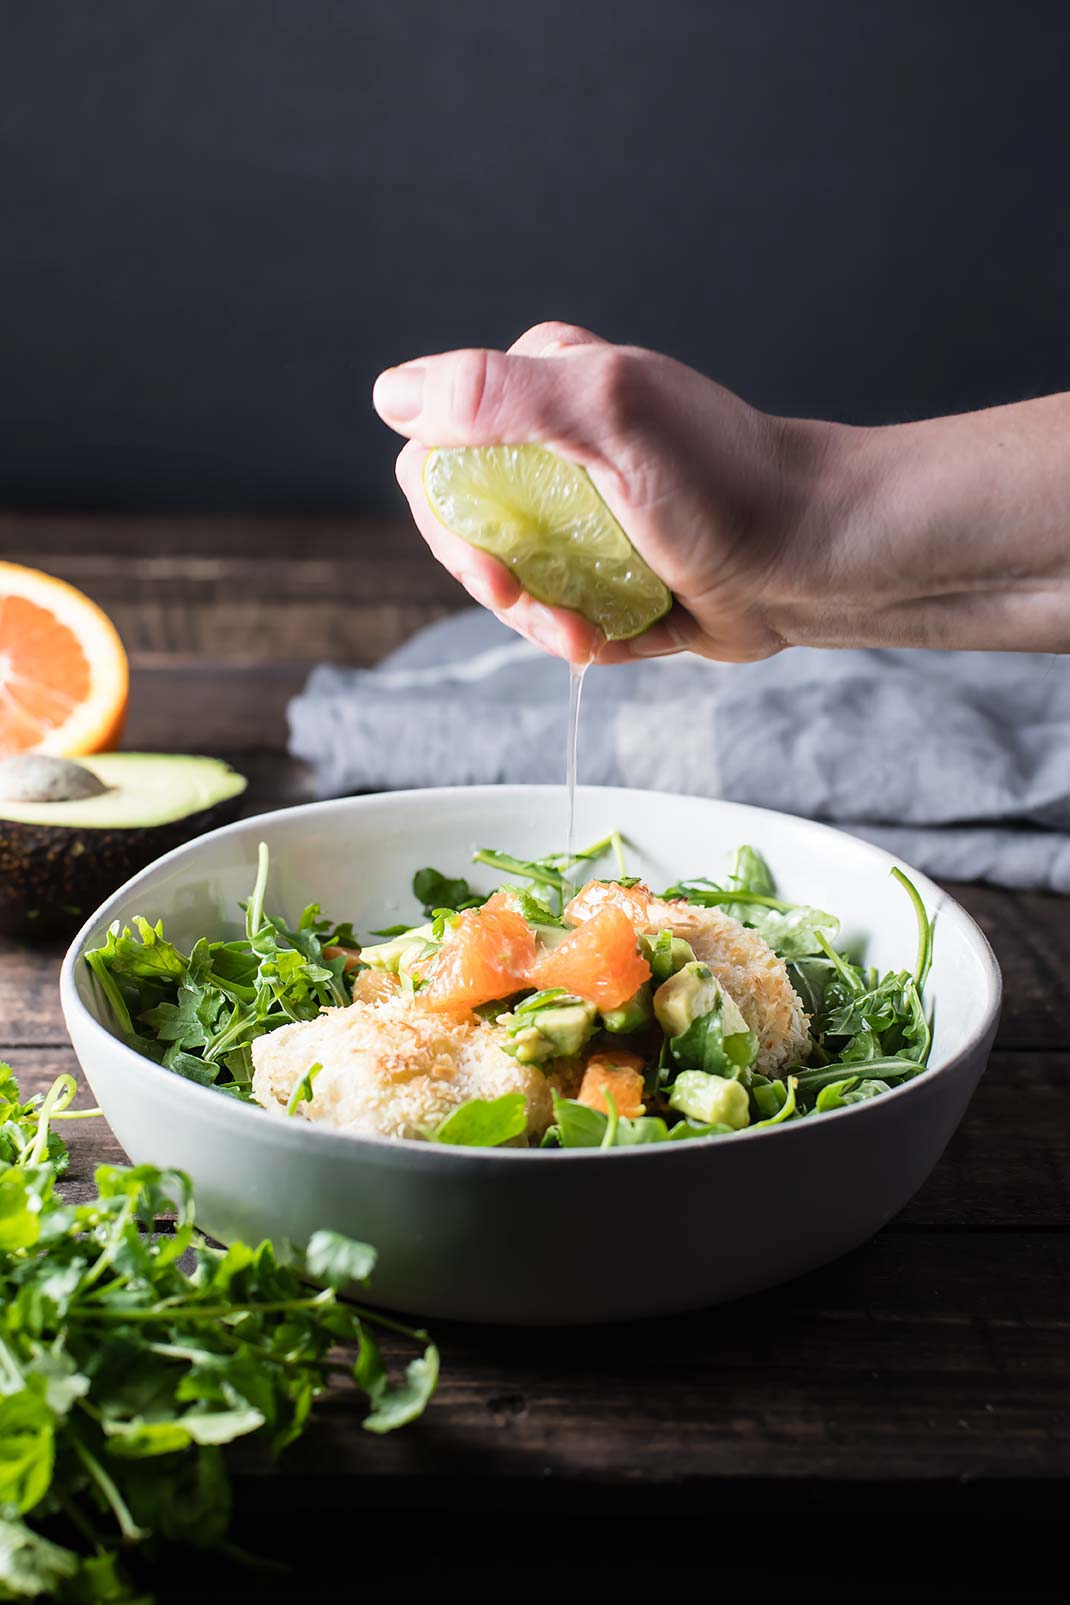
    The toasted coconut on the outside gives the flaky fish a crispy finish, and while you could probably use whatever fruit salsa you want, the citrus from the cara cara oranges cuts through the fish and coconut, balancing out the dish. Avocado brings it all together (like avocado so often does).

    The other wonderful thing about mahi-mahi is that it cooks quite fast — just 10-12 minutes in the oven. And while the oven is doing it’s thing, you can be prepping the salsa. SO while this dinner has an “ooh, wow, pretty” effect on the eyes it’s really not going to take you much time to through together.

    Coconut Crusted Mahi Mahi with Cara Cara Orange Salsa

    Coconut Crusted Mahi-Mahi with Cara Cara Orange Salsa

    Published March 20, 2018 by

    Serves: 4   |    Total Time: 20 minutes


    Ingredients:

    • 4 four-ounce fillets mahi-mahi (if frozen, thaw first)
    • 1/2 cup gluten-free flour (try cassava flour, or cup-for-cup gluten-free flour mix)
    • 1/4 teaspoon salt
    • 1/2 cup desiccated shredded coconut
    • 1 egg

    • For the salsa:
    • 2 cara cara oranges
    • 1 avocado
    • Juice of 1 lime
    • 1 jalapeño, minced
    • 1/4 cup cilantro, minced

    Directions:

    1. Preheat the oven to 400°F. Line a baking sheet with parchment. Set pan aside.
    2. Place three bowls on the counter. In the first, whisk flour and salt. In the second, whisk egg until yellow and frothy. In the last, place the coconut.
    3. Coat one fish fillet at a time: first, dip it in the flour, coating all sides. Shake off access. Now, place the fillet in the egg, coating each side in egg and then letting excess drip off. Finally, place the fish in the coconut, flipping it over to coat each side. Now, place fillet on prepared baking sheet.
    4. Repeat step three until each fillet is coated. Then, bake fish for 10-12 minutes, until it is flakey and opaque (check thickest fillet with a fork).
    5. While the fish cooks, prep the salsa: segment oranges (here is a good way to do that). Dice segmented oranges, and place in small mixing bowl. Dice the avocado, and add it to the bowl along with the minced jalapeño and cilantro, and the lime juice. Stir.
    6. To serve: place fish on serving plates (I served over a bed of arugula, for more greens) and spoon salsa over top.