Sourdough Bagels From Scratch

Sourdough Bagels

These round little baked goods have a special place in my heart, and not because I love New York bagels or have strong opinions about what a bagel “should" be. Instead, it’s because they are a token from my high school years, when I would get home from class and set to work mixing flour, salt, water and yeast. My dad loved (and still loves) telling people that this was how his teenage daughter chose to spend her free time. I haven't outgrown the phase, apparently—only matured it, taking the last year to research and test a sourdough version. These naturally leavened bagels are my new go-to, with a chewy crust, great rise, and complex flavor.

Sourdough Bagels
Sourdough Bagels

Sourdough Bagels from Scratch

Published February 9, 2021 by

Serves: 12   |    Active Time: 2 hours active cooking time; 25 total hours (including rising)


Ingredients:


For the Levain:
  • 500g bread flour
  • 500g warm water
  • 250g ripe sourdough starter (100% hydration) (For me, this is typically my entire jar of starter — that’s good, you will put some back in the jar after the first ferment. I’ve found this is a great way to reinvigorate my starter, too!)

  • For the Dough:
  • 1000g levain (above)
  • 360-480g bread flour
  • 6g diastatic malt powder (optional, provides improved rise and golden crust)
  • 17g salt
  • 3g instant dry yeast

  • For Cooking & Topping:
  • Large stock pot of water
  • 2 tablespoons honey (optional, gives bagels golden crust)
  • 1 cup of toppings, such as: sesame seeds, poppy seeds, everything bagel topping, shredded cheese, cinnamon sugar, etc.

  • Directions:

    1. This recipe includes a suggested baking schedule to help you plan, but you can adjust the schedule to fit your calendar. Feed your starter the night (or ~8hours) before making the levain.
    2. 8 am: Make levain by combining bread flour, warm water and 250g of ripe starter in the bowl of stand mixer. Cover, and set in a warm place to ferment, 8 hours (if it’s a very warm day, cut this to 6 hours).
    3. 4 pm: Move 250g of the levain back into your starter jar, leaving 1000g of active levain in the mixing bowl. Add 360g flour, malt powder, salt, and yeast to bowl. Place the dough hook attachment on your stand mixer, and mix until roughly combined. Turn mixer to speed 3 and knead, adding the additional 120g of flour in batches. The dough should be tough, smooth an elastic. If you notice the dough tearing, add a few small drops of water and stop adding flour. Knead for an additional 5-7 minutes.
    4. 4:15 pm: Line a baking sheet with parchment. Divide the dough in 12 equal sized pieces, about 120-130g each. Shape each piece into a ball, and place on baking sheet. Cover with a damp towel and set in a warm place for 20 minutes.
    5. 4:40 pm: Shape the bagels: working one at a time, use your thumb to poke a hole through the middle of each roll, and gently stretch to form a bagel shape. (Tip: once the initial hole is formed, I like to spin the loop around my finger and let gravitational pull do the stretching.) As the bagels rise and bake, the dough will puff, shrinking the hole in the middle, so make the hole a tad bigger than you want it to be in the finished product. Place shaped bagels back on baking sheet. Cover again with a damp towel, and rise for 20 minutes.
    6. 5:05 pm: The bagels should be puffy. Test their rise by dropping one in a bowl of water: it should float. If it does not, allow to rise longer. Cover entire tray of bagels loosely with a plastic bag (or two), and place in fridge overnight (or up to 36 hours - the longer you wait the more sour they will taste).
    7. 8 am (the next day): Prepare to cook bagels: Preheat oven to 475°F. As oven heats, bring a stock pot of water to a boil. Add honey. Prepare your toppings, by placing each topping in a wide bowl or on a plate that you can easily dip a bagel into.
    8. 8:05 am: Boil bagels: Remove bagels from fridge. Gently lower 3 bagels into pot. Cook for 30 seconds, then flip, and cook for 30 seconds on second side (Tip: I set a stopwatch next to the stove so I can watch the clock). Using a slotted spoon, remove bagels from water, allowing excess water to drain back into the pot. Dip top of bagel into bowl of toppings, then set, topping-side up, on the sheet pan. Repeat until all bagels are boiled. Note: Boiling will slow with the addition of the cold bagels — keep the water warm enough to maintain a gentle boil.
    9. 8:15 am: Bake bagels: Bake for 20-25 minutes, until golden brown on all sides.
    10. 8:35 am: Transfer to cooling rack and allow to cool at least 10 minutes before slicing.
    11. Serve to taste with butter, cream cheese, lox, capers, etc. Bagels are best fresh, but will last the week if stored well: Allow bagels to cool completely before storing. Once cooled, wrap tightly in plastic or place in an airtight container. Store at room temperature for up to 7 days.

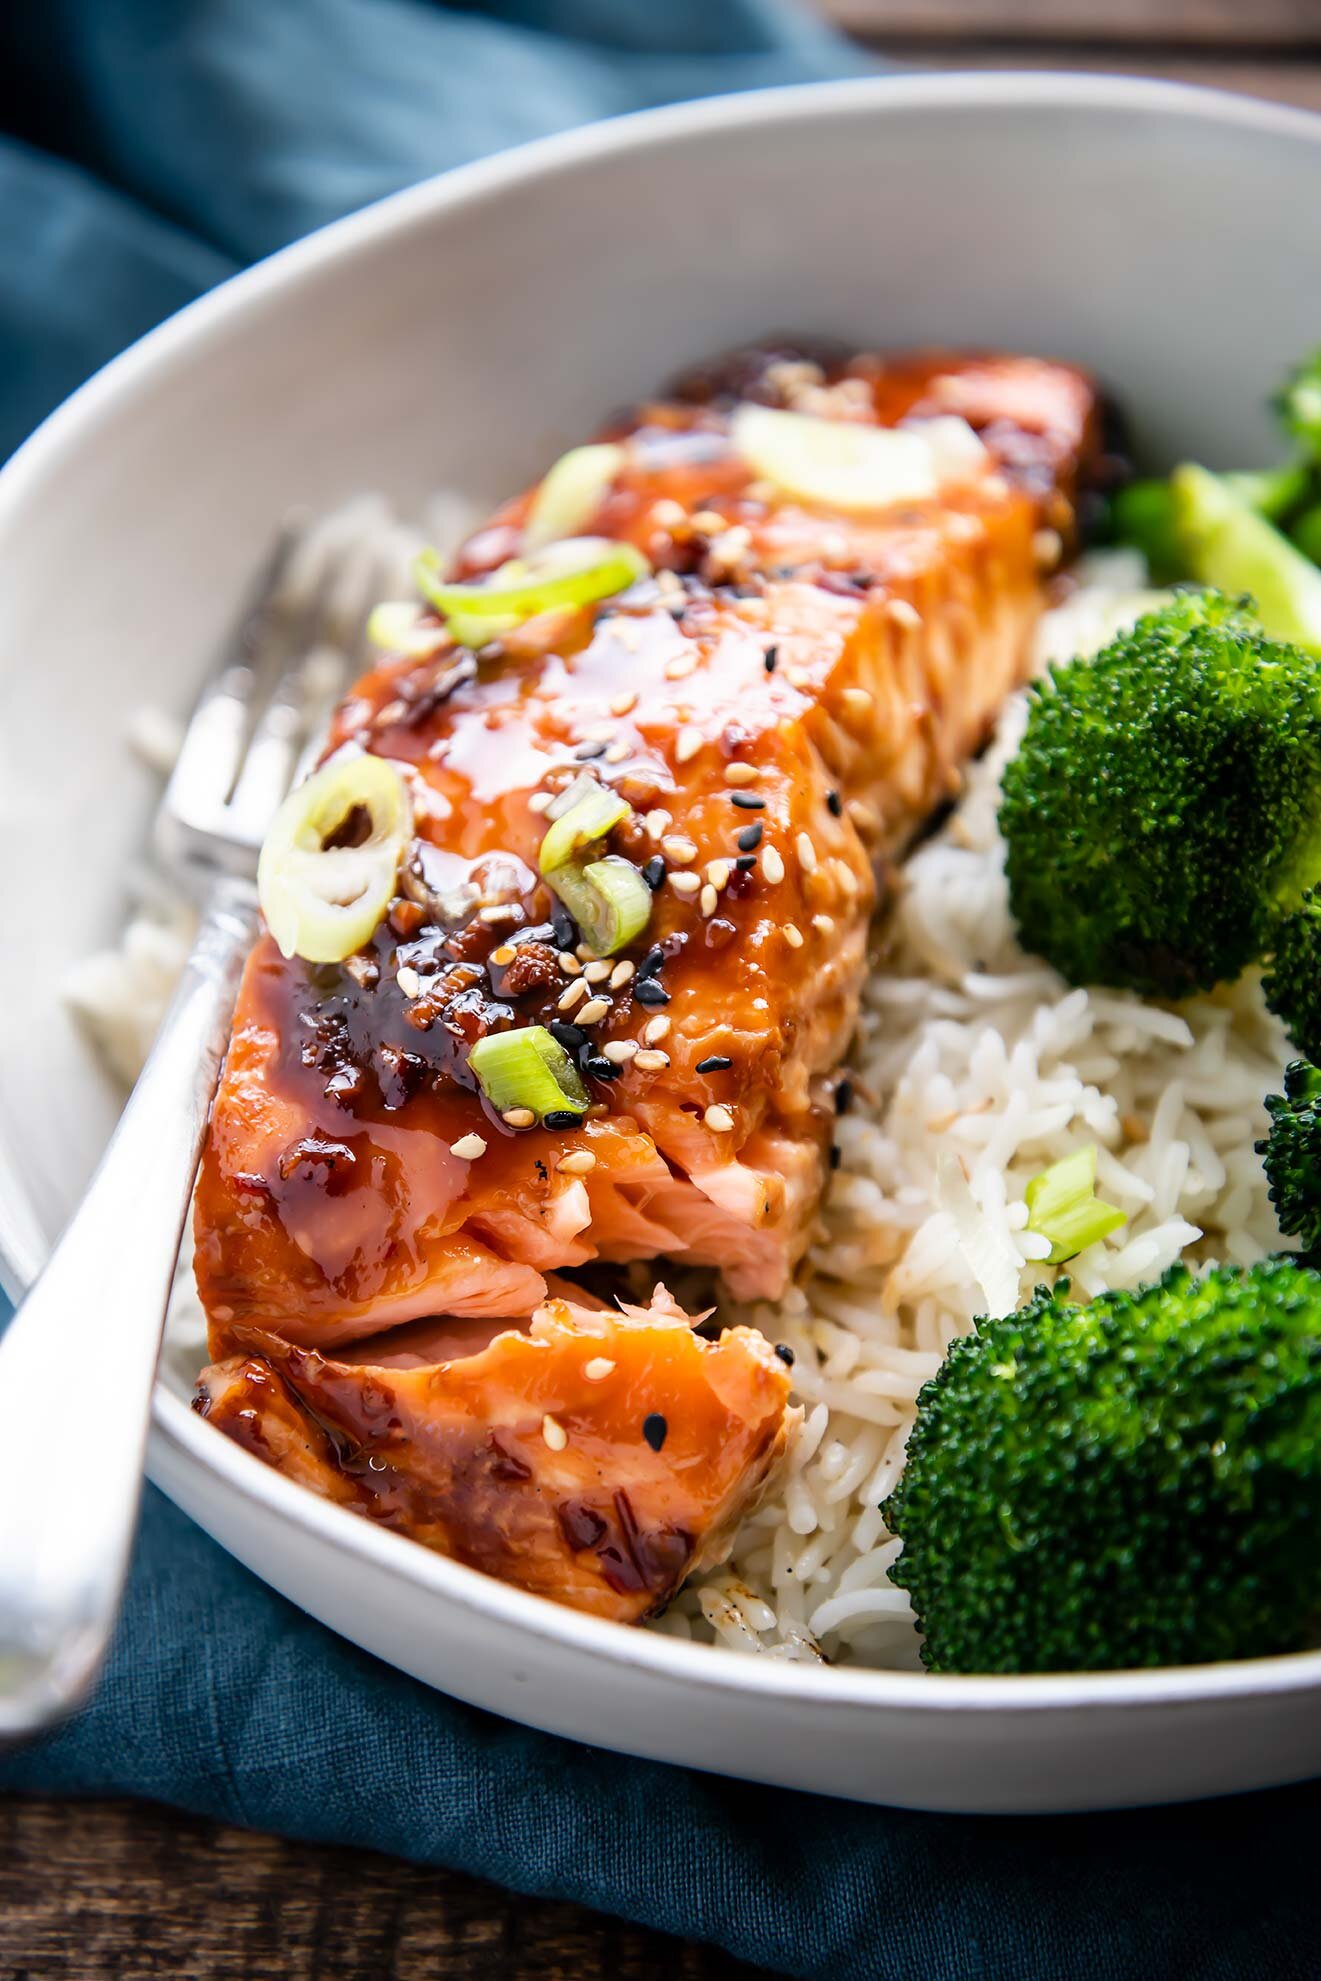
    Soy Ginger Salmon with Rice & Broccoli

    Soy Ginger Salmon with Rice & Broccoli

    Warm days are coming. And boy, do we need it. Because while many of us are still practicing stay-at-home or safer-at-home, the outdoors are a welcome breath of literal fresh air. Why not take advantage of the sunny days to come and also cook outside? And if you can—if you also have a picnic table, or even just an accommodating step, eat outside, too.

    This salmon: smothered in a salty-umami-sweet-sticky sauce, is served over rice with a side of grilled broccoli. It couldn’t be more simple. But a good fillet of salmon doesn’t need much to shine, and this sauce—well, you’ll want to make some extra. Drizzle it over the broccoli for an extra pop of flavor there, too.

    Soy Ginger Salmon with Rice & Broccoli
    Soy Ginger Salmon with Rice & Broccoli
    Soy Ginger Salmon with Rice & Broccoli

    Soy Ginger Salmon with Rice & Broccoli

    Published May 12, 2020 by

    Serves: 4   |    Active Time: 30 minutes


    Ingredients:

  • 1/4 cup soy sauce
  • 2 tablespoon maple syrup
  • 1/2 teaspoon corn starch
  • 1 teaspoon Sriracha
  • 1 clove garlic, finely grated (on a microplane)
  • 4 quarter-sized sliced of fresh ginger
  • 4 four-ounce pieces of salmon
  • 1 head of broccoli, roughly chopped into large pieces
  • 2 tablespoons cooking oil, such as avocado or olive
  • Generous pinch of salt
  • 2-3 cups rice, cooked
  • 3 green onions, sliced
  • 2 toasted sesame seeds

  • Directions:

    1. In a small sauce pan, whisk together soy sauce, maple syrup, corn starch, Sriracha, and finely grated garlic. Place on stove over medium heat. Add ginger coins, and bring to a simmer. As the sauce bubbles, it will thicken. Cook sauce, stirring frequently, until it is thick enough to coat the back of a spoon well. Remove from heat, and use a fork or spoon to remove and discard the ginger coins.
    2. Heat grill to about 450°F.
    3. While grill heats, toss the broccoli with the cooking oil to coat, and season with a generous pinch of salt.
    4. Use a brush to coat the top of the salmon with about half of the soy sauce mixture. Using tongs, place salmon on pre-heated grill, skin-side down, along with broccoli
    5. Turn flame down to medium, and close lid, cooking the salmon for 6-8 minutes.
    6. Using tongs, turn broccoli to the second side. Then, brush the salmon with remaining soy sauce mixture, and close grill lid again, cooking for another 4-5 minutes, or until internal temperature of salmon reaches 130°F, easily flakes, and is opaque in the center. Transfer to a plate and allow to rest for 1-2 minutes.
    7. While the salmon and broccoli cook, prepare rice according to your preferences.
    8. Divide rice among serving plates. Top with salmon and broccoli. Sprinkle with sesame seeds and green onions. Serve.

    1 Comment

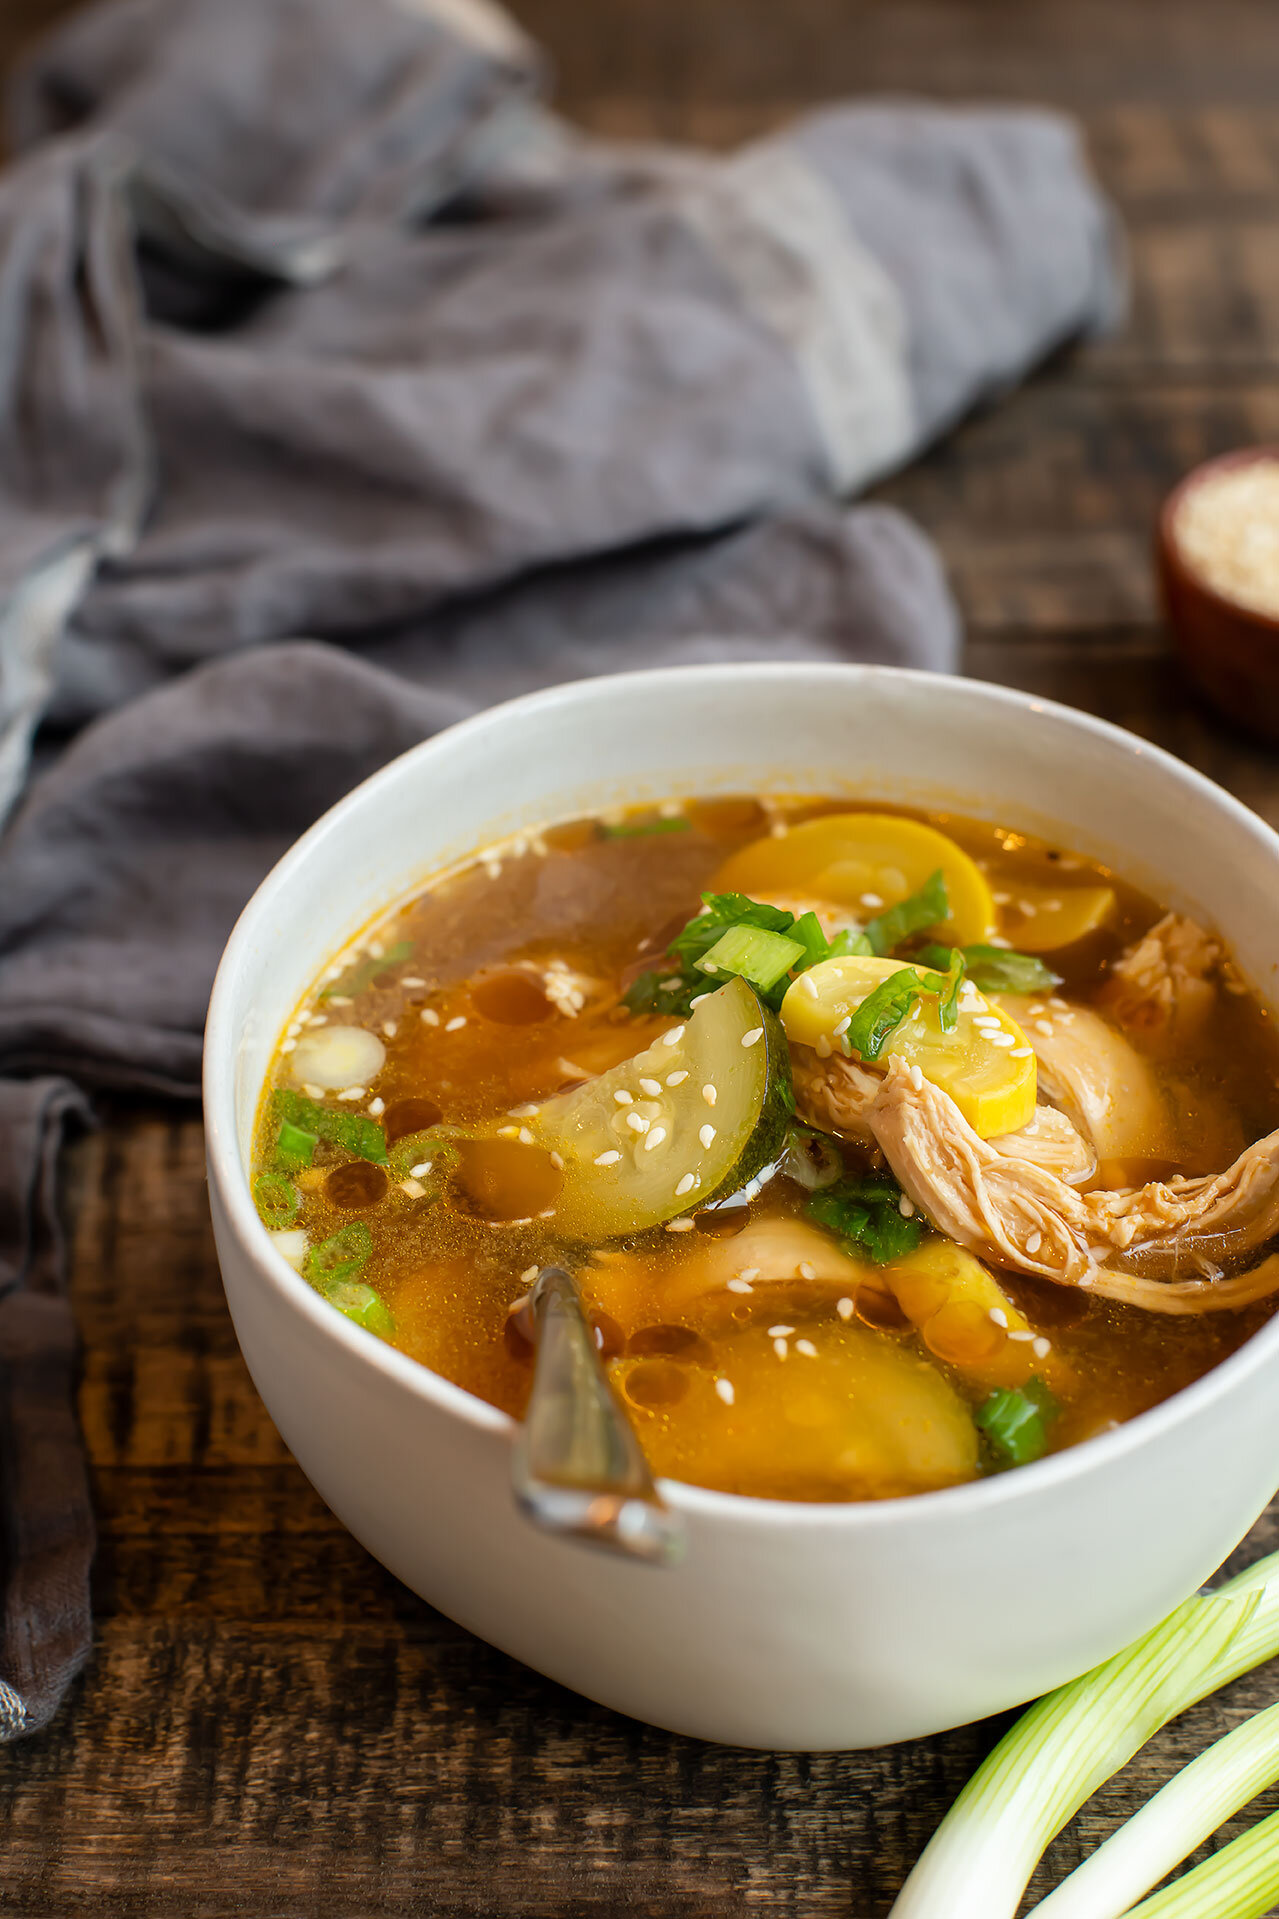
    Chicken & Rice Soup with Ginger & Toasted Sesame

    Chicken & Rice Soup with Ginger & Toasted Sesame
    Chicken & Rice Soup with Ginger & Toasted Sesame

    This recipe is a republish from 2016, originally inspired by a lunch at a little Korean shop, and long due for an update. If you hadn’t tried this one before, now’s the time! It’s bolder and tastier than ever.

    Located in an otherwise uninviting strip mall, “A Cup of Peace” is one of the few places in Boulder serving Korean food. While I have no idea what they put in their recipe for chicken soup, one bowl was enough to inspire me to make my own. An extremely simple soup, the broth is robust with umami, in part because it is doused with soy sauce and sesame oil (which is like liquid gold in the kitchen, isn’t it?).

    In a time where we all need a little added comfort in our lives, chicken soup seems like a sort of staple. A healing, cozy staple. Perhaps because I haven’t eaten much of it, classic chicken noodle soup has never been my thing. But the flavors here are very much my thing. (In case you forgot already, toasted sesame oil is liquid gold status in my cupboard).

    Chicken & Rice Soup with Ginger & Toasted Sesame
    Chicken & Rice Soup with Ginger & Toasted Sesame

    Chicken & Rice Soup with Ginger & Toasted Sesame

    Published March 14, 2020 by

    Serves: 6   |    Active Time: 45 minutes


    Ingredients:

  • 1 tablespoon coconut oil
  • 4 cloves garlic, minced
  • 1 inch ginger, minced or finely grated
  • 1 pound boneless, skinless chicken breasts
  • 8 cups chicken broth
  • 1/4 cup soy sauce
  • 2 tablespoon rice vinegar
  • 1 tablespoon chili garlic paste (Sambal Oelek)
  • 1 teaspoon fish sauce (optional)
  • 1/2 cup dry white rice
  • 1 zucchini
  • 1 summer squash
  • 3 stalks green onion, green and white parts sliced (roots removed)
  • Drizzle of toasted sesame oil
  • Salt to taste (Note: depending on your broth, you may not need any salt)
  • 1/4 cup sesame seeds

  • Directions:

    1. In a large soup pot, melt coconut oil over medium heat. Add minced garlic and ginger, and sauté a few minutes, until golden.
    2. Pour broth, soy sauce, rice vinegar, chili garlic sauce, and (optionally) fish sauce to the pot, and stir.
    3. Bring soup to a simmer, and add chicken breast. Continue to simmer until chicken is cooked through, about 10 minutes. (If using Instant Pot, see note below)
    4. Using tongs or a slotted spoon, remove chicken from the broth. Use two forks to shred the chicken. Then, add it back to the soup.
    5. Slice zucchini and summer squash into half-moons. Add zucchini, squash and the dried white rice to the soup, and return to a simmer. Cook, uncovered, until the vegetables and rice are tender, about 15 minutes.
    6. While soup is cooking, toast sesame seeds: place in a skillet over low heat. Shake the pan every minute or two to stir the seeds. Watch closely to avoid burning, and remove seeds from heat once lightly golden. Set aside.
    7. Remove soup from heat. Stir, and optionally season to taste with salt (depending on your broth, you may not need any salt!). Stir in half of the green onions, and drizzle with toasted sesame oil.
    8. Ladle into bowls, and garnish with additional green onions and sesame seeds. Serve.
    Note: If using an Insant Pot, saute ginger and garlic in bottom of IP using Sauté setting. Add broth, soy sauce, vinegar, chii garlic sauce, fish sauce, chicken, zucchini, summer squash, and dried rice. Turn IP to Manual and set to High Pressure for 7 minutes with valve closed. Allow to naturally release for 5 minutes, then open the valve.
    2 Comments