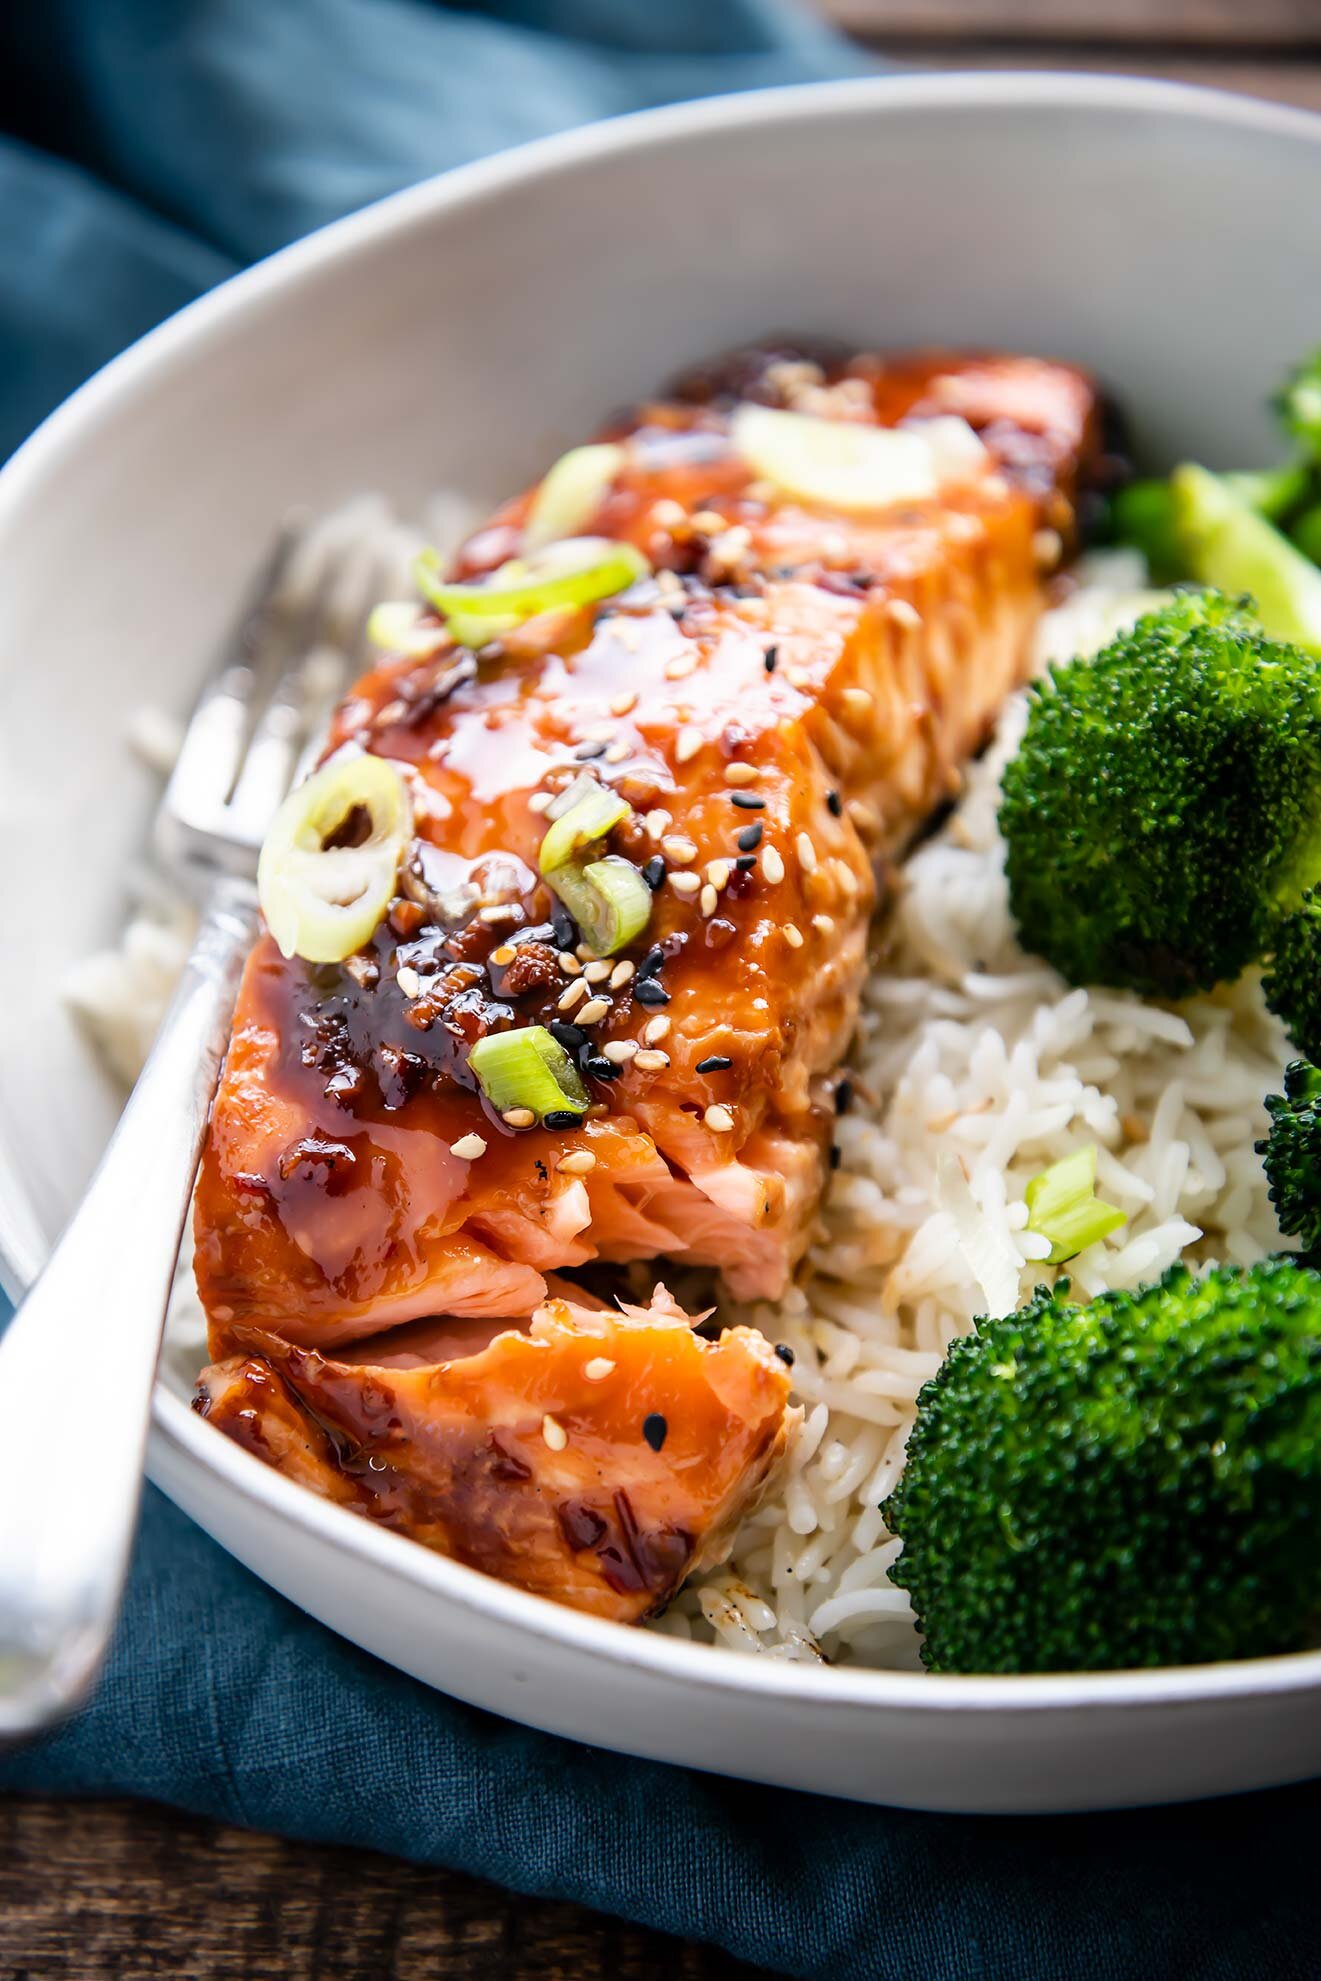
Soy Ginger Salmon with Rice & Broccoli

Soy Ginger Salmon with Rice & Broccoli

Warm days are coming. And boy, do we need it. Because while many of us are still practicing stay-at-home or safer-at-home, the outdoors are a welcome breath of literal fresh air. Why not take advantage of the sunny days to come and also cook outside? And if you can—if you also have a picnic table, or even just an accommodating step, eat outside, too.

This salmon: smothered in a salty-umami-sweet-sticky sauce, is served over rice with a side of grilled broccoli. It couldn’t be more simple. But a good fillet of salmon doesn’t need much to shine, and this sauce—well, you’ll want to make some extra. Drizzle it over the broccoli for an extra pop of flavor there, too.

Soy Ginger Salmon with Rice & Broccoli

Soy Ginger Salmon with Rice & Broccoli

Published May 12, 2020 by

Serves: 4   |    Active Time: 30 minutes


Ingredients:

  • 1/4 cup soy sauce
  • 2 tablespoon maple syrup
  • 1/2 teaspoon corn starch
  • 1 teaspoon Sriracha
  • 1 clove garlic, finely grated (on a microplane)
  • 4 quarter-sized sliced of fresh ginger
  • 4 four-ounce pieces of salmon
  • 1 head of broccoli, roughly chopped into large pieces
  • 2 tablespoons cooking oil, such as avocado or olive
  • Generous pinch of salt
  • 2-3 cups rice, cooked
  • 3 green onions, sliced
  • 2 toasted sesame seeds

  • Directions:

    1. In a small sauce pan, whisk together soy sauce, maple syrup, corn starch, Sriracha, and finely grated garlic. Place on stove over medium heat. Add ginger coins, and bring to a simmer. As the sauce bubbles, it will thicken. Cook sauce, stirring frequently, until it is thick enough to coat the back of a spoon well. Remove from heat, and use a fork or spoon to remove and discard the ginger coins.
    2. Heat grill to about 450°F.
    3. While grill heats, toss the broccoli with the cooking oil to coat, and season with a generous pinch of salt.
    4. Use a brush to coat the top of the salmon with about half of the soy sauce mixture. Using tongs, place salmon on pre-heated grill, skin-side down, along with broccoli
    5. Turn flame down to medium, and close lid, cooking the salmon for 6-8 minutes.
    6. Using tongs, turn broccoli to the second side. Then, brush the salmon with remaining soy sauce mixture, and close grill lid again, cooking for another 4-5 minutes, or until internal temperature of salmon reaches 130°F, easily flakes, and is opaque in the center. Transfer to a plate and allow to rest for 1-2 minutes.
    7. While the salmon and broccoli cook, prepare rice according to your preferences.
    8. Divide rice among serving plates. Top with salmon and broccoli. Sprinkle with sesame seeds and green onions. Serve.

    1 Comment

    Red Curry Noodle Bowl with Shrimp & Broccoli

    Red Curry Noodle Bowl with Shrimp & Broccoli

    Happy 2019! 🎉

    What are your goals this year? Any New Year Resolutions?

    I haven’t written any down, but after the holidays I am looking for some healthy meals to tuck into. (After all that Eggnog, thumbprint cookies, and pie — oh my!)

    Plus, when the days are short and it’s dark before I leave work, there’s nothing like a colorful, warm dinner to brighten things up. Red Curry Noodle Bowls are exactly that.

    Rice noodles cook in 5 minutes flat — a big advantage if you’re rushing to get dinner together after the gym or a long day! In fact, if you’re really in a rush, and you’re good at planning (eh-em — not me), you can make the coconut curry broth ahead of time, and then dinner will be on the table in 10 minutes! 

    Red Curry Noodle Bowl with Shrimp & Broccoli
    Red Curry Noodle Bowl with Shrimp & Broccoli

    Other than being 1) super delicious and 2) super cozy on a cold January day, this bowl has it all: complex carbohydrates, protein, fat (specifically, medium chain saturated fatty acids), and fiber. Plus: Vitamin C, folate, omega-6 and omega-3s, and essential minerals.

    Thai Curry is usually served over rice, but sometimes you just want to mix it up! Rice noodles are slurpy, delicious, and a perfect match for curry flavors. (Besides, see above comment about cooking time… they cook faster than rice, which takes closer to 18 minutes.)

    To store leftovers, I put cooked rice noodles in one pyrex dish and the broth and veggies in another. I’ve found that some brands of rice noodles will continue to soak up any broth or sauce after they’re cooked, so when you store them together the noodles get a little too soft for my taste. Keep them separate until it’s time to eat and you’re golden! (Sort of like ramen — add the noodles last!)

    Red Curry Noodle Bowl with Shrimp & Broccoli
    Red Curry Noodle Bowl with Shrimp & Broccoli

    Red Curry Noodle Bowl with Shrimp & Broccoli

    Published January 1, 2018 by

    Serves: 4   |    Active Time: 20 minutes


    Ingredients:


    For the red curry coconut broth:
  • 1 shallot, minced
  • 1 teaspoon coconut oil
  • 1 13.5-ounce can full-fat coconut milk
  • ¼ cup chicken broth
  • 4 tablespoons red curry paste
  • 1 tablespoon lime juice
  • 1 teaspoon maple syrup
  • Dash of fish sauce (optional)

  • For the shrimp & veggies:
  • 1 tablespoon coconut oil
  • 1 cup shrimp, raw, shelled & deveined
  • 2 cups broccoli florets
  • ½ cup sliced mushrooms

  • For serving: 
  • Brown rice noodles
  • 2 tablespoons scallions, sliced
  • Sesame seeds
  • Lime wedges
  • Hot sauce, such as sriracha

  • Directions:

    1. Make the sauce: Heat 1 teaspoon coconut oil in a sauce pan, and add minced shallot. Sauté until shallots are soft. Add coconut milk, broth, curry paste, lime juice, maple syrup, and a small dash of fish sauce (optional). Bring to a simmer, and stir until everything is well mixed.
    2. Sauté shrimp in veggies: Heat coconut oil in a large skillet or wok over high heat. Add shrimp and cook 2-3 minutes or until pink (about 1 minute on each side). Move shrimp to a plate, and reduce heat to medium. Add mushrooms to pan, and cook about 2 minutes, and then add broccoli. Cook for 3 mote minutes, stirring every minute or so — broccoli should be bright green and mushrooms should be soft.
    3. Cook noodles according to package. I used Lotus Foods Brown Rice Noodles, and boiled them in hot water for 5 minutes, and then strained them.
    4. Serve: Divide rice noodles between 4 bowls. Ladle coconut curry broth over top, and then use a spatula to divide shrimp and veggies between each. Top with sliced scallions, sesame seeds, lime wedges, and hot sauce to taste.

    1 Comment

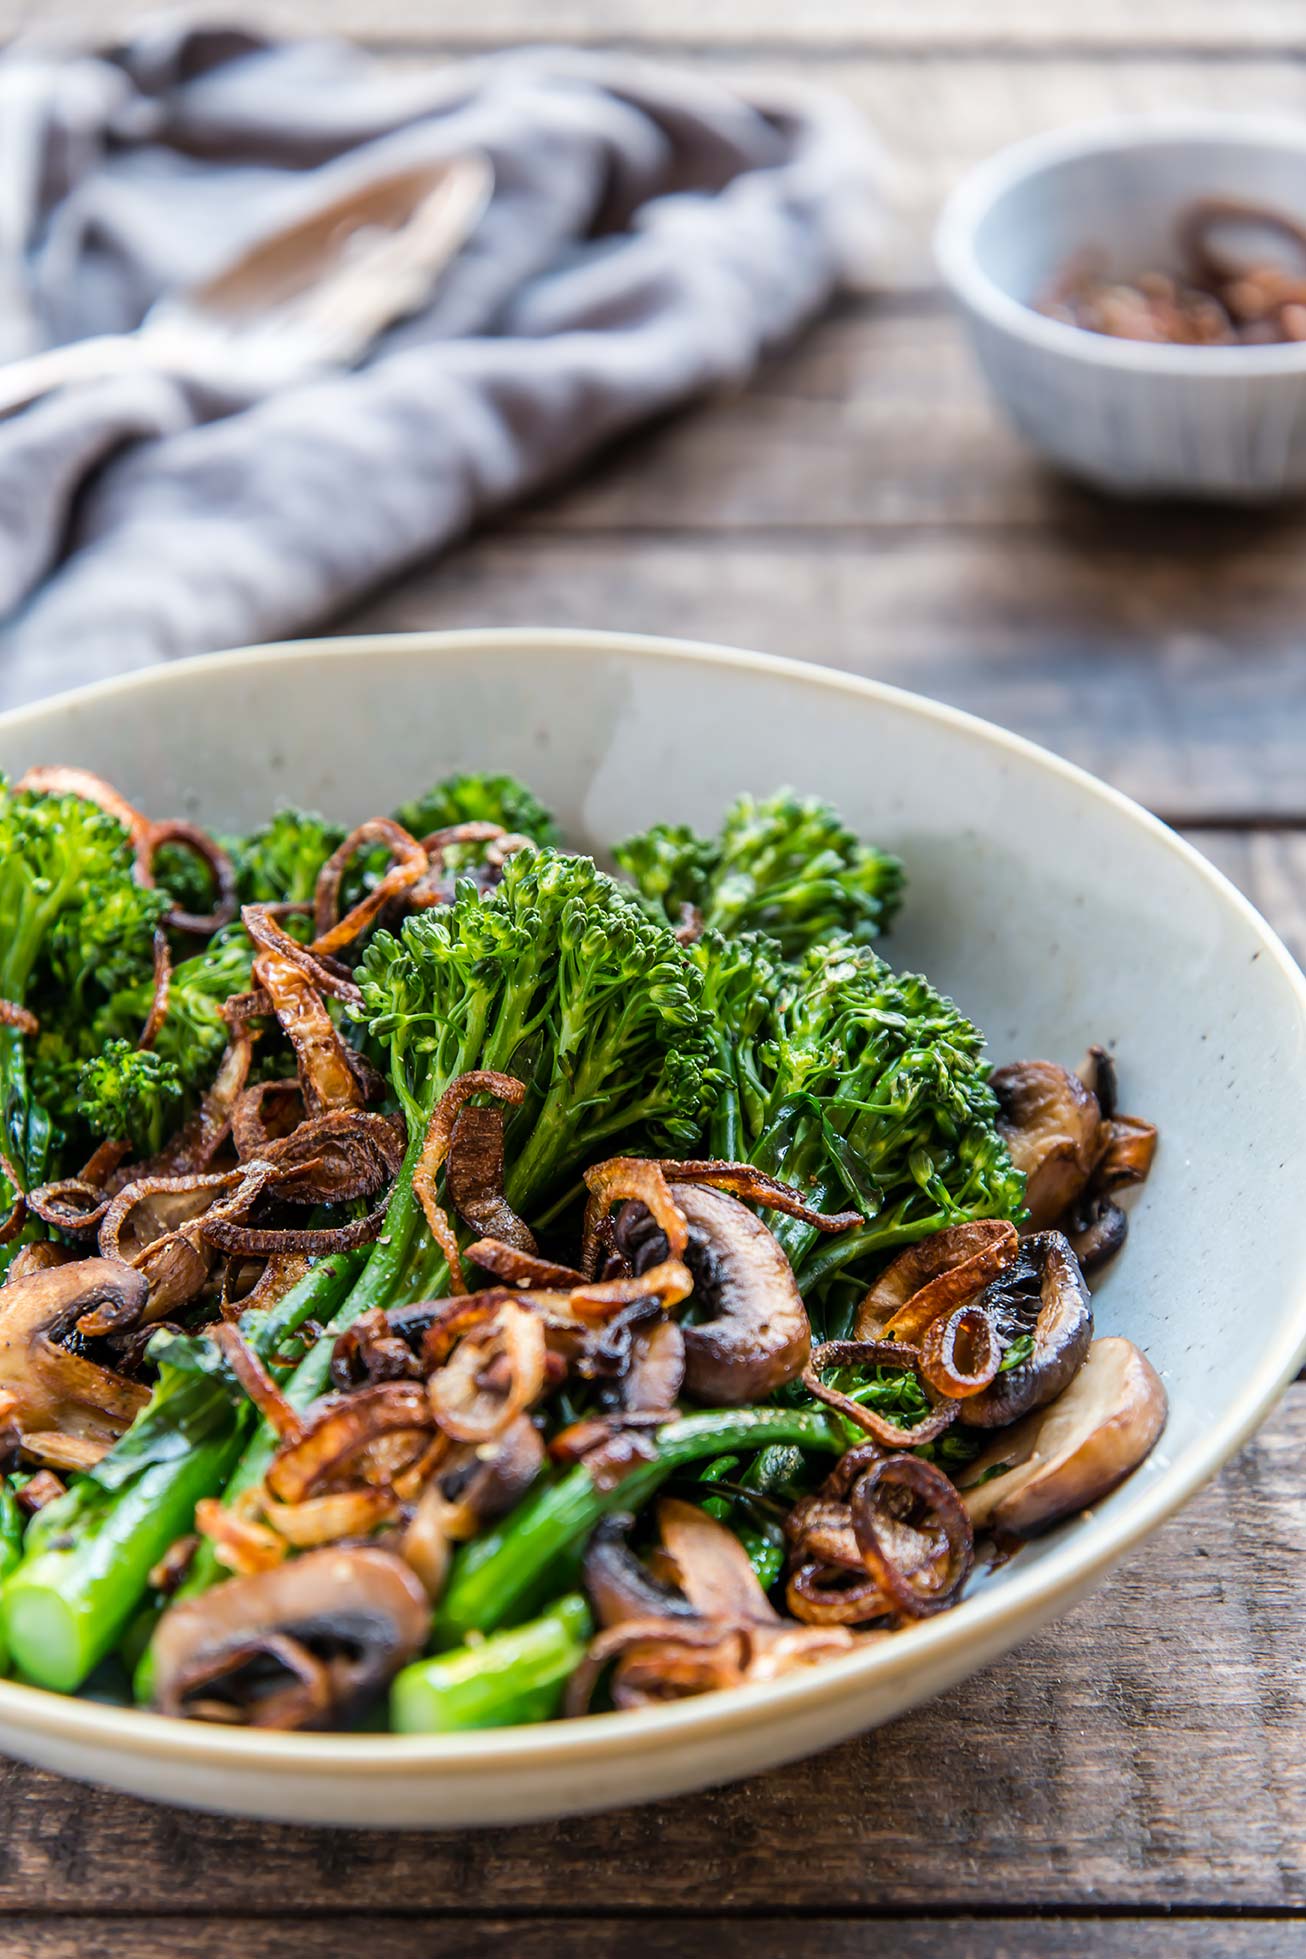
    Broccolini & Mushrooms with Fried Shallots

    Broccolini & Mushrooms with Fried Shallots

    Two words for you: fried shallots.

    They are crispy, salty, savory, and akin to those French’s Crispy Onions, but they’re just fried shallots with a little bit of salt. They can be used just about about any way you’d normally use French’s, but are also used in many Vietnamese recipes (like as a topping on Pho… YUM!). And they can be made ahead — one of two days before you’re going to use them. They add a crispy crunch to whatever you serve with them!

    In this case, broccolini and mushrooms get the special treatment. After being sautéd, They’re topped with a generous amount of crispy shallots. It’s a fun way to make something so simple (sautéd broccolini) feel special — special enough to be a side dish at a holiday meal, or topped with a poached egg for breakfast 😍 …runny yolk and fried shallot is a particularly great combo.

    With Winter Solstice tomorrow, it felt good to eat something earthy and fresh between all of the holiday cookies. 🌎 Happy Solstice! 

    Broccolini & Mushrooms with Fried Shallots
    Broccolini & Mushrooms with Fried Shallots

    So how do you make those little golden rings? It’s not too difficult, and once you’ve done it once you’ll be pro. Here are a few tips:

    • Slice two shallots extra thin.

    • Use an oil with a high smoke point. I used avocado oil, which has a fairly high smoke point — 520°F, far below what we’ll need here. Avoid olive oil.

    • Use an instant read thermometer to monitor the temperature of your oil. In this case, using a thermometer makes it way easier to get timing right!

    • You can drain fried shallots on a plate stacked with paper towels, but we don’t keep paper towels in the house. Instead, I place a fine mesh sieve over a heat-proof bowl or pot. Works great, less waste!

    • Salt immediately. With all fried food, salting right after frying helps the salt stick to the food, so salt those shallots up! A few sprinkles will do. Toss them gently to coat.

    Broccolini & Mushrooms with Fried Shallots

    Making fried shallots ahead of time: This can be very helpful, especially if you plan to already be at the stove earlier in the week. Plan ahead, and you’ll be glad. Store fried, cooled shallots in an air-tight container in the fridge (let them cool completely, so that no steam is trapped in the container — that will make for soggy shallots). You can store them in the fridge for two days, though the shallots are really best used right after they are fried or the next day. If they feel a little soft when you go to use them, you can toast them in a  oven or toaster oven for 10 minutes at 350°F, and then leave them to cool again (they will at first feel even softer when heated, and then will crisp up again as they cool).

    Broccolini & Mushrooms with Fried Shallots

    Published December 20, 2018 by

    Yield: 4   |    Active Time: 40 minutes


    Ingredients:

  • 2 shallots, sliced thin
  • 1-inch high-heat oil for frying (such as avocado), plus one tablespoon for sautéing broccolini
  • 1 bunch broccolini
  • 1 cup sliced baby portobello mushrooms
  • Salt & pepper to taste

  • Directions:

    1. Place a fine mesh sieve over a heat-proof bowl or pot. Set aside for later use.
    2. Heat oil in a skillet. Use an instant read thermometer to monitor the temperature of the oil. When the oil reach 275°F, carefully add shallots to the oil. Shallots will slowly turn from pink-white to yellow-brown. Stir occasionally. When the oil temperature reaches 375°F, wait 5 more seconds. Then, use a slotted spoon to transfer shallots from oil to prepared sieve. Sprinkle salt over shallots and toss to coat (1/16 to 1/8 teaspoon). Allow shallots to continue to cool in sieve.
    3. Sauté mushrooms & broccolini: heat remaining 1 tablespoon oil in a skillet over medium heat. Once oil glistens, add sliced mushrooms. Cook for about 5 minutes, and stir. Add broccolini, and place lid on pan. After about 5 minutes, stir again, and then return lid to pan, cooking until broccolini is bright green and tender through.
    4. Transfer cooked broccolini and mushrooms to a serving dish, and top with fried shallots. Season to taste with salt & black pepper.
    5. Serving suggestion: Serve this as a dinner side, and top with freshly grated Parmesan Reggiano, or for breakfast, topped with a poached egg.