Roasted Red Pepper, Black Bean & Quinoa Breakfast Bowl

Roasted Red Pepper, Black Bean & Quinoa Breakfast Bowl

Leftover quinoa in the fridge? This one is for you. 😊

I recently bought a bag full of quinoa because I wanted to try my hand at popping it (like popcorn). Popped quinoa is something that was sold roadside and in artisan markets when I visited northern Chile. It was a novelty for me — though I had eaten plenty of quinoa before, and knew it was local to the Andean region, seeing it puffed was different. Think puffed rice, but round, smaller, and with a delicious nutty flavor.

I tried two methods for popping the grains (one stove top, one in the microwave) and neither produced the results I was looking for. The final product was like a toasted quinoa seed, which was crunchy and nutty and great on yogurt. But it wasn’t a “pop” or a “puff” by any standard. Have you popped quinoa? How did you do it? Do I need an air popper? I have dreams of a chocolate almond butter granola bar with puffed quinoa and need your help!!

On the bright side: these experiments have meant I’ve had plenty of quinoa in the pantry.

Roasted Red Pepper, Black Bean & Quinoa Breakfast Bowl

Roasted Red Pepper, Black Bean & Quinoa Breakfast Bowls have been the highlight of my quinoa-filled week.

They are an “oooooh, yummy” and also “oh that looks nourishing” kind of dish, at the same time.

Making these in the morning is easiest when you have leftover quinoa and already cooked (or canned) black beans to start with. You can totally cook up a fresh batch to make these bowls, but using leftovers makes this easy, and easy mornings = good. Next time you’re making quinoa, make extra with tomorrow’s breakfast in mind.

Roasted Red Pepper, Black Bean & Quinoa Breakfast Bowl

Roasted Red Pepper, Black Bean & Quinoa Breakfast Bowl

Published January 24, 2019 by

Serves: 2   |    Active Time: 20 minutes


Ingredients:

  • 2 eggs
  • 1 tablespoon coconut oil or other cooking oil
  • 1 red bell pepper, sliced in strips
  • 2 cups cooked quinoa, warmed
  • 1/2 cup black beans, canned or pre-cooked and strained, warmed
  • For serving: salt & pepper, sliced avocado, minced cilantro, lime wedges

  • Directions:

    1. Divide quinoa and black beans between two serving bowls.
    2. Cook the peppers: Heat cooking oil in a skillet over medium heat. When the oil glistens, tilt the pan back and forth to coat it in oil. Place red peppers in pan, and sauté, stirring every 2-3 minutes, until peppers are soft and edges are browning. Transfer peppers to serving bowls.
    3. If your pan is dry, add a bit more oil. Crack the eggs into the pan, one at a time, and reduce heat to low. Cook until whites are completely set and yolks have reached your desired doneness. Use a spatula to transfer eggs to serving bowls.
    4. Top each bowl with salt & pepper to taste, sliced avocado, minced cilantro, and a lime wedge. Serve warm.

    Goat Cheese & Chive Scrambled Eggs

    Goat Cheese & Chive Scrambled Eggs

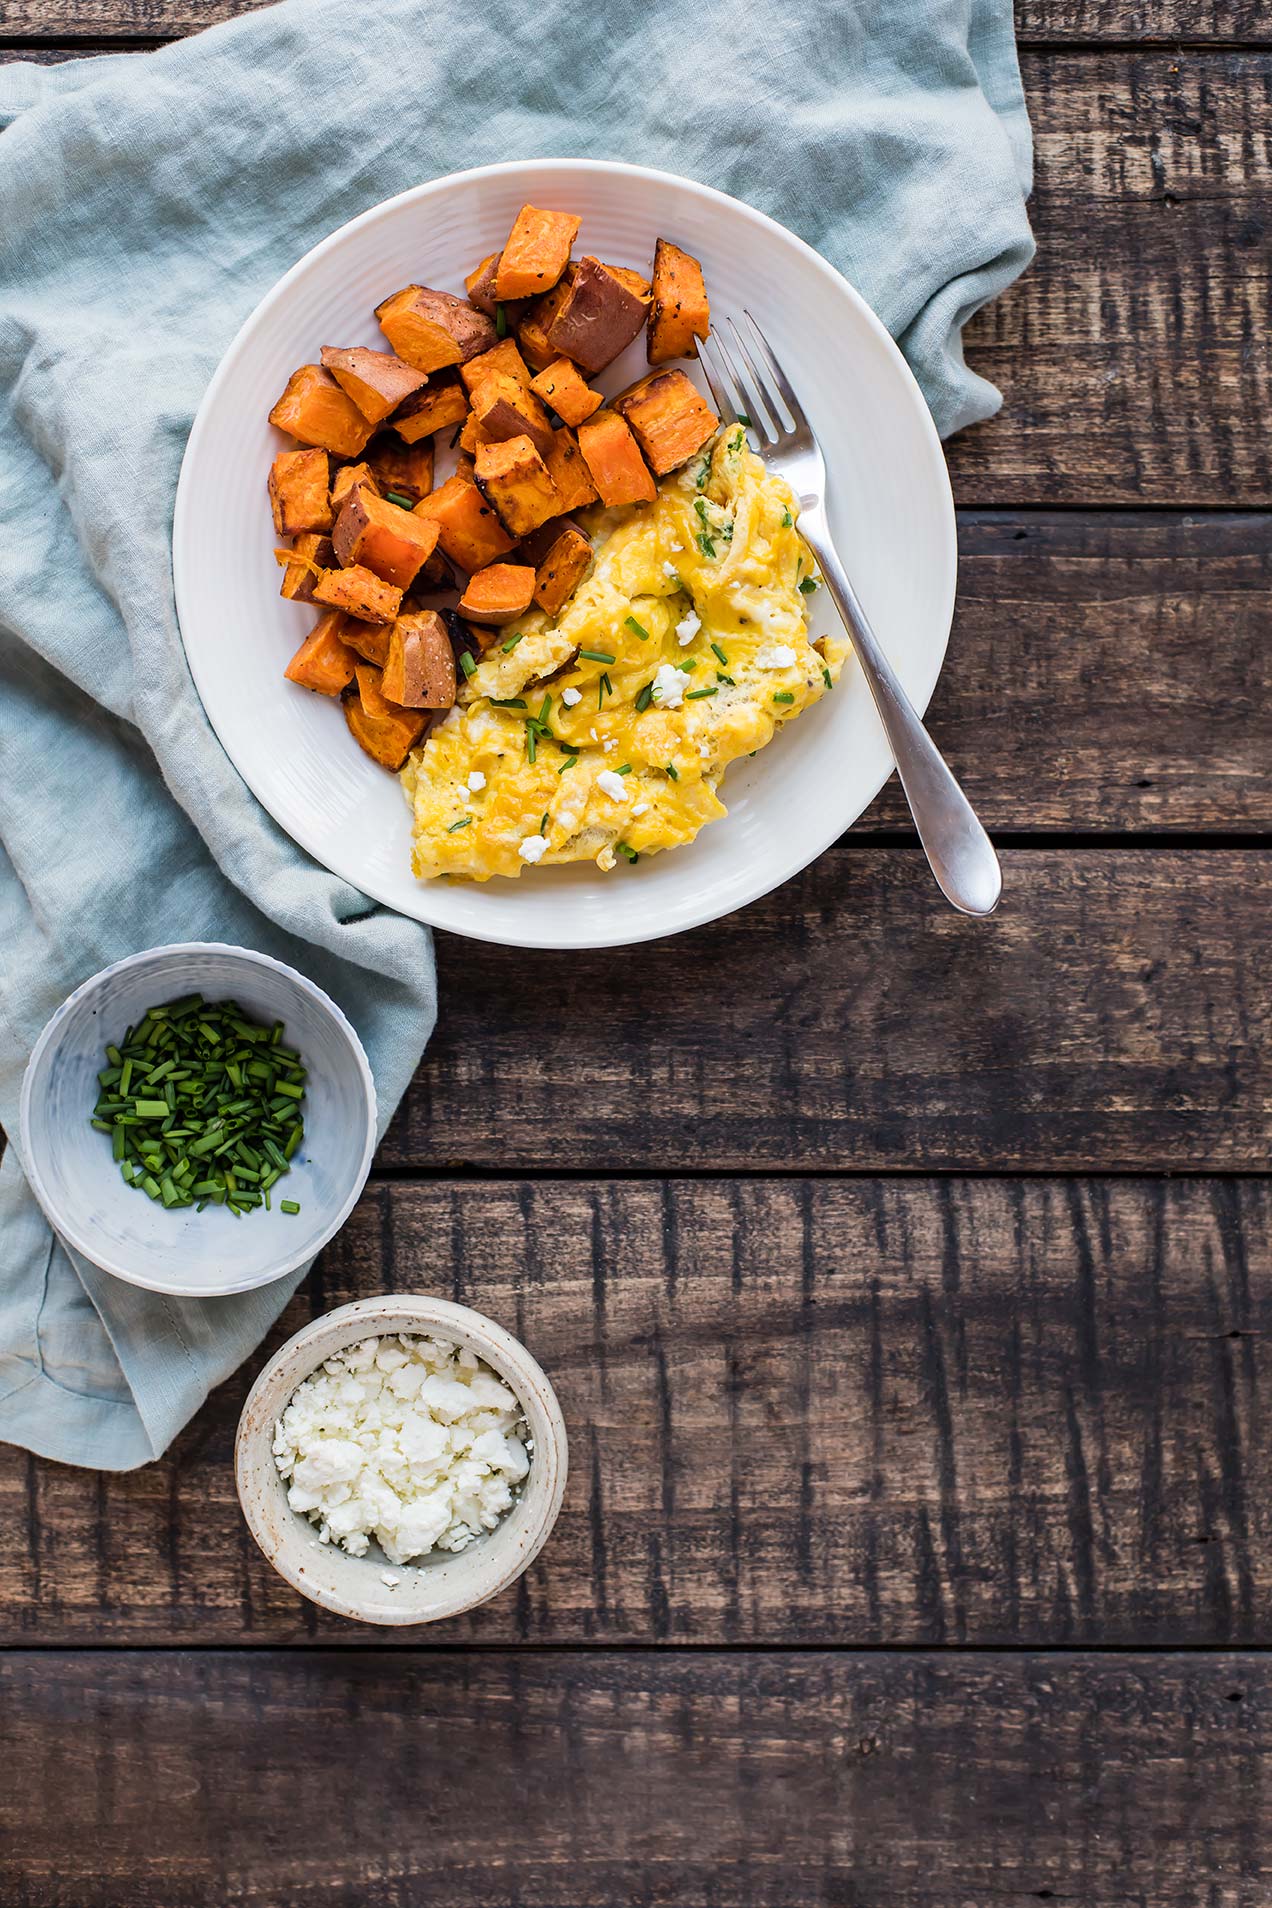
    Adding goat cheese crumbles to scrambled eggs takes about two additional seconds but adds so much creamy cheesy flavor.

    While I normally opt for eggs over easy these days, scrambled eggs were probably the first thing I ever learned to cook myself, and that alone made them one of my favorite foods as a kid. (I would scramble and egg in the microwave on slow weekends when my mom would ask, “Are you going to eat breakfast today?")

    That version didn’t call for goat cheese (and I don’t think twenty-years-ago Caitlin would’ve appreciated the addition), but goat cheese adds pockets of creaminess that are out of this world.

    Goat Cheese & Chive Scrambled Eggs
    Goat Cheese & Chive Scrambled Eggs

    Chives and goat cheese are a classic combo. Chives add a delicate onion-garlic flavor that is just zippy enough to give creamy goat cheese some extra life. Chives are one of the first plants in the garden that turns green come spring, making this breakfast a perfect early spring kind of dish.

    I happened to also be cooking up a batch of creamy Icelandic Langoustine Soup, and had some extra chives to burn. I hate buying a bunch of herbs and only using half, leaving the other half to wither in the fridge… though, that ends up being the fate of many MANY bunches of herbs in our fridge. Sound familiar? Well, there are LOTS of ways to use up chives, including this recipe! Here are a few more to help you finish off that bunch: Crustless Quiche Lorraine (a reader fave!), Sweet Potato Chive Hash Brown Waffles, or Garlic and Herb Shrimp with Vine Ripe Tomatoes. You could basically build a whole week’s meal plan around a bunch of chives!

    We served these eggs with a side of roasted sweet potatoes, but sautéd veggies would also be delish!

    Goat Cheese & Chive Scrambled Eggs
    Goat Cheese & Chive Scrambled Eggs

    Watch now: Goat Cheese & Chive Scrambled Eggs

    Goat Cheese & Chive Scrambled Eggs

    Published January 17, 2018 by

    Serves: 2   |    Active Time: 20 minutes


    Ingredients:

  • 4 eggs
  • 3 tablespoons goat cheese crumbles, plus more for topping
  • 1/8 teaspoon salt
  • 1/8 teaspoon ground black pepper, plus more for topping to taste
  • 1 tablespoon cooking oil, such as coconut or avocado
  • 2 tablespoons minced chives, plus more for garnish 

  • Directions:

    1. Crack all four eggs into a mixing bowl. Whisk together until they are frothy and solid yellow. Add goat cheese, salt, and pepper, and whisk to incorporate.
    2. Heat oil in a 10-inch skillet over medium heat. Pour egg mixture into skillet. As eggs begin to set (after a few minutes) gently use a spatula to pull eggs across pan, making curds. Add in chives and continue to cook for a few more minutes, occasionally stirring, until all of the egg mixture is set.
    3. Divide among serving plates and sprinkle with extra goat cheese and chives, along with extra black pepper to taste.

    Grain-Free Mint Chocolate Brownies

    Grain-Free Mint Chocolate Brownies

    “These are a treat,” I said to Oliver after taking a bite. Fudgy on the bottom, creamy in the middle, and even more chocolatey on top, these brownies are rich all the way through.

    If you like York Patties, or Mint Chocolate Chip Ice Cream, or Andes Mints, these brownies are for you. And before I get to far… they are grain-free, gluten-free, and nut-free. Plus, they’re sweetened with honey!

    Mint and chocolate is a favorite combo of mine, and when I was day dreaming of holiday baking these stayed in the forefront of my mind. They feel super festive! It wasn’t until after I had made them that I was swiping through images of a cookbook my mom made of her favorite recipes and I found mint brownies nestled in there. Somewhere in the back of my mind I suppose I remembered her brownies…

    Grain-Free Mint Chocolate Brownies
    Grain-Free Mint Chocolate Brownies

    Let’s start at the bottom: the brownie base is made of the same batter used in these strawberry cheesecake swirled brownies. It is a very chocolatey, batter that calls for coconut flour and a LOT of cocoa. The result is one fudgy brownie!

    The next layer is a sweet mint cream cheese frosting. Most mint brownies call for buttercream here, but I’ve never been a fan of buttercream, and even as a kid I preferred cream cheese frosting. Nothing’s changed on that front! (For extra festive-ness, you can stir in a drop or two of green food coloring if you like.)

    The topping is a simple chocolate ganache, making a chocolate mint sandwich that even looks a bit like an Andes Mint!

    When you bite through all three layers it is rich, sweet and melt-in-your-mouth delicious… a total treat! (One night we had these with the Mint Chip Ice Cream from CoolHaus. 😍)

    Grain-Free Mint Chocolate Brownies

    Grain-Free Mint Chocolate Brownies

    Published December 6, 2018 by

    Serves: 16   |    Active Time: 1 hour


    Ingredients:

    Brownie Base:
  • 1/2 cup melted unsalted butter or coconut oil
  • 1/2 cup cocoa powder
  • 1/3 cup semi-sweet chocolate chips
  • 1/4 cup honey
  • 2 eggs, room temperature
  • 1 teaspoon vanilla extract
  • 1/4 cup coconut flour
  • 1/4 teaspoon salt

  • Mint Filling:
  • 8 ounces cream cheese, room temperature
  • 1/4 cup honey
  • 1/4 teaspoon peppermint extract

  • Chocolate Ganache Topping:
  • 2 tablespoons unsalted butter or coconut oil
  • 2 tablespoons half-and-half
  • 1/2 cup semi-sweet chocolate chips

  • Directions:

    1. Preheat oven to 350°F and line a 8x8 baking dish with parchment paper.
    2. In a small sauce pan, combine melted butter or coconut oil, cocoa powder, and chocolate. Heat over low heat, stirring until most of the clumps have melted. Remove from heat and allow to sit until entire mixture is smooth and melted.
    3. Scrape mixture into a mixing bowl. Using electric beaters, stir in honey. Add eggs and vanilla and beat again. Mixture should begin to thicken. Add coconut flour and salt. Beat until smooth and no clumps remain.
    4. Spread batter in even layer in prepared baking dish.
    5. Bake for 20 minutes, until brownies are slightly puffy, and a knife comes out clean when inserted in the middle. Allow to cool for completely before topping with mint filling.
    6. Mint filling: while brownies are cooling, beat together cream cheese, honey, and mint until smooth. When brownies are no longer warm to the touch, spread cream cheese mixture over top in an even layer. Place brownies in fridge, covered, for at least one hour (or overnight! Short cutting this time will make it hard to spread the ganache over top and get clean layers.)
    7. Chocolate ganache topping: Place butter, half-and-half, and chocolate in a small sauce pan and heat over low heat, stirring constantly, until a smooth ganache is formed. Remove from heat. Spread chocolate ganache over cream cheese mixture and allow to set 10 minutes before slicing into 9-16 squares. Tip: for the cleanest cuts, rinse your knife between each slice.