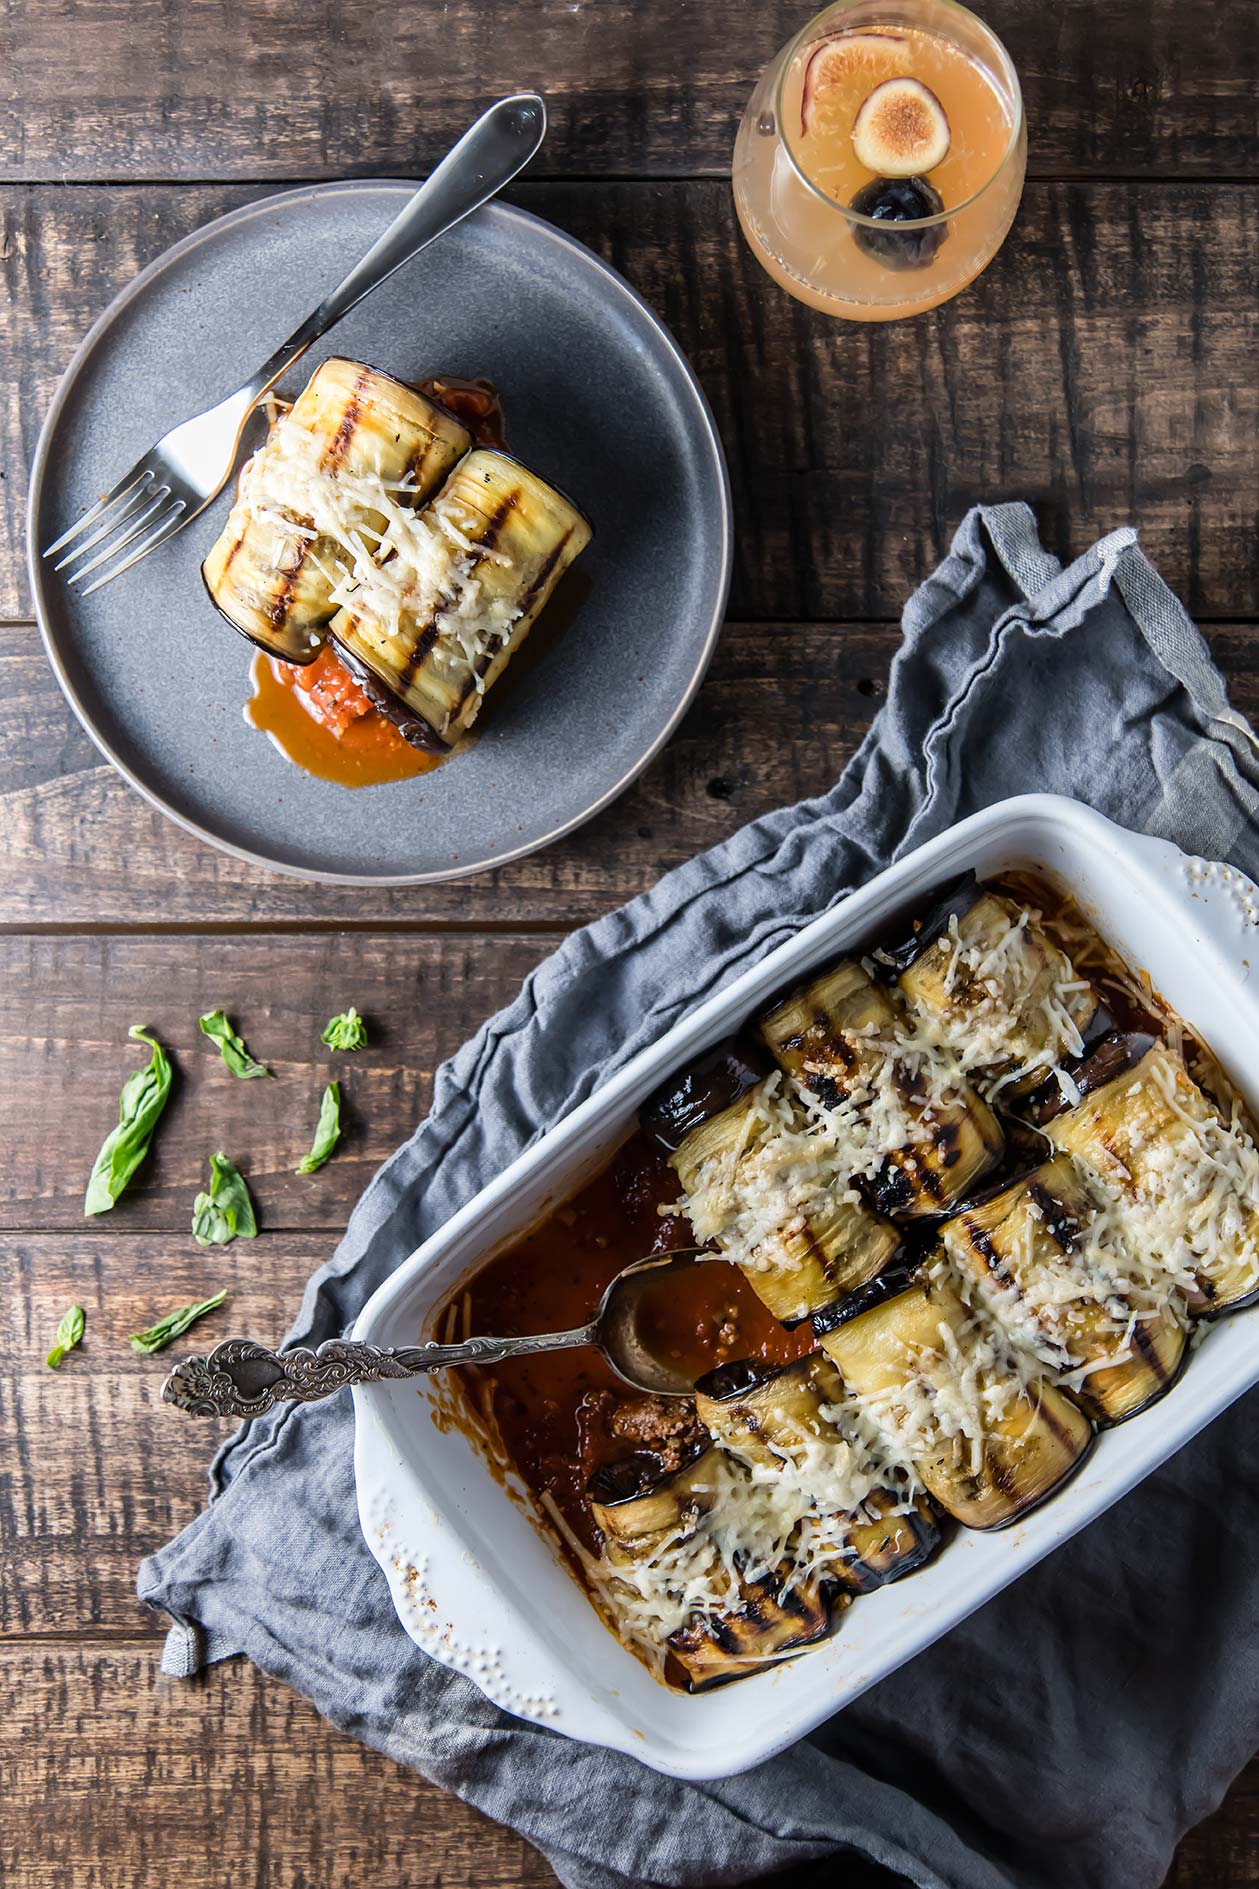
Eggplant Cannelloni

Eggplant Cannelloni

The last few months have been go, go, go, which has meant fewer posts to the blog, less time to photograph recipes, 😭 and learning to cut myself a break every once in a while.

Somehow, yesterday was April and today it's September. September thirteenth. Back in April my mantra was, "You can't do literally everything," but somewhere between then and now, my mantra became nothing but a string of words, as I continued to ignore their meaning. So, today, I'm trying out this new mantra: Cut yourself a break. It means going easy on yourself when you've been trying your hardest. It means giving yourself a pass when you need it most.

Eggplant Cannelloni

In the midst of my mantra-creating and mantra-forgetting, our stockpile of eggplants has been growing: Not a day goes by that I don't have at least three of them sitting in our fruit bowl, staring me back. This year I planted six varieties, next year I'll plant two: Fengyuan and Black Beauty. 

  • Edirne - these were the first to fruit, but they're my least favorite to eat. other than their pretty green and purple stripes, they are just a little bitter and not as tasty.

  • Antigua - these are my favorite to look at but they are quite small, better for slicing in half and roasting with some harissa or something of the sort.

  • Fengyuan - my most copious producer, I freakin' love these eggplants. They are long (17 inches!), skinny and usually make a "J" shape. They are absolutely delicious when stir fried with some garlic and Thai basil.

  • Ping Tung - I also like these for stir fries, but for whatever reason I prefer the Fengyuan... no need to grow both, they are so similar!

  • Black Beauty and Florida - speaking of similar, I can barely tell these two plants apart. I think I like the black beauty ones the most (we have gotten some massive eggplants from those plants). In any case, they are the best variety for recipes like this cannelloni, where you want wide strips, or this roasted eggplant salad. They're also the variety you usually find at the grocery store.

Ok, don't quote me on the only growing two varieties thing. But those are my favorite so far this season. Have you ever grow eggplants? What were your favorite varieties? 

Basket of Eggplants from the Garden
Eggplant Cannelloni

Normally I'd suggest serving this with a glass of red, but I happened to also be making a batch of this Fig & Pear White Wine Sangria, so of course I had to have a glass of that instead. 

P.S., if you like this recipe, you'll LOVE this Zucchini Ricotta Manicotti. 😋

Eggplant Cannelloni

Published September 13, 2018 by

Serves: 6-8   |    Active Time: 40 minutes


Ingredients:

  • 2 medium sized eggplants
  • 2-4 tablespoons olive oil
  • 2 cups marinara sauce
  • 1 cup mozzarella
  • 1/2 cup parmesan
  • 1 pound beef
  • 1 teaspoon coconut oil
  • 1/2 yellow onion, diced
  • 4 cloves garlic, minced
  • Salt & pepper to taste

  • Directions:

    1. Light grill set flame to medium. Slice eggplant into strips the long way. Brush eggplant slices with olive oil, and them place on grill, cooking for about 5 minutes before flipping. Eggplant slices should have char marks on the outside and be softened through. Remove from heat, turn off grill, and set eggplant aside.
    2. Heat coconut oil in a medium sized skillet over medium-high heat until it glistens. Add diced onion and minced garlic and sauté until onions are transparent.
    3. Add beef to skillet. Brown beef, using a wooden spatula to create crumbles as it cooks. When beef is browned, add 1/2 cup marinara sauce to the pan and stir. Turn off heat.
    4. Allow beef mixture and eggplant to cool just enough so they can be handled before proceeding to next step. (Warm is fine, just avoid burning yourself!)
    5. Prepare baking dish: spread remaining 1-1/2 cups marinara sauce in the bottom of a 9x9 or 7x12 baking dish.
    6. Work with one eggplant strip at a time. Lay it out in front of you, with the short end towards you, and place about 2 tablespoons of beef mixture in the center of the strip. Roll the strip around the beef, rolling in the opposite direction of your body. Place rolled eggplant in the baking dish, with the “seam” down. Repeat this step until all eggplant strips are used.
    7. Sprinkle top of cannelloni with mozzarella and then parmesan, and place in oven. Set broiler to high and broil for 5-10 minutes, until cheese and sauce are bubbling. Serve hot.

    1 Comment

    Chickpea Antipasto Salad

    Chickpea Antipasto Salad

    In the kitchen, there is the sound of a ticking clock. From the open sliding door on my right, the leaves rustling in the breeze. The high today is seventy-one degrees. The last time I could say that was probably early April, and it feels like a treat. 

    We had no idea what to expect when we arrived in McCall. Boise is surrounded by golden dry hills, the city itself an sprawl of big box department stores. But the further north you go the more trees you find, and the grasses begin to turn green. As you coast down the road into McCall's center you spot Lake Payette, like a gem in the rough. 

    Here, I'm going to be soaking up the cooler weather -- currently drinking orange cinnamon tea - but back home, I'm still defaulting to no-cook, no-bake, minimal effort meals, like this Chickpea Antipasto Salad. 

    This dish is a bit like pasta salad, minus the pasta, and all you do is mix. That's right: skip the oven, skip the stove, and even skip dishes -- it's a one-bowl wonder. 

    Antipasto pasta salad is a picnic classic, with olives, artichokes, sun dried tomatoes, and cheese. But I wanted to make a version that didn’t use pasta. Something gluten-free with more nutrients per bite. Chickpeas are the perfect option here — they have a starchy quality that makes them a good filler, though they are also filling, more so than pasta, and in a good way. So there you have it, a way to fill those pasta salad cravings when you don’t want to fill your stomach with pasta.

    You can make this salad ahead of time and chill it. Served over a few fresh lettuce leaves, it makes for a great make-ahead lunch in the middle of summer! Or, put everything in a large serving dish and tote your chickpea antipasto salad along to a potluck.

    Chickpea Antipasto Salad
    Chickpea Antipasto Salad

    Chickpea Antipasto Salad

    Published August 23, 2018 by

    Serves: 4-6   |    Active Time: 10 minutes


    Ingredients:

  • 2 sixteen-ounce cans chickpeas, drained
  • 1/4 cup red onion, minced
  • 1 cup artichoke hearts, quartered and drained
  • 1/2 cup sliced sun dried tomatoes in oil, drained
  • 1/2 cup sliced kalamata olives, pitted and drained
  • 1/3 cup pesto
  • 1/4 cup fresh basil, minced
  • 2 tablespoons red wine vinegar
  • 1/2 cup feta crumbles
  • Optional: serve over a bed of butterhead lettuce

  • Directions:

    1. In a medium size mixing bowl, combine all ingredients and stir to combine.
    2. Serve immediately, or make a day ahead of time, cover and refrigerate until ready to serve.
    3. Optionally, serve over a bed of butterhead lettuce leaves.

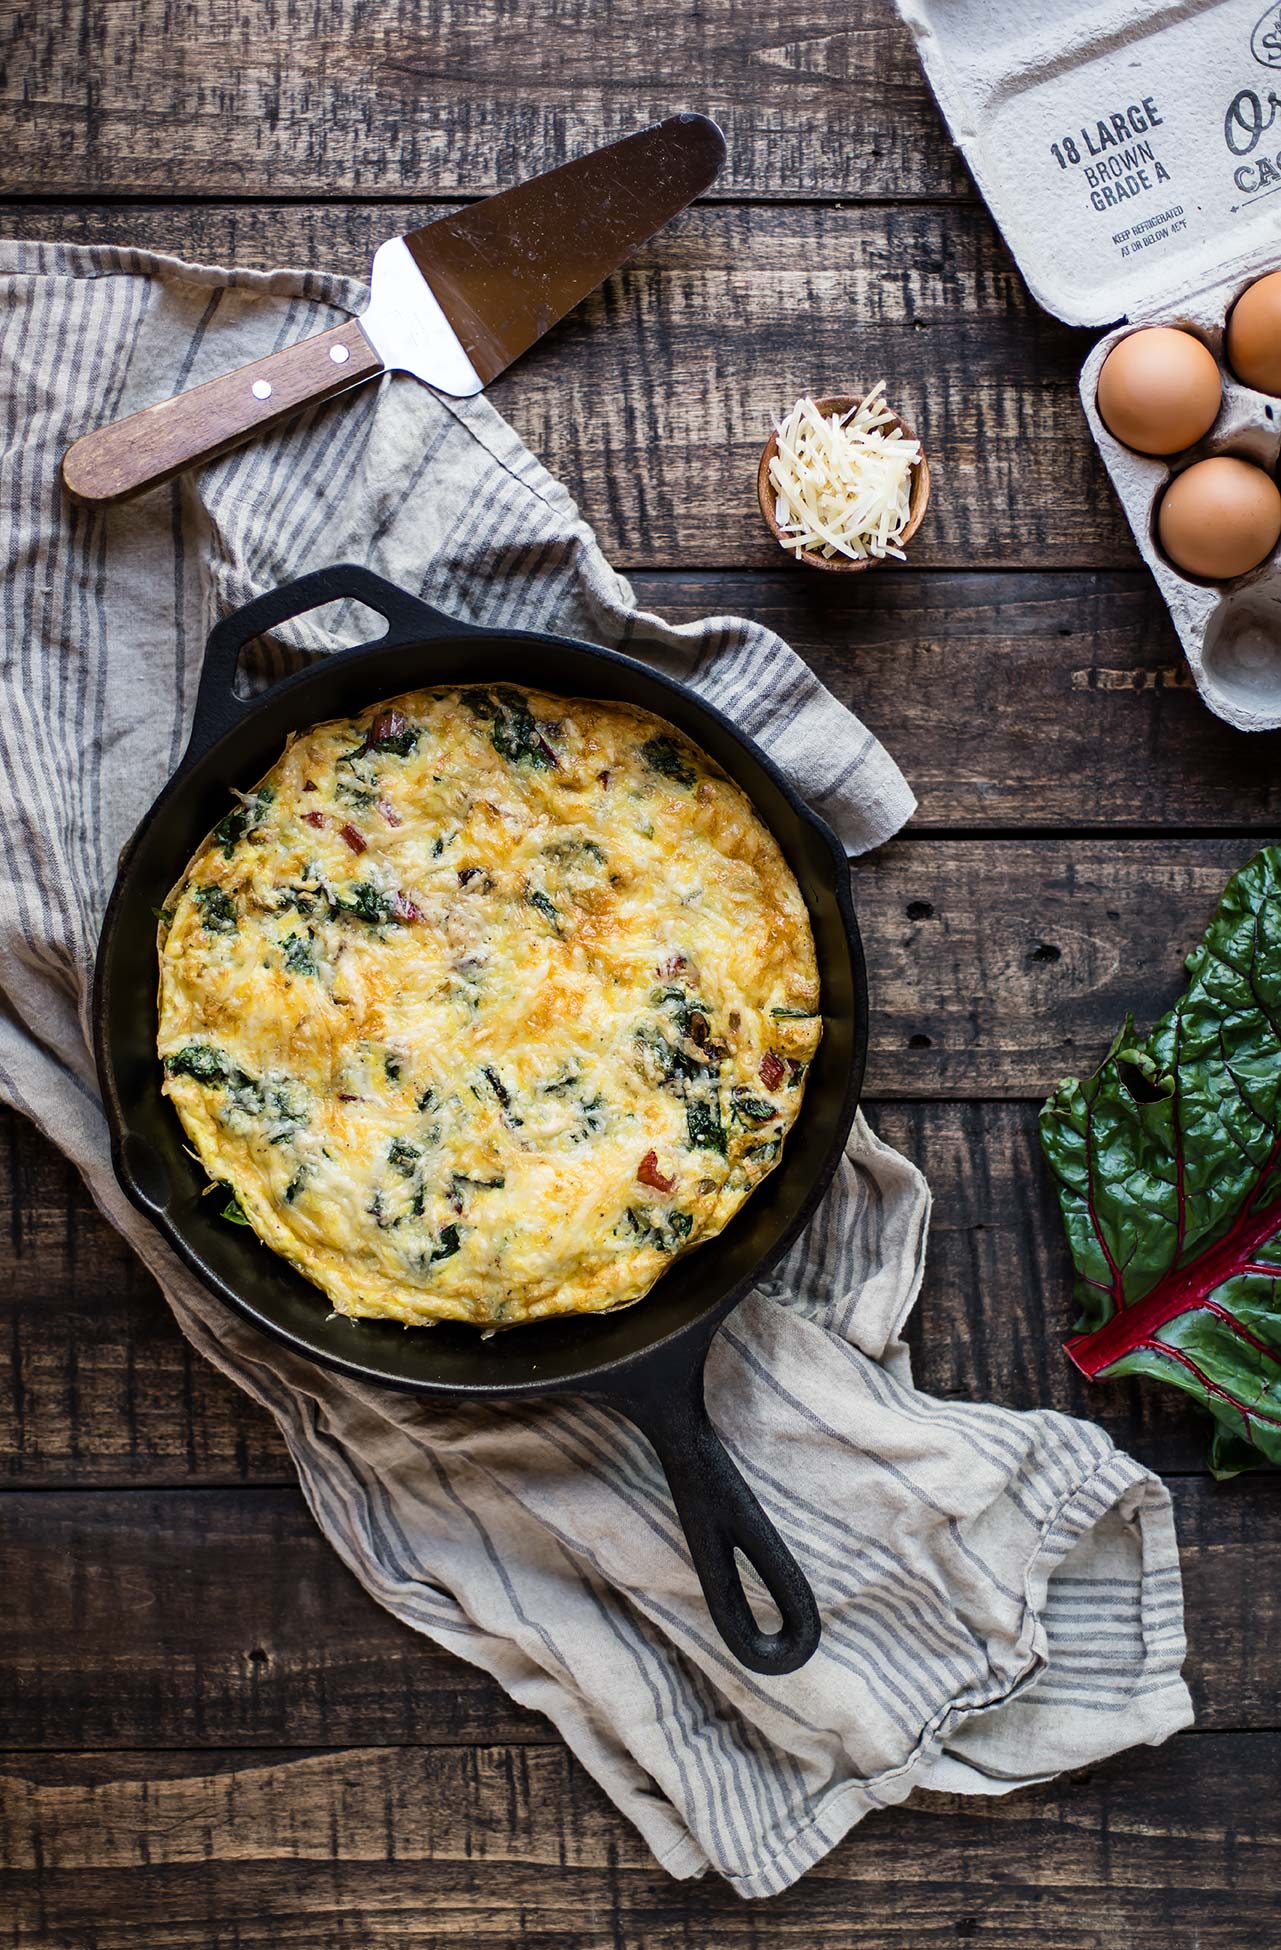
    Swiss Chard Frittata

    Swiss Chard Frittata

    Once I learned to flip, there was no going back. Life was truly never the same, as gymnastics suddenly became the grounding element in my life. And then one day, sometime in college, it all came to halt. I stopped coaching (I got a different job), and with that I also stopped having a reason to be a gym rat daily (this gave way to me trying many other sports, some of which I still love, but none as much as gymnastics).

    Two weeks ago I went to my old gym for an adult gymnastics class, something that never fails to make me feel old and weak and also young and nostalgic at the same time. We did bars (which was always my least favorite event) but sure enough my muscle memory held on: glide, toes to the bar— Kip. Switch kip. Free hip, cut kip. I found myself in the air again, older sure— but the muscle memory was there. In a way nothing had changed and in others everything had. 

    About 15 minutes in, I spun around the bar and felt a familiar and unpleasant sensation: a rip. My palm cut open (like a popped blister, but almost and inch across). Damn does that sting! At 15 years old, a rip was nothing: a causality at most. You got back up and kept going. Man I was strong then. And that’s how it goes: a mixture of rediscovering why I loved the sport in the first place — reinforcing what I always have known, which is that I simply love gymnastics, all of it - and learning how I have changed. 

    Swiss Chard Frittata
    Swiss Chard Frittata

    Gymnastics was the first sport that I loved — before that I just wasn’t into most of what we did in gym class - and it taught me to care. To care about results and to try hard, sure, but also to care about my body and what I ate. I love gymnastics so much that anything that might help me be a better gymnast was worth doing.

    Somewhere along this road I moved from breakfast-skipper to breakfast lover. More specifically, high protein breakfast lover. Eggs! I love eggs, and they’re a great way to get some protein in your body, which you need in order to rebuild (or just build) between work outs. This swiss chard parmesan frittata is a quick one — sauté the greens in an oven-safe skillet, add the adds, pop it in the oven under the broiler, and boom! High protein breakfast (with veggies) (and cheese!) is ready. Eat up!

    Swiss Chard Frittata

    Swiss Chard Frittata

    Published August 21, 2018 by

    Serves: 4   |    Active Time: 20 minutes


    Ingredients:

  • 6 eggs 
  • 1 shallot, sliced thin
  • 4 swiss chard leaves 
  • 1 teaspoon coconut oil
  • 1/4 cup milk of choice
  • 1/4 teaspoon salt
  • 1/8 teaspoon pepper
  • 1/2-3/4 cup parmesan

  • Directions:

    1. In a 10-inch skillet, heat coconut oil over medium-high heat.
    2. When oil glistens, sauté shallots until translucent.
    3. Cut the swiss chard: cut out the stems, and chop them. Add stems to the pan. Then, roughly chop the leafy green parts. Add the leafy green parts to the skillet once the stems begin to soften. Place lid on skill, and allow greens to cook until dark green.
    4. In a medium bowl, whisk together the eggs, milk, salt and pepper. Once yellow and frothy, pour egg mixture into skillet. You may want to use a fork or spoon to move the swiss chard into an even layer if it is in clumps. Sprinkle parmesan on top.
    5. Turn oven to a high broil. Place skillet on top rack in oven, and cook for 5-10 minutes, until eggs are puffed, golden on top, and set through. Remove from oven, and allow to cool 3-5 minutes.
    6. Slice and serve.