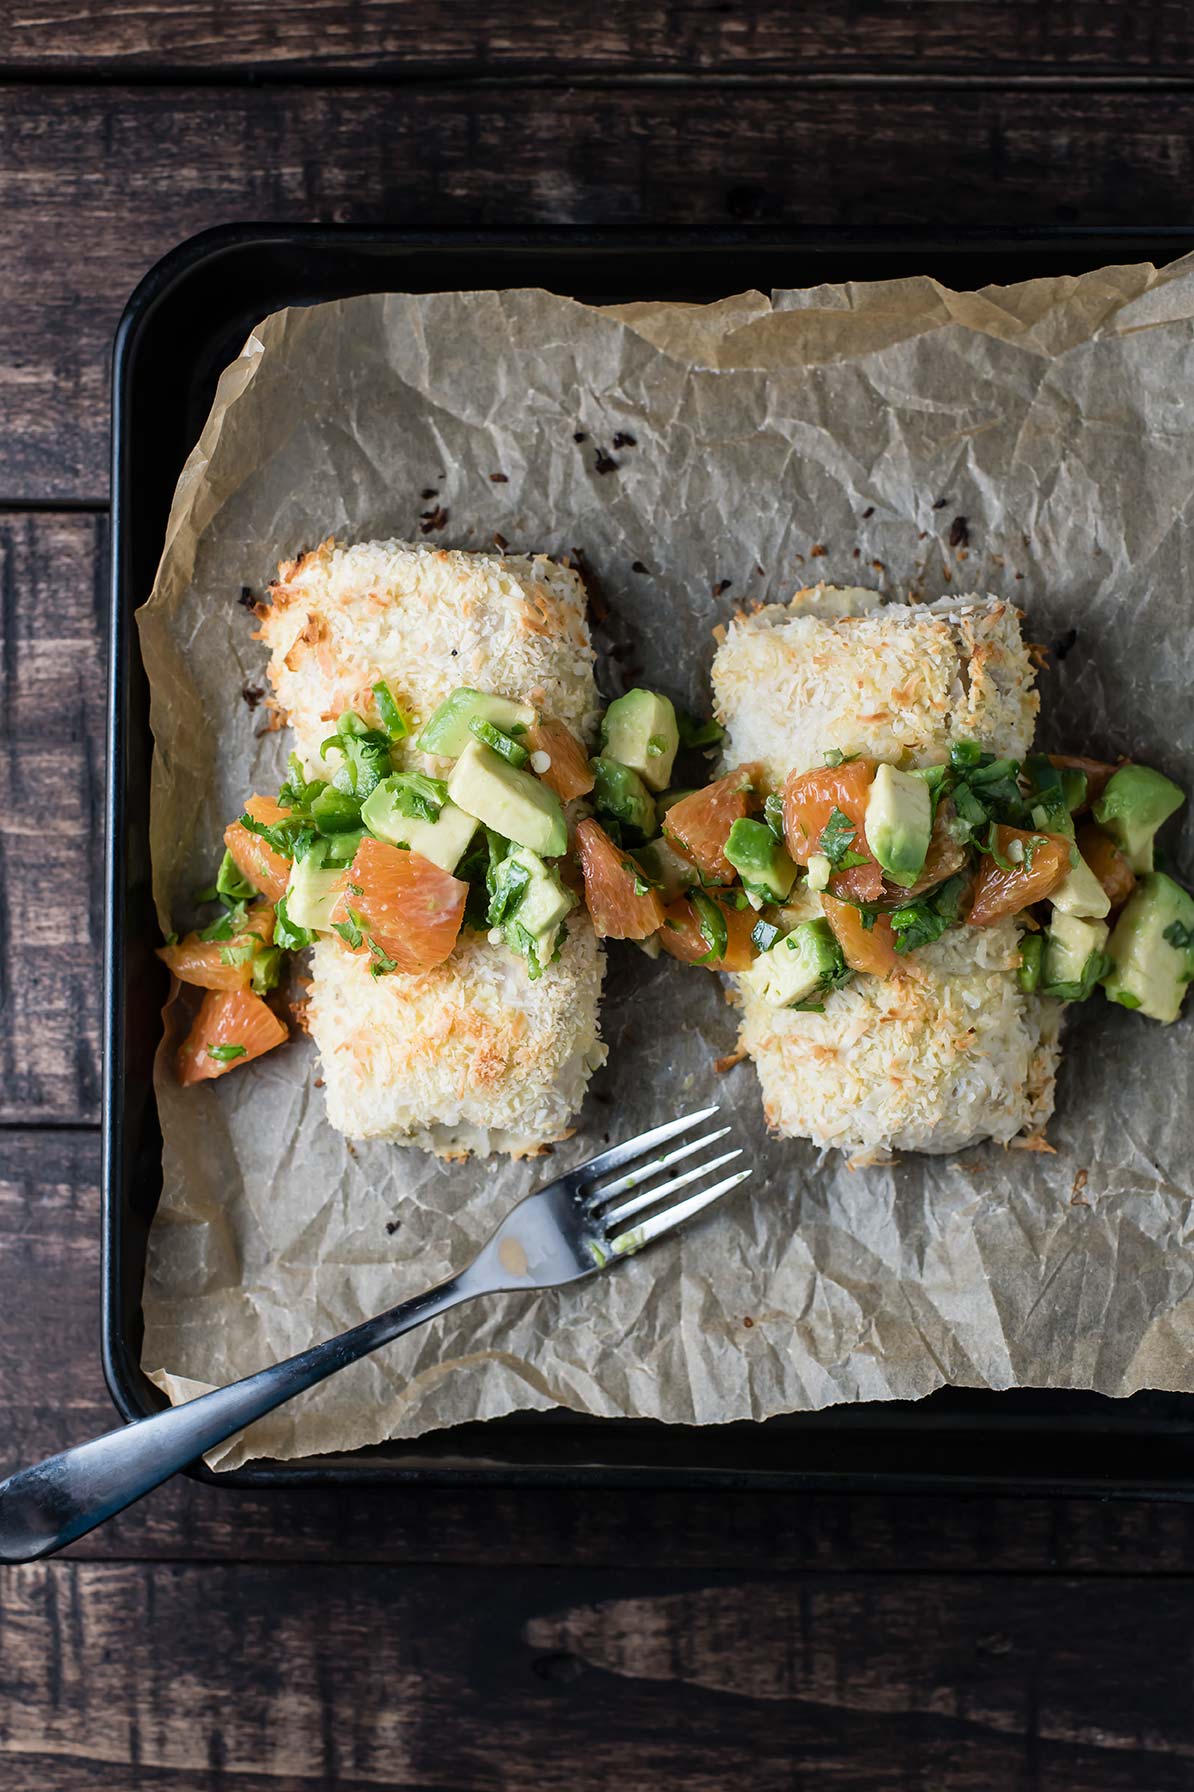
Coconut Crusted Mahi-Mahi with Cara Cara Orange Salsa
/
There are days I plan dinner from the moment I wake up. The way the ingredients will feel as I chop them, the way they all come together, and the way they'll taste when finally on my fork. And then there are the days when I have no plan at all. On our drive home Oliver asks, "What’s for dinner?" and it catches me by surprise as if I didn’t know dinner was happening that day. I find this happens the most when I’m busy, the days I have the least time to day dream about recipes.
These are always the days I can’t fit a grocery run in. Instead, I focus on one ingredient that I know we have. In this case, it was frozen mahi-mahi fillets. Then, with mahi-mahi as the muse, I brainstorm recipes. Fish tacos? But we don’t have tortillas. Or salsa. Or cheese. Fish curry? When was the last time I bought coconut milk? Coconut. I have coconut, I thought as I remembered the pink bag of coconut buried with other baking supplies in the pantry.

This is how the pieces fall together. Sometimes it’s a disaster. Other times it’s happy coincidence, like it was meant to be. Like it had been planned. That’s how I first discovered this meal. A win; happy coincidence. I have since made this quite a few times—even planned on making it several times after the one happy coincidence.
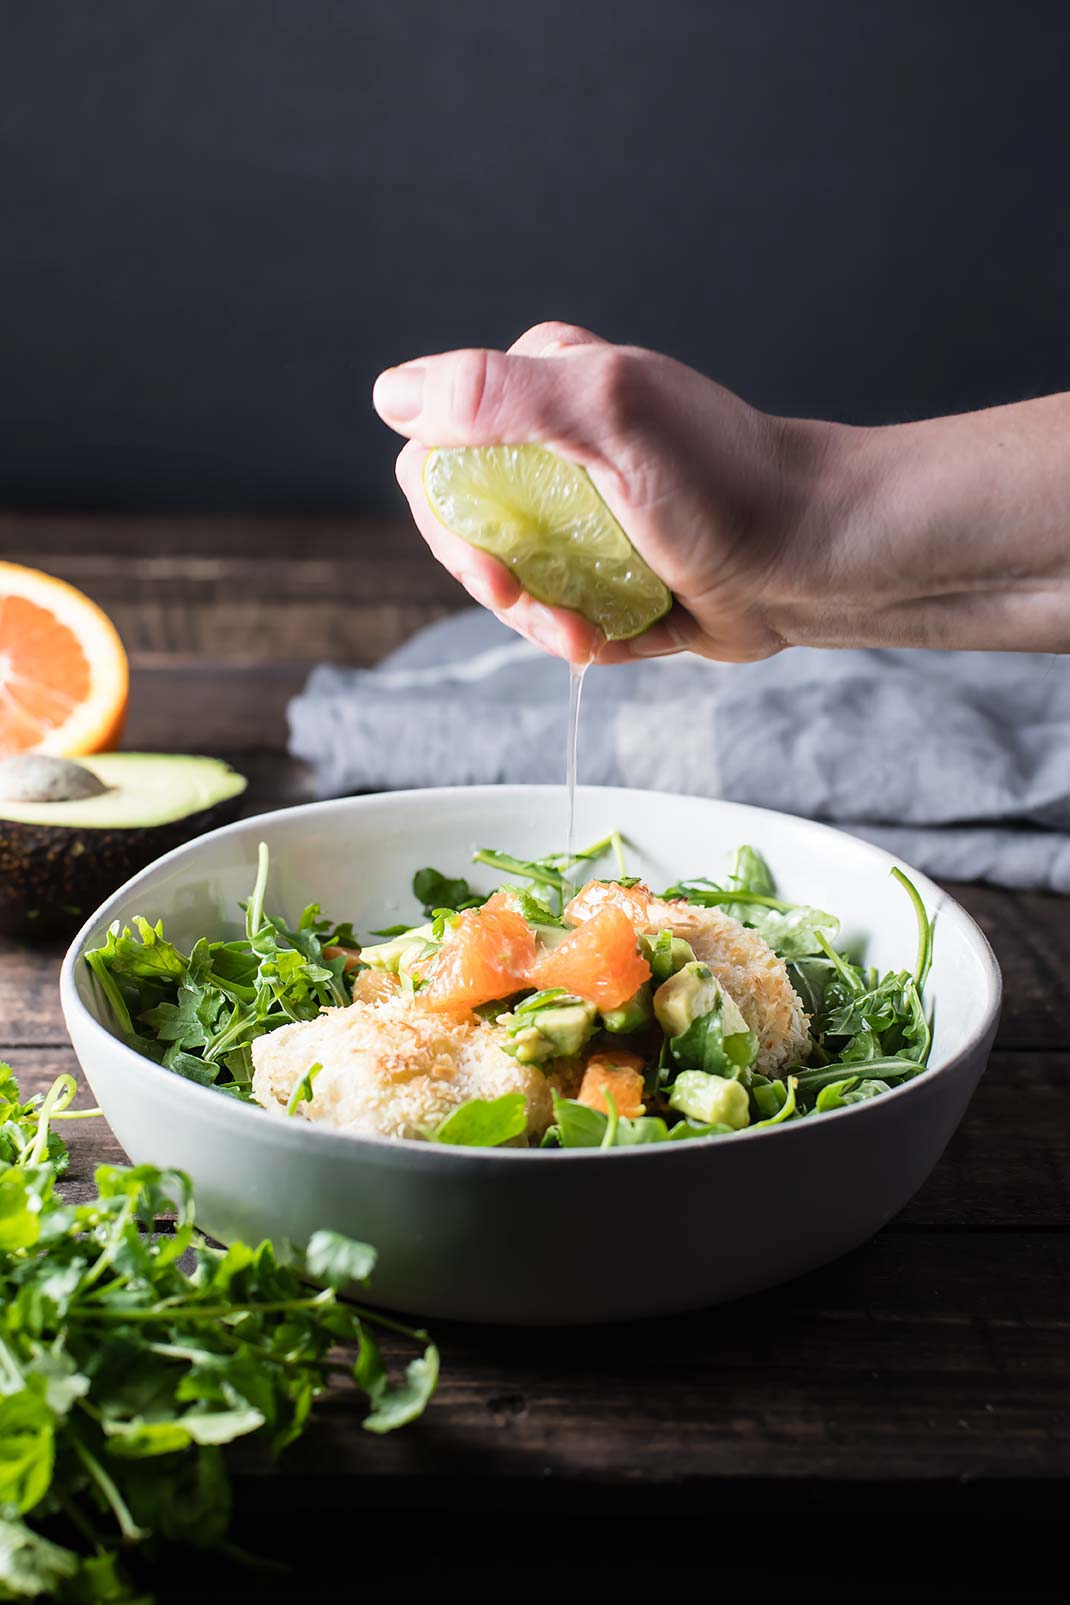
The toasted coconut on the outside gives the flaky fish a crispy finish, and while you could probably use whatever fruit salsa you want, the citrus from the cara cara oranges cuts through the fish and coconut, balancing out the dish. Avocado brings it all together (like avocado so often does).
The other wonderful thing about mahi-mahi is that it cooks quite fast — just 10-12 minutes in the oven. And while the oven is doing it’s thing, you can be prepping the salsa. SO while this dinner has an “ooh, wow, pretty” effect on the eyes it’s really not going to take you much time to through together.

Coconut Crusted Mahi-Mahi with Cara Cara Orange Salsa
Serves: 4 | Total Time: 20 minutes
Ingredients:
- 4 four-ounce fillets mahi-mahi (if frozen, thaw first)
- 1/2 cup gluten-free flour (try cassava flour, or cup-for-cup gluten-free flour mix)
- 1/4 teaspoon salt
- 1/2 cup desiccated shredded coconut
- 1 egg For the salsa:
- 2 cara cara oranges
- 1 avocado
- Juice of 1 lime
- 1 jalapeño, minced
- 1/4 cup cilantro, minced
Directions:
- Preheat the oven to 400°F. Line a baking sheet with parchment. Set pan aside.
- Place three bowls on the counter. In the first, whisk flour and salt. In the second, whisk egg until yellow and frothy. In the last, place the coconut.
- Coat one fish fillet at a time: first, dip it in the flour, coating all sides. Shake off access. Now, place the fillet in the egg, coating each side in egg and then letting excess drip off. Finally, place the fish in the coconut, flipping it over to coat each side. Now, place fillet on prepared baking sheet.
- Repeat step three until each fillet is coated. Then, bake fish for 10-12 minutes, until it is flakey and opaque (check thickest fillet with a fork).
- While the fish cooks, prep the salsa: segment oranges (here is a good way to do that). Dice segmented oranges, and place in small mixing bowl. Dice the avocado, and add it to the bowl along with the minced jalapeño and cilantro, and the lime juice. Stir.
- To serve: place fish on serving plates (I served over a bed of arugula, for more greens) and spoon salsa over top.