No-Churn Rhubarb Crisp Ice Cream

No-Churn Rhubarb Crisp Ice Cream

About a ten months ago this recipe for no-churn chocolate ice cream landed on my screen. Was it possible? A no-churn ice cream that was worth an almost perfect rating? Even after making it, I was boggled by how darn good (and easy to make) it was. That moment was a game changer, because I realized how easy it would be to adapt that chocolate ice cream recipe into any flavor I could dream of.

First I folded chunks of grain-free peanut butter cookie into the chocolate base. (That was amazing, highly recommended for PB lovers). Then, I skipped the cocoa and folded in instant coffee powder, along cacao nibs and extra caramel sauce I had in the fridge (from this recipe). Also a hit — best afternoon pick me up. 😍

Next, I made pistachio paste and mixed that in. This recipe was proving itself to be extraordinarily adaptable. But there was one thing I couldn’t get out of my head: rhubarb crisp ice cream. I have a thing for ice creams named after baked goods — or at least, the few ice creams I’ve had that fit this bill have been amazing. One was Ben & Jerry’s Pecan Pie Ice Cream, which they later discontinued (though I found out in the process of writing this post that they now have a similar flavor as a regional special). The second was oatmeal cookie ice cream from Lucky’s Bakehouse & Creamery in Boulder — wonderful with fresh peaches!

Anyways — the best part of this ice cream, to me, is when the sweet vanilla cream swirls with the crispy, butter oat topping. 🤤

No-Churn Rhubarb Crisp Ice Cream

No-Churn Rhubarb Crisp Ice Cream

Published April 9, 2019 by

Serves: 12   |    Active Time: 20 active minutes; 5 hours in freezer


Ingredients:

  • 1 14-ounce can sweetened condensed milk
  • 2 cups heavy cream, cold
  • Pinch salt
  • 1 teaspoon vanilla extract
  • About 1 cup of leftover rhubarb crisp, full cooled! — if crisp is at all warm, it will melt the ice cream into a slop. Tip: the oaty crisp is the best part! Make sure you have some of that in there.

  • Directions:

    1. Whisk together the sweetened condensed milk, salt, and vanilla in a small bowl. Set aside.
    2. In a separate large mixing bowl, whip heavy cream until peaks form (about 2 minutes on medium-high speed with a hand mixer).
    3. Fold 1 cup of the whipping cream into the condensed milk with a rubber spatula, then fold condensed milk mixture into whipped cream, folding gently so as to keep as much air in the whipped cream as possible. Fold until fully incorporated and few to no streaks of condensed milk remain (avoid over mixing).
    4. Pour mixture into a a 9x9 glass dish with a lid (a bread pan, or large pyrex Tupperware will work too). Cover and freeze for about 2 hours.
    5. Meanwhile, cut or crumble rhubarb crisp into small pieces. Rhubarb chunks should be bite-sized or smaller (aim for 1/2 inch pieces or smaller). Sprinkle rhubarb crisp over ice cream mixture, and then use a rubber spatula to gently swirl into the ice cream. Smooth ice cream in container, and then return to freezer for 3 more hours before serving.
    6. Store in an air-tight container in the freezer.

    Goat Cheese & Chive Scrambled Eggs

    Goat Cheese & Chive Scrambled Eggs

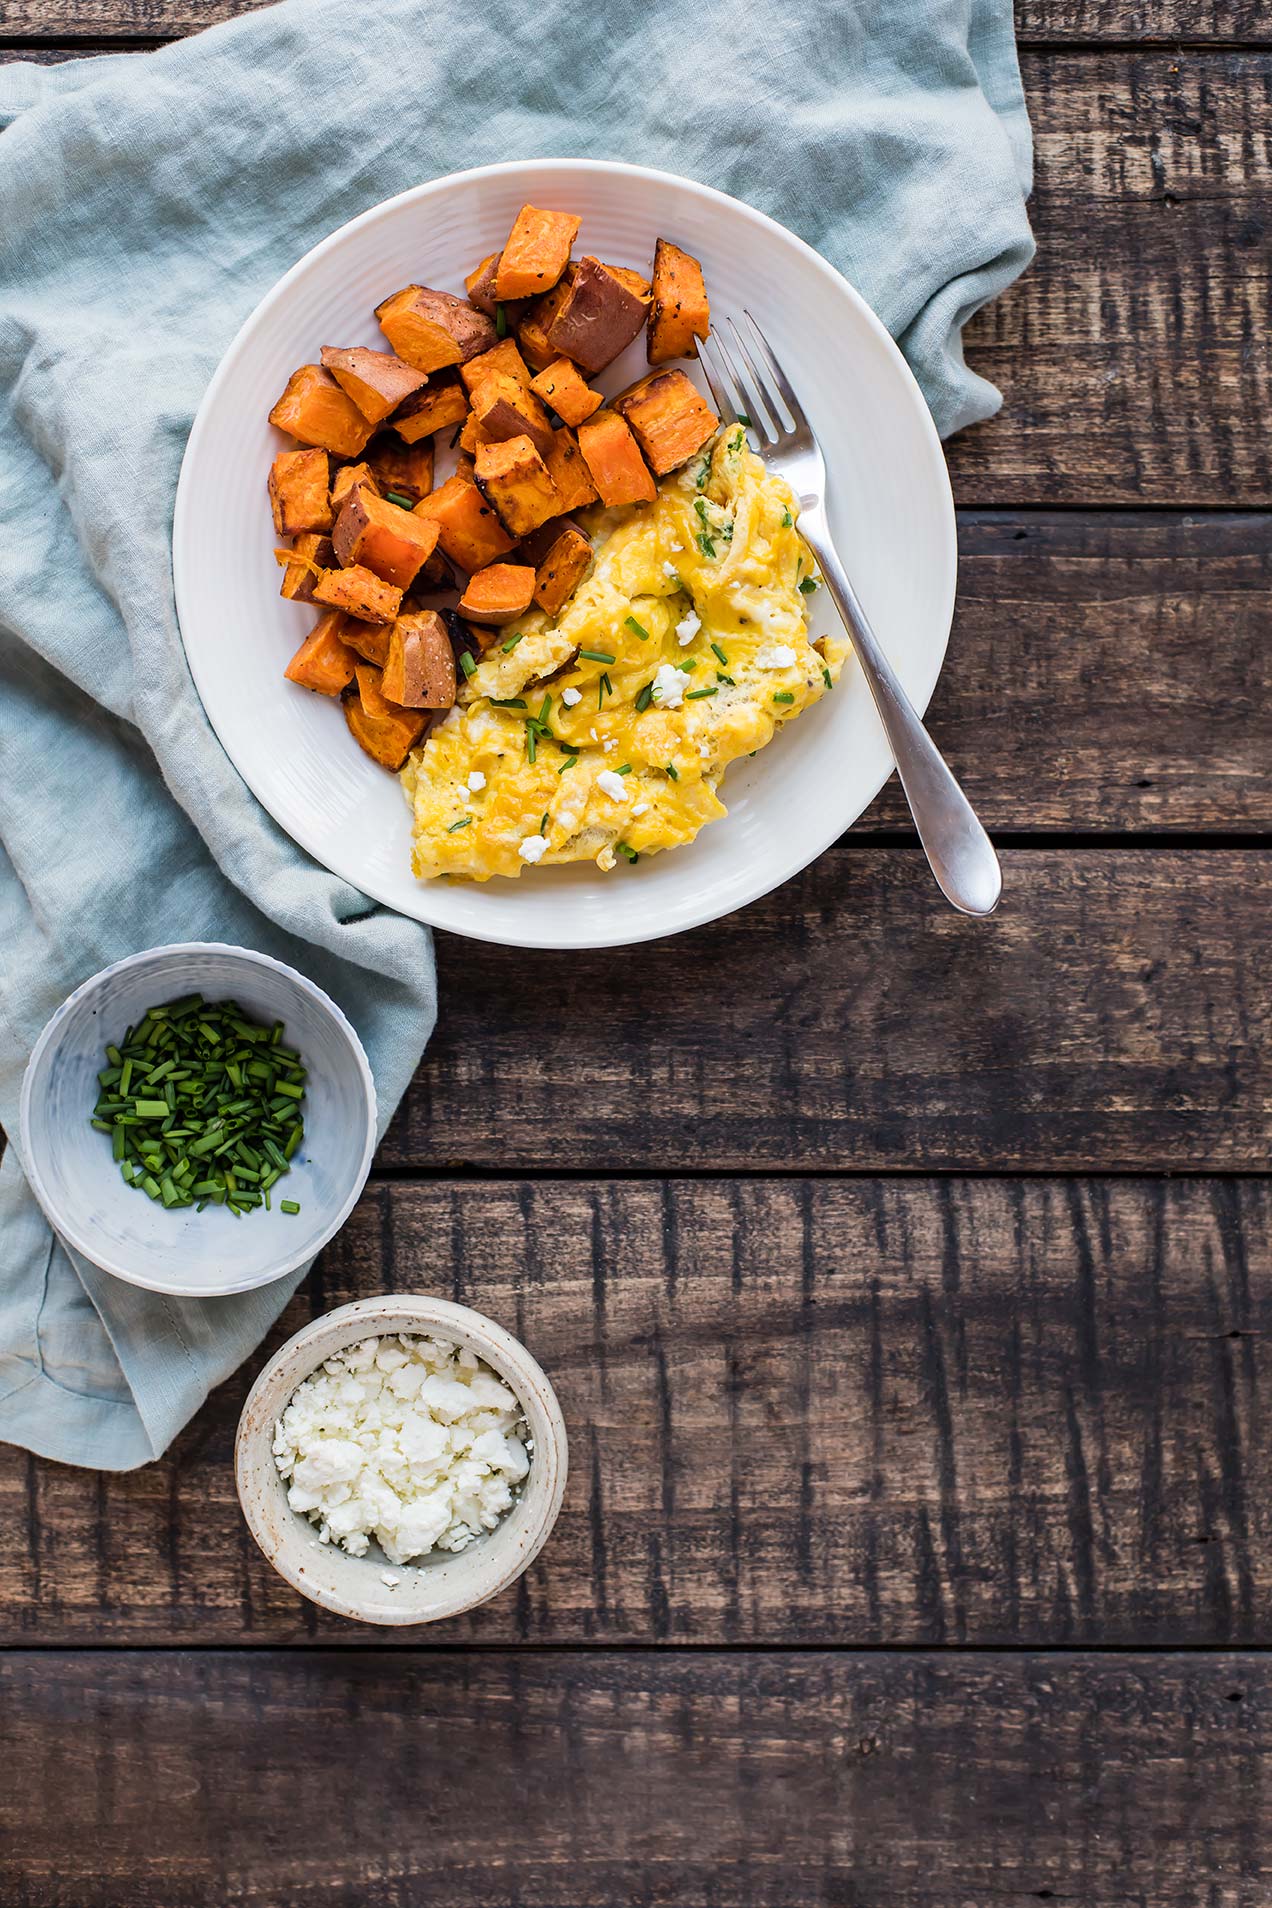
    Adding goat cheese crumbles to scrambled eggs takes about two additional seconds but adds so much creamy cheesy flavor.

    While I normally opt for eggs over easy these days, scrambled eggs were probably the first thing I ever learned to cook myself, and that alone made them one of my favorite foods as a kid. (I would scramble and egg in the microwave on slow weekends when my mom would ask, “Are you going to eat breakfast today?")

    That version didn’t call for goat cheese (and I don’t think twenty-years-ago Caitlin would’ve appreciated the addition), but goat cheese adds pockets of creaminess that are out of this world.

    Goat Cheese & Chive Scrambled Eggs
    Goat Cheese & Chive Scrambled Eggs

    Chives and goat cheese are a classic combo. Chives add a delicate onion-garlic flavor that is just zippy enough to give creamy goat cheese some extra life. Chives are one of the first plants in the garden that turns green come spring, making this breakfast a perfect early spring kind of dish.

    I happened to also be cooking up a batch of creamy Icelandic Langoustine Soup, and had some extra chives to burn. I hate buying a bunch of herbs and only using half, leaving the other half to wither in the fridge… though, that ends up being the fate of many MANY bunches of herbs in our fridge. Sound familiar? Well, there are LOTS of ways to use up chives, including this recipe! Here are a few more to help you finish off that bunch: Crustless Quiche Lorraine (a reader fave!), Sweet Potato Chive Hash Brown Waffles, or Garlic and Herb Shrimp with Vine Ripe Tomatoes. You could basically build a whole week’s meal plan around a bunch of chives!

    We served these eggs with a side of roasted sweet potatoes, but sautéd veggies would also be delish!

    Goat Cheese & Chive Scrambled Eggs
    Goat Cheese & Chive Scrambled Eggs

    Watch now: Goat Cheese & Chive Scrambled Eggs

    Goat Cheese & Chive Scrambled Eggs

    Published January 17, 2018 by

    Serves: 2   |    Active Time: 20 minutes


    Ingredients:

  • 4 eggs
  • 3 tablespoons goat cheese crumbles, plus more for topping
  • 1/8 teaspoon salt
  • 1/8 teaspoon ground black pepper, plus more for topping to taste
  • 1 tablespoon cooking oil, such as coconut or avocado
  • 2 tablespoons minced chives, plus more for garnish 

  • Directions:

    1. Crack all four eggs into a mixing bowl. Whisk together until they are frothy and solid yellow. Add goat cheese, salt, and pepper, and whisk to incorporate.
    2. Heat oil in a 10-inch skillet over medium heat. Pour egg mixture into skillet. As eggs begin to set (after a few minutes) gently use a spatula to pull eggs across pan, making curds. Add in chives and continue to cook for a few more minutes, occasionally stirring, until all of the egg mixture is set.
    3. Divide among serving plates and sprinkle with extra goat cheese and chives, along with extra black pepper to taste.

    Carrot Cake Baked Oatmeal

    Carrot Cake Baked Oatmeal

    When I first discovered baked oatmeal, I was in college and was immediately excited about the dish. An oatmeal that I actually liked! I went home to my mom’s house and told her about my discovery. As I was explaining it to her, she said, “Sounds a bit like cake. “

    I furrowed my brow. Cake? I mean sure, it has some similar ingredients. But it is “better for me.” Right? In truth, that version of baked oatmeal was a lot like cake. I think it called for both sugar and flour. But, it also taught me that I can like oatmeal. Baked, it became something that I enjoyed.

    Carrot Cake Baked Oatmeal
    Carrot Cake Baked Oatmeal

    I still make baked oatmeal every now and again, adding in seasonal fruits and nuts (like this cinnamon berry pecan baked oatmeal). These days, the main difference is that I sweeten it with maple syrup, honey, or fruit, and use whole ingredients. And while it is a pretty carb-heavy dish, I find that rolled oats do keep me full through the morning until lunch. The other main advantage? One batch lasts us the better half of a week, so breakfast is squared away in the morning for a few days.

    With this recipe, I’ve taken the idea of a cake and folded it in: carrot cake baked oatmeal. (Carrot cake — definitely a cake. But it calls for vegetables!) Along with rolled oats, you fold in carrots, raisins, coconut, fresh ginger and even walnuts (I love the crunch these add. If you do not like walnuts, try pecans). All of those together combined to make a pretty hearty oatmeal — one that’s not really cake, but you can imagine it is, while knowing you’re eating something much more nourishing!

    Carrot Cake Baked Oatmeal

    Carrot Cake Baked Oatmeal

    Published January 3, 2018 by

    Serves: 8   |    Active Time: 50 minutes


    Ingredients:

  • 2 cup rolled oats
  • 1 teaspoon baking powder
  • 1/2 teaspoon salt
  • 1-1/2 teaspoon cinnamon
  • 1/2 cup shredded desiccated coconut + 2 tablespoons for topping
  • 1 egg
  • 1/4 cup honey
  • 3 tablespoons butter, melted and cooled
  • 1 teaspoon freshly grated ginger
  • 1 cup milk
  • 1 cup whole milk yogurt
  • 2 teaspoons vanilla extract
  • 1 cup shredded carrot
  • 1/2 cup raisins
  • 1/2 cup chopped walnuts + 2 tablespoons for topping

  • Directions:

    1. Preheat oven to 375°F and grease a 9x9 inch baking dish.
    2. In a medium mixing bowl, combine rolled oats, baking powder, salt, cinnamon, and 1/2 cup coconut.
    3. Add egg, honey/maple syrup, melted butter, freshly grated ginger, milk, yogurt, and vanilla. Stir until everything is incorporated.
    4. Fold in shredded carrot, raisins, and 1/2 cup chopped walnuts.
    5. Spread mixture in an even layer in the baking dish. Sprinkle with remaining 2 tablespoons coconut and chopped walnuts.
    6. Bake for 35-40 minutes, until edges of oatmeal begin to brown. Remove from oven and allow to cool 10 minutes. Serve warm.

    Comment