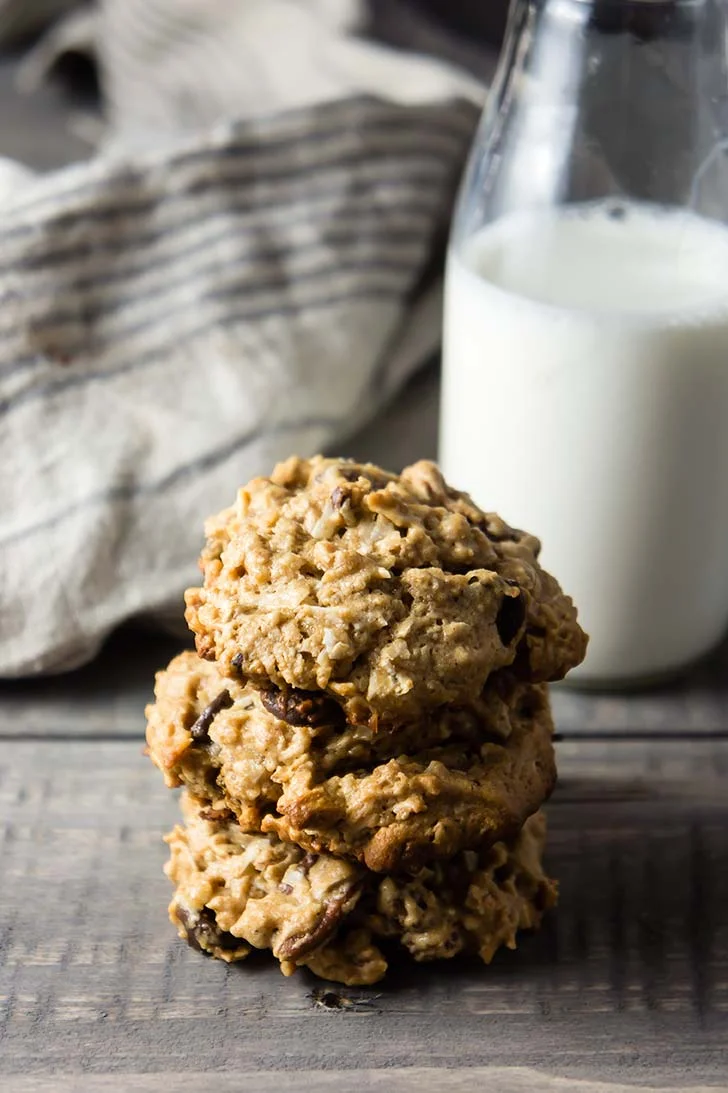
Soft & Chewy Flourless Ginger Tahini Cookies

Soft & Chewy Ginger Tahini Cookies

In January, well after holiday season was over, a client sent a big box of Tate's Cookies to the office, where they filled the kitchen counter for half a week. It was the worst (but also the best) kind of way to kick off January. I had been wanted to make a gingery version of these tahini chocolate chip cookies for some time -- I even had made a batch over the holidays that didn't quite work out. Despite it being peak resolution season, that counter full of cookies was just the push I needed to dive back into recipe development. 

The dream: a chewy, rich, flourless ginger cookie with chunks of crystallized ginger. 

I knew that tahini would be the perfect base, but my first attempt used far too much molasses and the cookies were WAY too soft. I learned, on that attempt, that coconut sugar really imparts enough molasses-y flavor anyhow, as it's unrefined so still carries all of the minerals that are stripped from refined sugars when molasses is made. 

Soft & Chewy Ginger Tahini Cookies

Tips for making these chewy tahini ginger cookies: 

  • STIR THAT TAHINI. This is in all caps because it's no joke. Tahini separates fast and if your tahini is all oil or all solids you're batter won't work. Last time I published a tahini cookie recipe someone asked about how to best stir tahini, which is a really good question because it's not the easiest to stir. But don't worry! Just scrape the entire jar into a blender, and let it rip. OR, carefully put your immersion blender into your tahini container (this is what I do, but also can foresee what a mess this might make in the wrong circumstances) 

  • Let them cool. Really! I too like hot-out-of-the-oven cookies, but these cookies need a minute to set up. More like 5-10. They'll still be warm, and they'll stay soft for a week at room temperature. BUT, if you try to pick one up while it's still piping hot it will just collapse and melt in your hand (if you can even get it into your hand). 

Now, the recipe! 

Soft & Chewy Ginger Tahini Cookies

Soft & Chewy Flourless Ginger Tahini Cookies

Published February 21, 2019 by

Yields: 16   |    Active Time: 30 minutes


Ingredients:

  • 1 cup coconut sugar
  • 1/4 teaspoon baking soda
  • 1/4 teaspoon salt
  • 1/2 teaspoon ground ginger
  • 1/4 teaspoon ground cinnamon
  • 1/16 teaspoon ground cloves
  • 1 cup tahini (stirred very well - try blending it with your blender if it is separated)
  • 1 teaspoon vanilla
  • 1 egg
  • 1-1/2 teaspoon fresh ginger grated on a microplane
  • Optional: 1/3 cup ginger chips or finely chopped crystallized ginger

  • Directions:

    1. Preheat oven to 350°F.
    2. In a medium sized mixing bowl, combine coconut sugar, baking soda, salt, ground ginger, ground cinnamon, and ground cloves. Whisk briefly.
    3. Add tahini, vanilla, egg, and fresh ginger to bowl, and use a spatula to stir until a stiff, sticky batter forms.
    4. Optional: place bowl of batter in the fridge for 10 minutes to allow dough to stiffen a bit more.
    5. Using your hands, roll dough into spheres by the heaping tablespoonful. Place spheres at least 2 inches apart of a baking sheet lined with parchment paper, and flatted slightly with your fingers.
    6. Bake for 10-12 minutes, until cookies have spread and are golden. Cookies will still be quite soft when you remove them from the oven. Allow them to cool at least 10 minutes before attempting to move them to a cooling wrack or a plate.

    16 Comments

    Honey Nut Coconut Clusters

    Honey Nut Coconut Clusters

    Covered in dirt from the soles of my shoes to the tips of my hair, I made my way up our driveway, which was now blanketed in the shade of the night. The sunlight was up and on this day, like every day this week, that meant it was time to put down the shovel and go find something to eat.

    When we moved to a new house a year and a half ago, we inherited a front and back yard, both of which were covered in some patchy grass and a lot of bindweed (my nemesis). We knew we would never put out a sprinkler to keep our grass green; it's something that feels like a waste of water in this naturally semi-arid landscape. 

    So, a woman on a mission, little has passed through my mind this month other than how to build our garden boxes, which native plants to buy, and where to acquire a copious amount of mulch. It seems everything — even stopping for lunch - has taken a back seat as I rush home to put in a few hours of labor before the sun sets. Rather than planning recipes, I wander in around 8:30pm and make something that requires no thinking… an usually no cooking. 

    Honey Nut Coconut Clusters
    Honey Nut Coconut Clusters

    Like all house projects, I probably under estimated the amount of work it would take to get it all done, but I'm a keep-your-head-down and get-her-done type of person. Besides, I found that even in the heat of day I would be smiling as I dug in the dirt. It's satisfying. So, I just keep digging. 

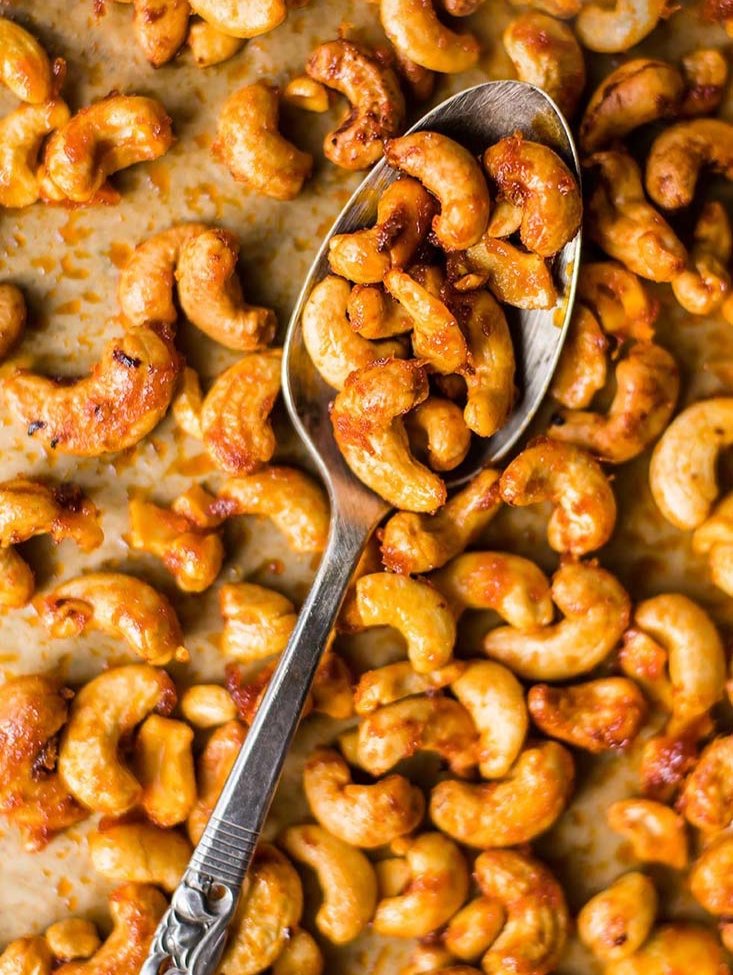
    Snacks that are ready to eat whenever have been necessary this week. Crackers and cheese, fresh fruit, hummus. And of course, these Honey Nut Coconut Clusters, which sit somewhere between granola and trail mix (and they call for only five ingredients: coconut, sesame seeds, cashews, honey and salt). 

    Thanks to the honey and the sesame seeds, they taste a bit like Honey Nut Cheerios -- hence the name. But, of course, made with coconut and real nuts and seeds, they are far more satisfying. These would be perfect as a trail mix while hiking, or as a a topping to yogurt, but I mostly just ate them as an afternoon snack. 😋

    Honey Nut Coconut Clusters

    Honey Nut Coconut Clusters

    Published May 8, 2018 by

    Serves: 6   |    Total Time: 20 minutes


    Ingredients:

    • 2 1/2 cups coconut flakes
    • 1/2 cup cashew pieces
    • 1/4 cup sesame seeds
    • 1/3 cup honey
    • Generous sprinkle of salt

    Directions:

    1. Preheat oven to 350°F.
    2. In a medium sized mixing bowl, combine coconut, cashew, and sesame seeds. Pour in honey and toss until everything is coated and sticky. Sprinkle with salt, and stir a bit more until salt is incorporated.
    3. Spread mixture out on a baking sheet lined with parchment. Bake 8-10 minutes, stirring at the 5 minute mark to ensure even cooking. After 10 minutes, coconut should be toasted. Allow to cool 5 minutes. Store in airtight container.

    4 Comments

    Grain-Free Butternut Squash Pie with Pecan-Crumble Crust

    Grain-Free Butternut Squash Pie with Pecan-Crumble Crust

    My good friend had a butternut squash pie making craze last year, and while he seems to now be over that caramelly, cinnamon-y flavor, I'm still stuck on it. 

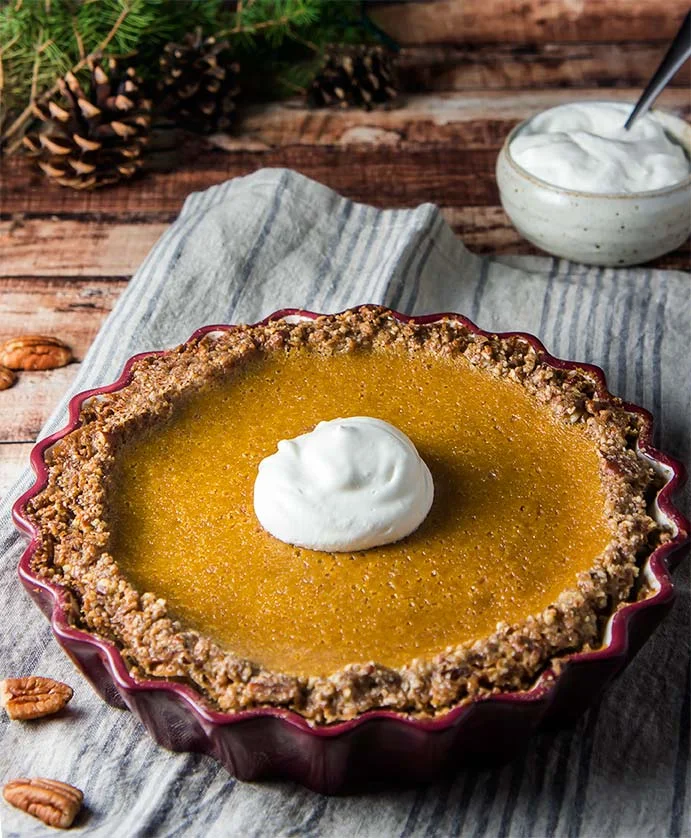
    What I needed though, to really make the ultimate butternut squash pie, was an alternate crust. I've always been partial to graham cracker crusts (the kind you find on many cheesecakes) but wanted to keep this recipe from-scratch and grain-free.

    Grain-Free Butternut Squash Pie with Pecan-Crumble Crust

    Pondering this crust dilemma brought me to pecans. It wasn't sure pecans would work in place of graham crackers, but I had a hunch. I was nervous about it, putting the pie into the oven. A few friends stopped by and I explained to them it was just an experiment and could go terribly wrong. 

    Out of the oven it came and I was, even then, a little nervous. I took pictures, serving everyone else, and then grabbed the last piece for myself, topping it with an oversized dollop of whipped cream.

    Grain-Free Butternut Squash Pie with Pecan-Crumble Crust

    It was my butternut-pie-making-friend who said it first: a crust made of pecans is like a butternut pie inside of a pecan pie. A custardy filling nestled inside a crunchy, sweet, nutty shell. The butter and sugar caramelized in the oven while the pecans toasted, making something so delicious it stole the show, even from the pie filling itself. 

    In this pie, crust is no longer just a vehicle for transporting filling. It's a part of the experience, as must as every other ingredient. 

    Grain-Free Butternut Squash Pie with Pecan-Crumble Crust

    Grain-Free Butternut Squash Pie with Pecan-Crumble Crust

    Published December 15, 2017 by

    Serves: 8   |    Total Time: 1 hour 15 minutes


    Ingredients:


      For the crust:
    • 2 cups pecans 
    • 1/3 cup packed light brown sugar or coconut sugar
    • 4 tablespoons butter, melted
    • 1/2 teaspoon ground cinnamon 

    • For the filling:
    • 10 ounces frozen cubed butternut squash, thawed
    • 1/4 cup packed light brown sugar or coconut sugar
    • 1/4 cup wildflower honey
    • 2/3 cup half-and-half 
    • 1-1/2 teaspoon ground cinnamon
    • 1/4 teaspoon ground nutmeg
    • 1/4 teaspoon ground ginger
    • 1/4 teaspoon salt 
    • 3 eggs
    • 1 tablespoon butter, melted 
    • 1 teaspoon vanilla extract 

    • To serve:
    • 1/2 cup heavy whipping cream
    • 1/2 teaspoon vanilla extract

    Directions:

    1. Preheat oven to 350°F, and grease an 9-inch ceramic or glass pie pan .
    2. Put pecans in a food processor and pulse to grind them into a fine crumb. Scrape sides frequently to ensure even chopping. Few larger chunks should remain (several are ok but for the most part you are looking for an even, fine crumb). Scrape pecan crumbs into a bowl, and add sugar and melted butter. Use a spatula to stir until everything is combined and crumb should stick together when squeezed between two fingers. Now, press crumb mixture into prepared pie pan, working it up the sides and into an even layer along the bottom to form a crust. Tip: use the flat bottom of a glass to make a smooth bottom. Make sure there are no gaps or cracks, and then set aside.
    3. In a blender, combine: thawed butternut squash, sugar, honey, half-and-half, cinnamon, nutmeg, ginger, salt, eggs, melted butter, and vanilla. Puree until completely smooth, scraping sides down as needed. Then, allow mixture to rest for 5 minutes so any air bubbles have time to float to the top.
    4. Pour butternut mixture into prepared pie shell, filling it until almost—but not quite- full (shoot for 90-95% full). Place in oven and bake for 45-55 minutes, until custard filling jiggles slightly in the middle but not at the edges. Turn heat off, and allow pie to cook in oven with the door open for 10-15 minutes. This super slow cooling method will prevent the custard filling from cracking.
    5. While the pie cools, make the whipped cream. Add heavy cream to a bowl and whip with an electric mixture until it beings to hold peaks. Add vanilla, and beat 30 more seconds.
    6. Serve pie with dollops of whipped cream (ice cream would be good as well!).

    10 Comments