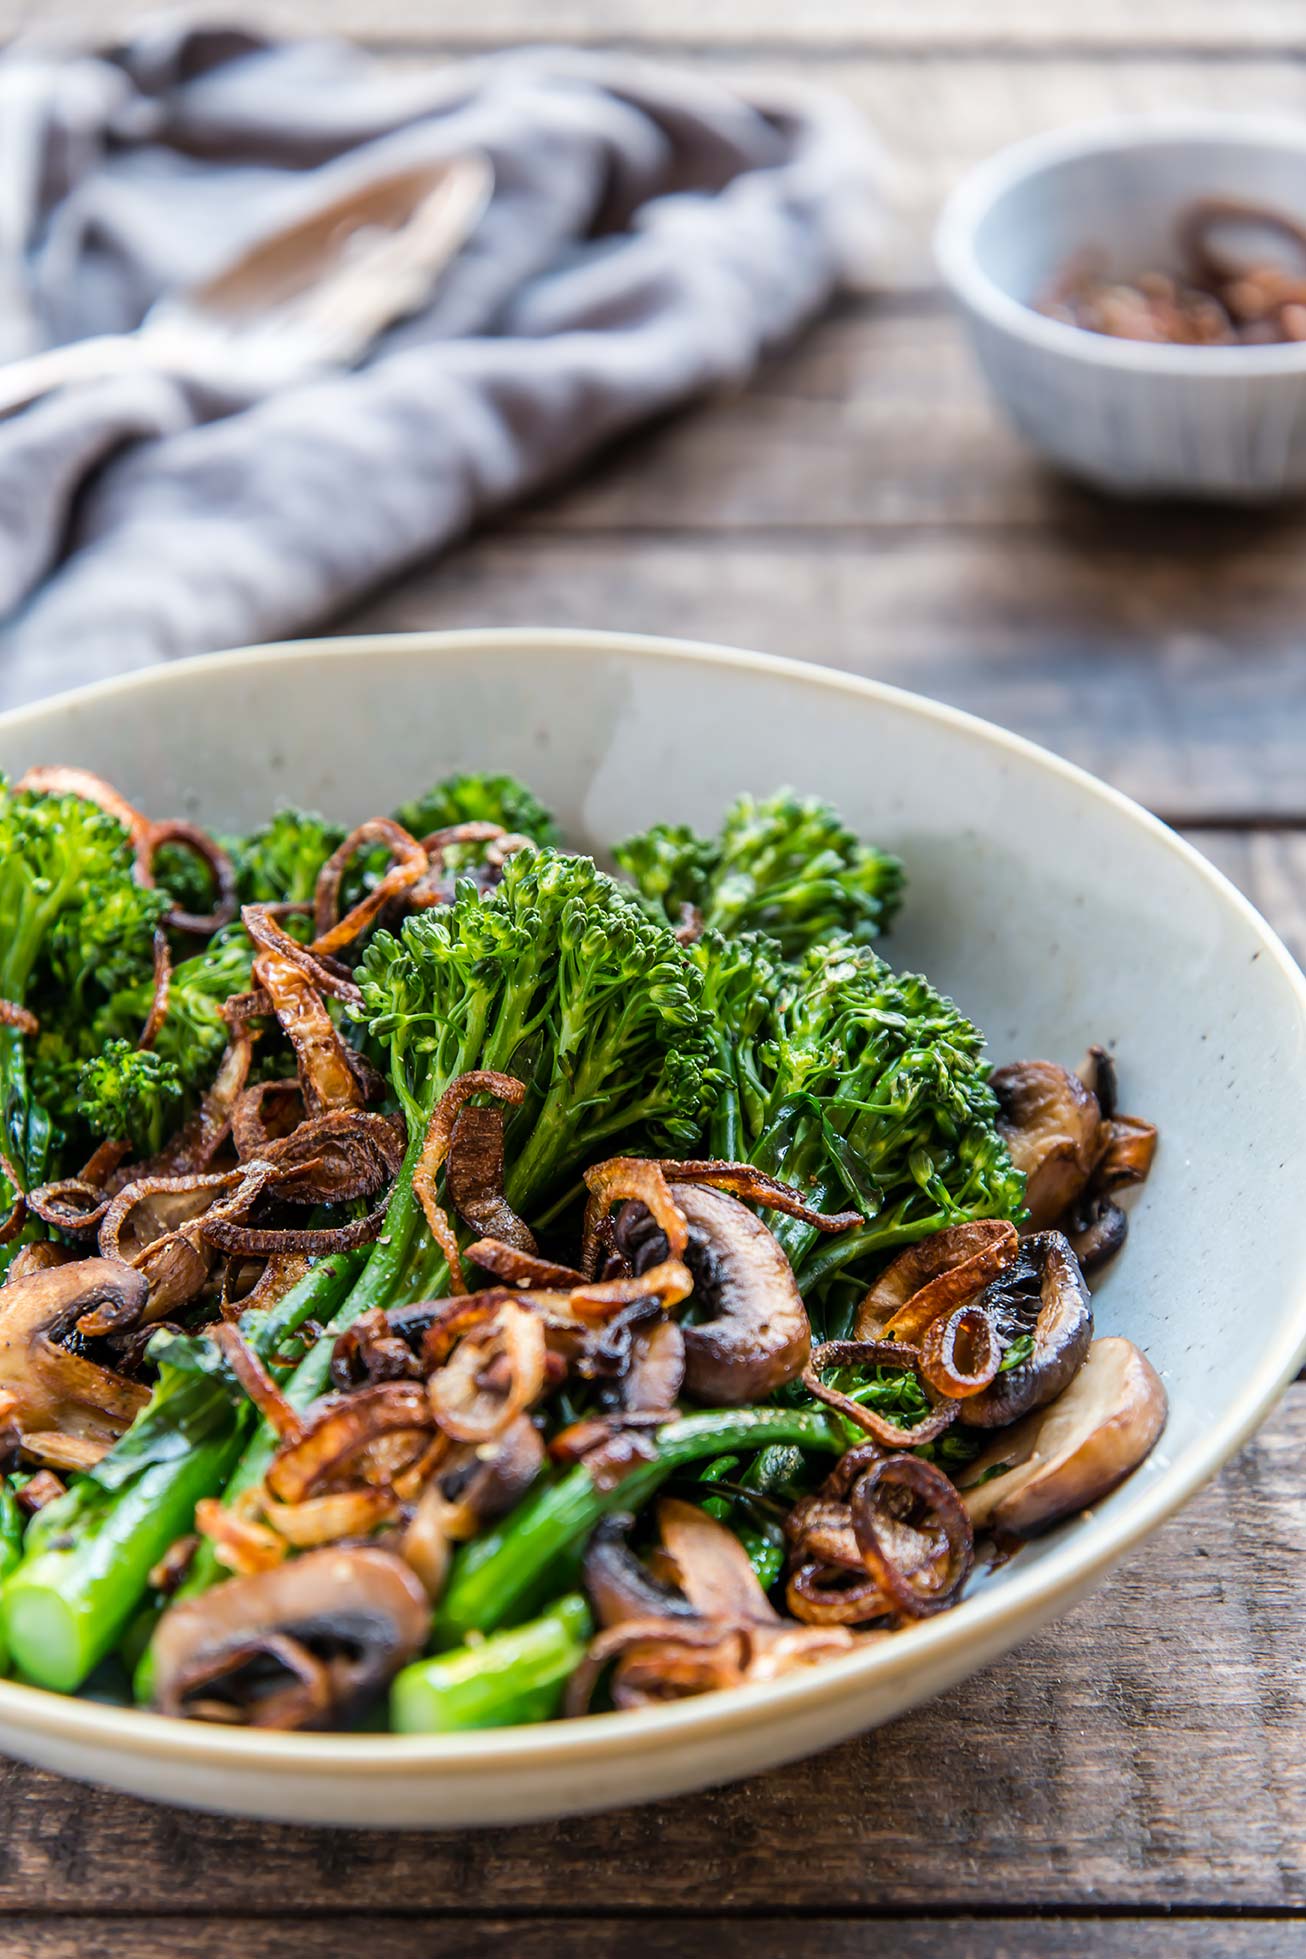
Broccolini & Mushrooms with Fried Shallots

Broccolini & Mushrooms with Fried Shallots

Two words for you: fried shallots.

They are crispy, salty, savory, and akin to those French’s Crispy Onions, but they’re just fried shallots with a little bit of salt. They can be used just about about any way you’d normally use French’s, but are also used in many Vietnamese recipes (like as a topping on Pho… YUM!). And they can be made ahead — one of two days before you’re going to use them. They add a crispy crunch to whatever you serve with them!

In this case, broccolini and mushrooms get the special treatment. After being sautéd, They’re topped with a generous amount of crispy shallots. It’s a fun way to make something so simple (sautéd broccolini) feel special — special enough to be a side dish at a holiday meal, or topped with a poached egg for breakfast 😍 …runny yolk and fried shallot is a particularly great combo.

With Winter Solstice tomorrow, it felt good to eat something earthy and fresh between all of the holiday cookies. 🌎 Happy Solstice! 

Broccolini & Mushrooms with Fried Shallots

So how do you make those little golden rings? It’s not too difficult, and once you’ve done it once you’ll be pro. Here are a few tips:

  • Slice two shallots extra thin.

  • Use an oil with a high smoke point. I used avocado oil, which has a fairly high smoke point — 520°F, far below what we’ll need here. Avoid olive oil.

  • Use an instant read thermometer to monitor the temperature of your oil. In this case, using a thermometer makes it way easier to get timing right!

  • You can drain fried shallots on a plate stacked with paper towels, but we don’t keep paper towels in the house. Instead, I place a fine mesh sieve over a heat-proof bowl or pot. Works great, less waste!

  • Salt immediately. With all fried food, salting right after frying helps the salt stick to the food, so salt those shallots up! A few sprinkles will do. Toss them gently to coat.

Broccolini & Mushrooms with Fried Shallots

Making fried shallots ahead of time: This can be very helpful, especially if you plan to already be at the stove earlier in the week. Plan ahead, and you’ll be glad. Store fried, cooled shallots in an air-tight container in the fridge (let them cool completely, so that no steam is trapped in the container — that will make for soggy shallots). You can store them in the fridge for two days, though the shallots are really best used right after they are fried or the next day. If they feel a little soft when you go to use them, you can toast them in a  oven or toaster oven for 10 minutes at 350°F, and then leave them to cool again (they will at first feel even softer when heated, and then will crisp up again as they cool).

Broccolini & Mushrooms with Fried Shallots

Published December 20, 2018 by

Yield: 4   |    Active Time: 40 minutes


Ingredients:

  • 2 shallots, sliced thin
  • 1-inch high-heat oil for frying (such as avocado), plus one tablespoon for sautéing broccolini
  • 1 bunch broccolini
  • 1 cup sliced baby portobello mushrooms
  • Salt & pepper to taste

  • Directions:

    1. Place a fine mesh sieve over a heat-proof bowl or pot. Set aside for later use.
    2. Heat oil in a skillet. Use an instant read thermometer to monitor the temperature of the oil. When the oil reach 275°F, carefully add shallots to the oil. Shallots will slowly turn from pink-white to yellow-brown. Stir occasionally. When the oil temperature reaches 375°F, wait 5 more seconds. Then, use a slotted spoon to transfer shallots from oil to prepared sieve. Sprinkle salt over shallots and toss to coat (1/16 to 1/8 teaspoon). Allow shallots to continue to cool in sieve.
    3. Sauté mushrooms & broccolini: heat remaining 1 tablespoon oil in a skillet over medium heat. Once oil glistens, add sliced mushrooms. Cook for about 5 minutes, and stir. Add broccolini, and place lid on pan. After about 5 minutes, stir again, and then return lid to pan, cooking until broccolini is bright green and tender through.
    4. Transfer cooked broccolini and mushrooms to a serving dish, and top with fried shallots. Season to taste with salt & black pepper.
    5. Serving suggestion: Serve this as a dinner side, and top with freshly grated Parmesan Reggiano, or for breakfast, topped with a poached egg.

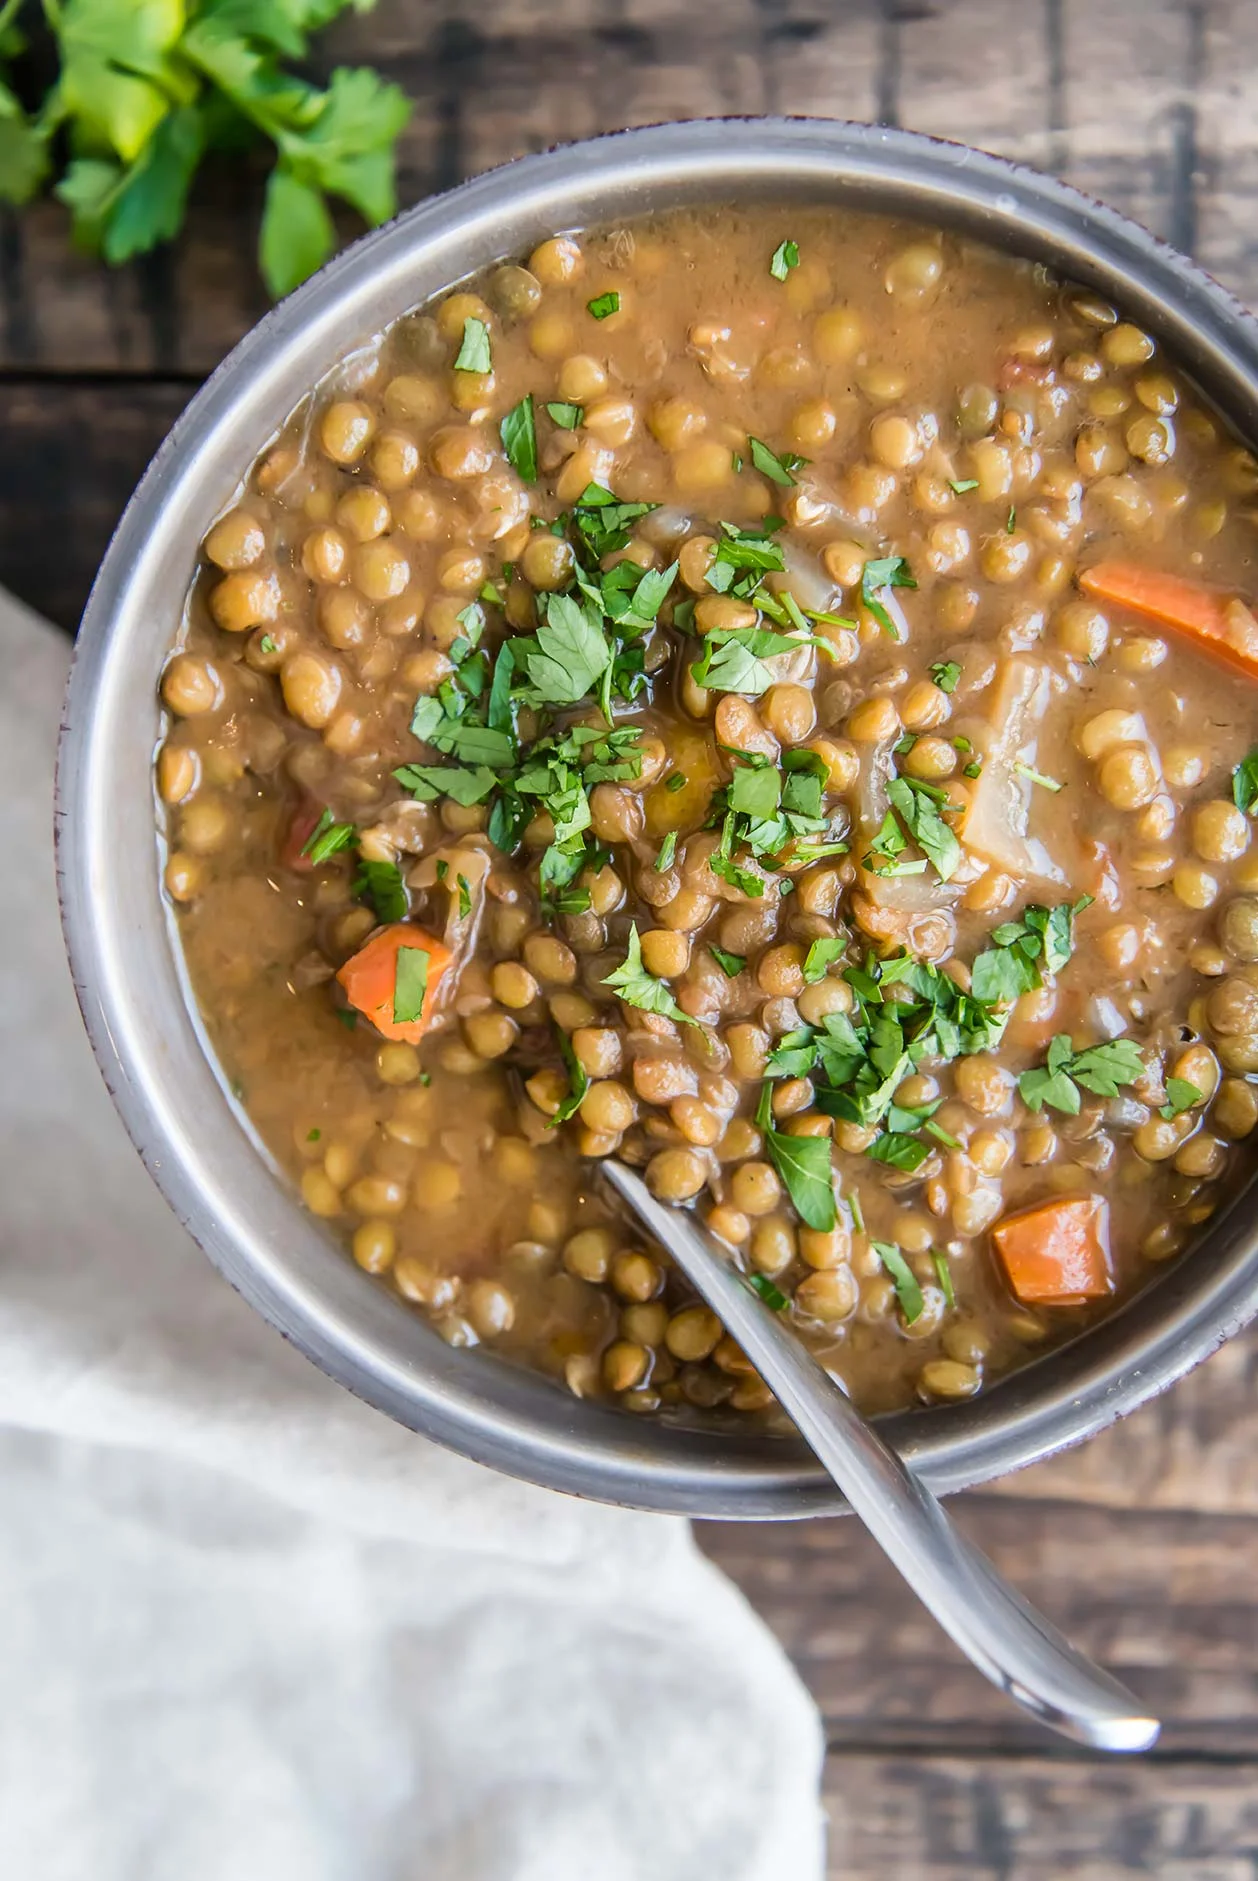
    Instant Pot French Lentil Soup

    Instant Pot French Lentil Soup

    The dictionary definition of “Cozy” might as well include French Lentil Soup. It fits right in there between "giving a feeling a comfort” and “keeping warm.”

    In addition to French lentils, bay leaves, white wine, and fresh thyme go into the pot. What comes out is this steaming hot, broth-y stew that boasts every flavor a “French” soup should. It’s amazing what a splash of wine can do! Lentils are not the first thing I think of when I imagine French food (maybe brie, or baguettes, or wine) but lentils are a huge part of French culture. Even though lentils originated in the Middle East, Le Puy Lentils (French Lentils) are specific to France and have the same Protected Designation of Origin as Champagne — to be called lentilles du Puy, they must be grown in Puy.

    Instant Pot French Lentil Soup
    Instant Pot French Lentil Soup
    Instant Pot French Lentil Soup

    Instant Pot French Lentil Soup

    Published December 6, 2018 by

    Serves: 8   |    Active Time: 20 minutes


    Ingredients:

  • 2 cups french lentils, rinsed (also called Le Puy or French Green Lentils)
  • 1 tablespoon coconut oil
  • 1 large onion, diced
  • 1 stalk celery, diced
  • 3 cloves garlic, minced
  • Splash white wine (about 1/4 cup)
  • 2 large carrots, diced
  • 1 14-ounce can diced tomatoes
  • 2 bay leaves
  • 6-1/2 cups vegetable broth
  • 1/4 teaspoon freshly cracked black pepper 
  • Leaves from 3 sprigs of thyme
  • 1/4-1/2 teaspoon salt (more if using homemade broth, less if using store-bought broth with sodium), plus more to taste
  • Garnish: minced parsley

  • Directions:

    1. Heat coconut oil in the bottom of an Instant Pot on the sauté setting. Add onion, garlic, and celery, and sauté, stirring occasionally, for about 10 minutes, until onions are translucent and starting to brown. Add the splash of wine and stir. Continue to cook on sauté setting until wine has cooked off.
    2. Add carrots, canned tomatoes, lentils, bay leaves, vegetable broth, black pepper, salt and thyme, and stir.
    3. Place lid on Instant Pot and turn to “Bean/Chili” setting with timer set to 14 minutes and vent in the sealed position.
    4. When timer goes off, release the pressure. Stir soup and season with salt additional to taste. Serve topped with minced parsley.
    5. Tip: For extra veggies in your meal, place a handful of baby kale or spinach in the bottom of your bowl when serving, and spoon the hot lentils over top.

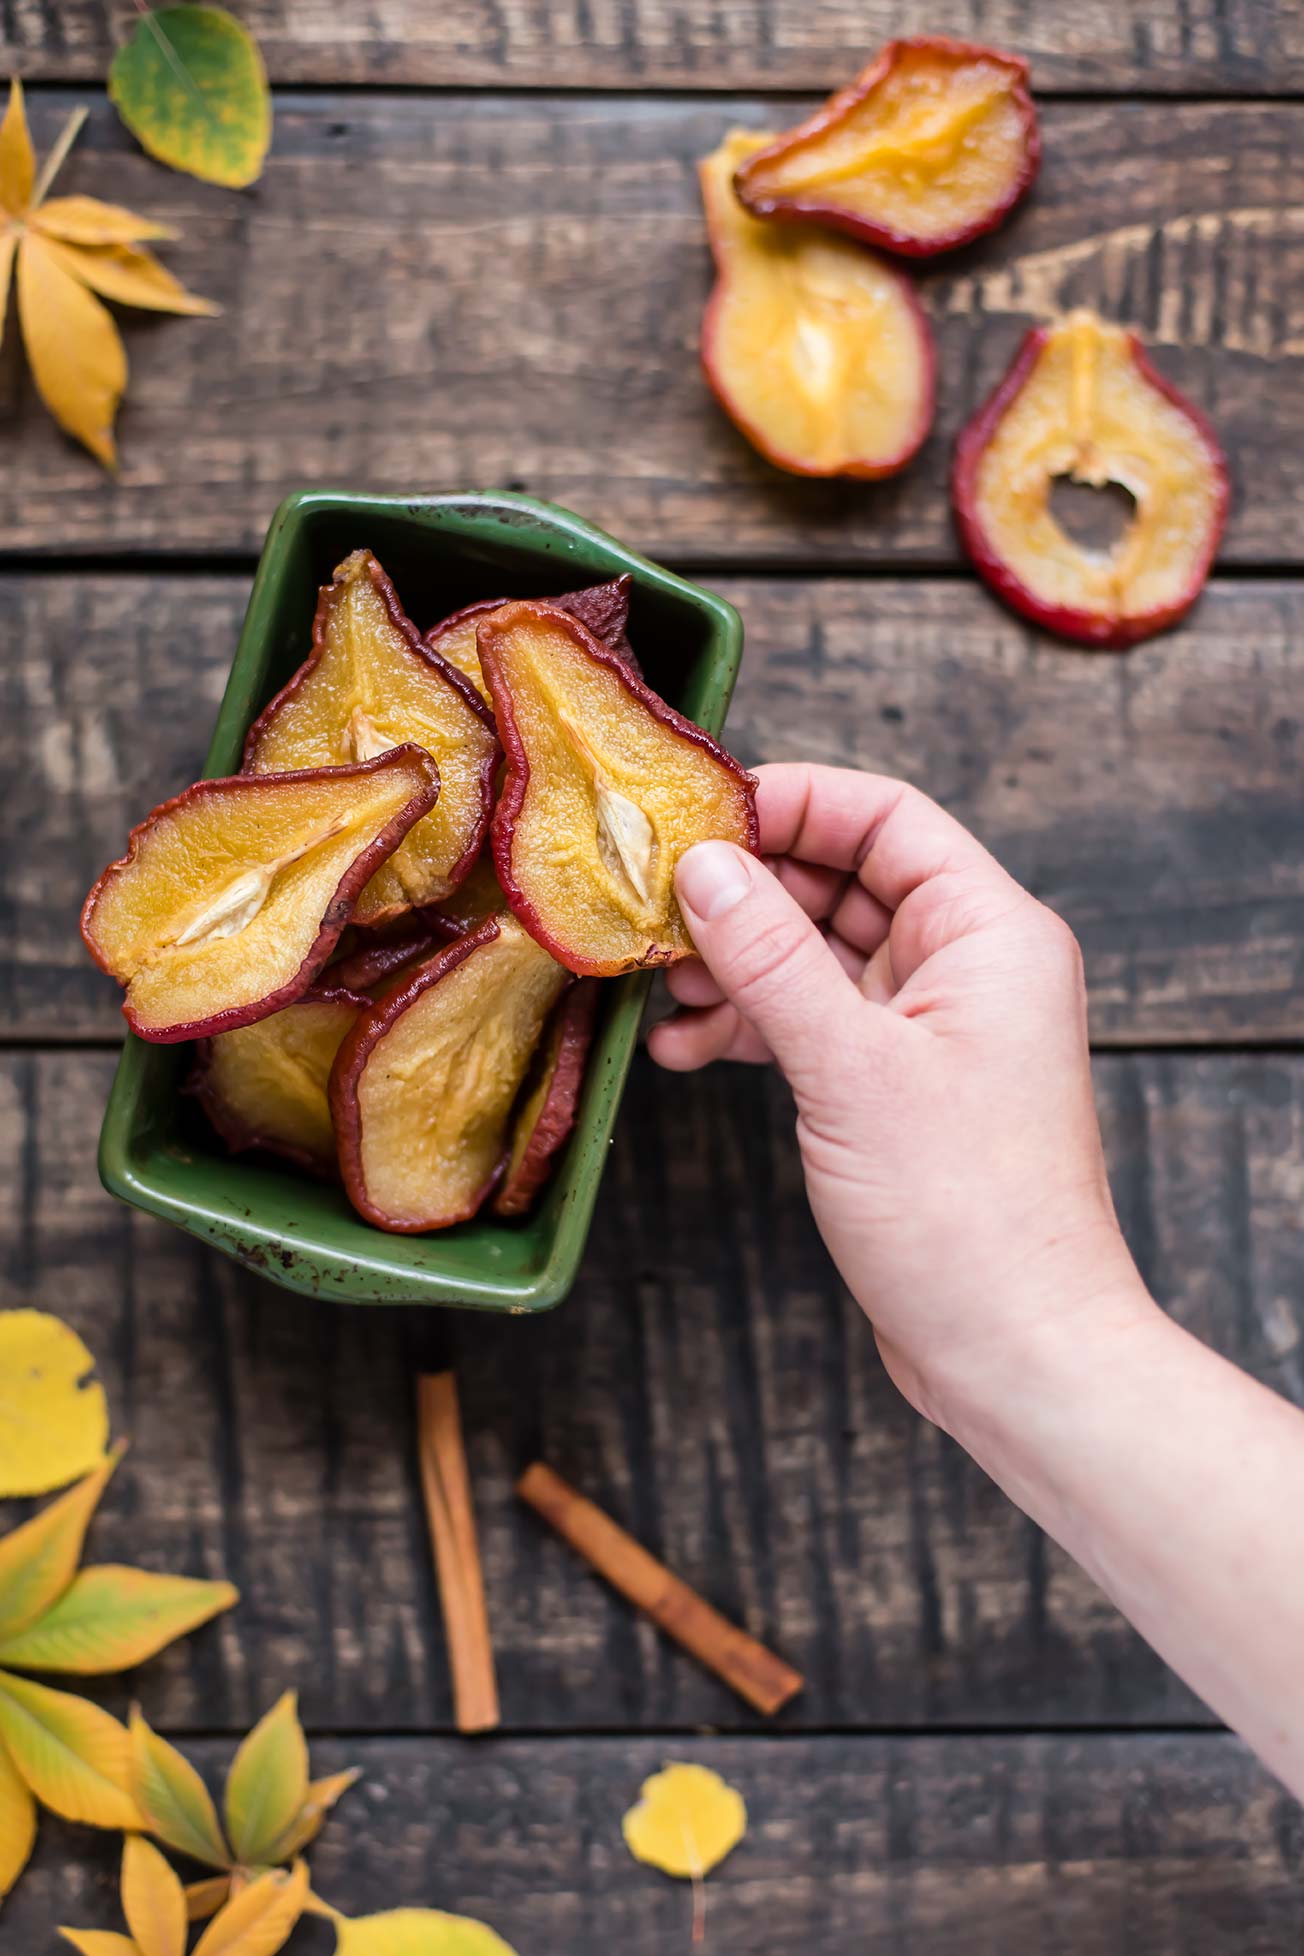
    Vanilla Chai Spice Dried Pears

    Vanilla Chai Spice Dried Pears

    A big box showed up in our dining room in mid-September with my name on the shipping label. 

    It was my birthday but I still scratched my head. This September, I had been so stressed that I mostly avoided the topic of my birthday or gifts with anyone that asked— I certainly didn’t need anything, but I also just couldn’t find a minute to think about it clearly.

    I had ordered nothing (though in the same minute that thought entered my mind I also started doubting myself— had I hit “buy now” on that Dehydrator I had been eyeing instead of “add to cart?”). 

    When I got halfway through opening the box with a paring knife and found it was a Dehydrator, I doubted myself even further. So much so, that I stopped right there and pulled out my phone to check my order history.

    Vanilla Chai Spice Dried Pears

    Relief washed over me when I saw I had placed no orders in the last month, but I still had a mystery on my hands. I finished unpacking the appliance before drilling Oliver on who had bought it. It probably took me four tries to get it right, but when I did land on my dad it all made sense. I had given him a non-answer when he had asked about my birthday in general, so he had asked Oliver.

    This new dehydrator was about five times nicer than any of the ones I was planning to buy myself! (THANKS DAD!)

    So far, my absolute favorite thing to dehydrate has been pears.

    This recipe is inspired by one I found in the book, “Dried and True”, a cookbook that takes dehydrating to the next level, moving it from boring old-fashioned recipes to new, inventive, and tantalizing flavors. I made the Dried Vanilla Pears from the book twice before venturing out on my own.

    Vanilla Chai Spice Dried Pears

    As soon as our first fall day hit, I immediately was dreaming about warmer flavors, like cinnamon, nutmeg, and cloves. Chai. And that’s how these pears came to be — a day dream, like most of my recipes 😉

    In real life, each slice of pear was such a treat, I savored every one. We took them hiking, ate them around the house, and packed them in our bags for outings around town. I always looked forward to those delicious pears. I thought, for about 5 seconds, about sharing them with a few coworkers but greed got the best of me and I kept it to myself. Sharing the recipe is almost as good, right?!

    This recipe is good for dehydrating-pros or a newbies like me. Make it while the pears are at their peak! I used Starkrimson Pears one round and Colorado Heirloom Pears another; Starkrimson are especially hardy pears so hold up well to the boiling and dehydrating process.

    Vanilla Chai Spice Dried Pears

    Vanilla Chai Spice Dried Pears

    Published October 16, 2018 by

    Yield: 20 slices   |    Active Time: 8-9 hours


    Ingredients:

  • 4 ripe pears (recommend Starkrimson)
  • 1/2 cup granulated sugar
  • 1 cup water
  • 5 slices of fresh ginger - each about the size of a nickel
  • 1/8 teaspoon ground cinnamon
  • 1/8 teaspoon vanilla extract
  • 1/16 teaspoon ground nutmeg
  • 1/16 teaspoon ground cardamom
  • Pinch of ground cloves

  • Directions:

    1. Combine all ingredients but the pears in a sauce pan, and bring to a simmer, stirring until sugar is dissolved.
    2. Wash pears and cut into 1/4-inch thick slices. Remove seeds and cut of stems as you go.
    3. Work with 3-4 pear slices at once: submerge pears in syrup on the stove, simmering slices for 10 minutes. Pears should be softened through but should not fall apart easily.
    4. Use a slotted spoon to remove slices from syrup and set on a plate to cool for several minutes.
    5. When all of the pears are done, spread them out on the wracks of your dehydrator, with at least 1/4-inch of space between each slice.
    6. Place wrack in dehydrator and set to 135°F for 8-10 hours, until pears are dried but still chewy.