Crustless Quiche Lorraine

Crustless Quiche Lorraine

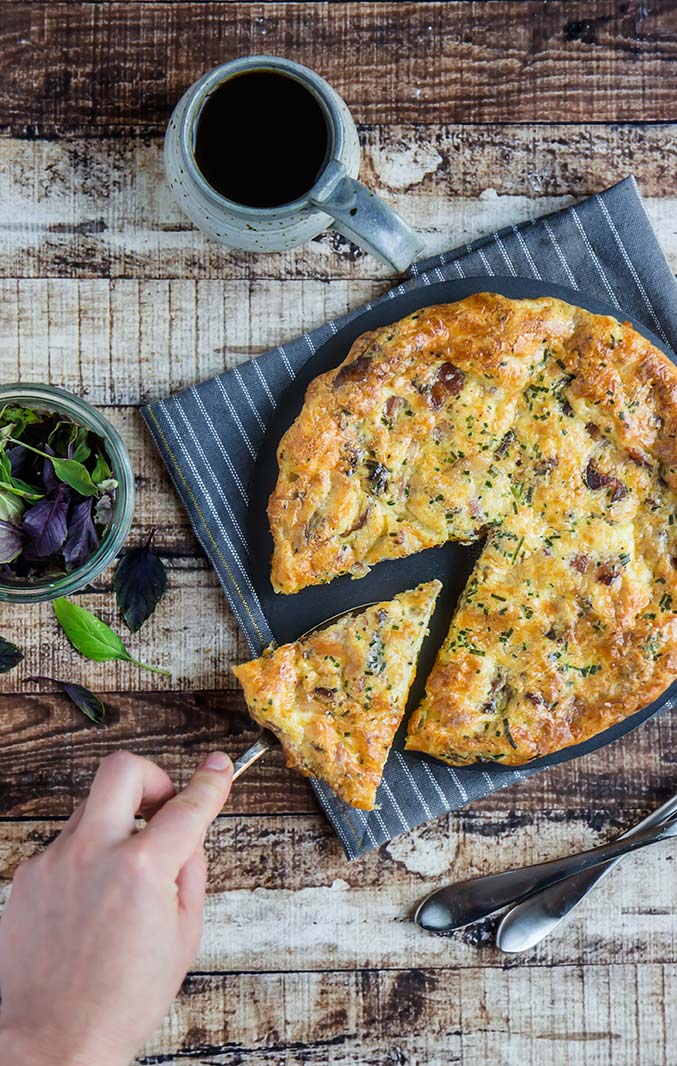
Quiche Lorraine is the queen of quiches, in my eyes. Other quiches might be delicious (they definitely are) but none of them boast the richness in history or flavor that a Quiche Lorraine does.

You know those bite sized quiche Costco sells in the freezer aisle? They come in three flavors, one of them Lorraine. My mom would keep them in the freezer--they made a perfect after school snack, or appetizer for guests (tea parties? yes).

But after you make Quiche Lorraine from scratch, you'll learn that even though they are delicious, those mini quiche bites aren't even worth a second thought. You'll never go back. Homemade, Quiche Lorraine carries the flavor of bacon and the creaminess of gruyere in every bite. Basically, it's amazing, and you'll want to make it right away. 

Crustless Quiche Lorraine

This version is crustless, which makes it a little bit lighter and of course, grain-free and gluten-free. It puffs up delicately, creating a crispy top and a custard base. It is good cold, but I prefer it warm.

This recipe makes enough to feed a household of two for a few days (depending on how hungry everyone is... or how much they like the combination of bacon and gruyere, which let's be real, is a lot), or a small crowd for a single brunch, along with a few other sides. For a big crowd, I'd make two: there's never too much quiche, and leftover quiche is just as good as fresh-from-the-oven quiche. Tummy rumbling? Mine to. Quiche, get in my belly.

Crustless Quiche Lorraine

Crustless Quiche Lorraine

Published November 2, 2017 by

Serves: 3-4   |    Total Time: 45 minutes


Ingredients:

  • 1/4 pound bacon
  • 1/2 cup milk
  • 3 eggs
  • 1/4 teaspoon salt (or to your tastes)
  • 1/4 teaspoon ground black pepper 
  • Sprinkle ground nutmeg 
  • 1/2 cup grated gruyere or white cheddar 
  • 1 tablespoon fresh minced chives 

Directions:

  1. Preheat oven to 375°F, and generously grease a 9-inch pie pan.
  2. Cook bacon according to directions on package, until crisp. Set on plate to cool.
  3. Whisk together the milk, eggs, salt, black pepper, and nutmeg until frothy. Break cooled bacon into 1/2-inch or smaller pieces, and add to egg mixture. Add the cheese, and stir until bacon pieces and cheese are incorporated.
  4. Pour egg mixture into pie pan and sprinkle with minced chives. Place in center of oven. Bake for 25-30 minutes, or until quiche is puffy and no raw egg remains (test this by inserting a toothpick into the middle. It should come out clean). Remove quiche from oven and allow to cool for 5 minutes before slicing and serving.

Crustless Quiche Lorraine
2 Comments

Paleo Chocolate Turtle Bars with Honey Caramel

Paleo Chocolate Turtle Bars with Honey Caramel

This recipe started with a single sweet craving for caramel. I wanted it silky and coating apples as soon as the first days of fall hit. I wanted it chewy, lightly salted, and wrapped in little wax papers. Then, I wanted it gushing out between layers of chocolate. That's when I gave in. 

There is nothing like Halloween to get your sweet tooth going. I used to be a total sucker for those sugary fruit-flavored candies you would fill pillow cases with as a kid, but now I'm more for anything chocolate (which you might already know, just from perusing the dessert section of this site). Visions of chocolate layers is probably what ultimately did me in with that caramel craving.  

Paleo Chocolate Turtle Bars with Honey Caramel

A word of warning: this caramel is ooey-gooey. Like, if you plan on taking the whole batch of bars out of the pan at once, make sure you have a plate or napkins handy. That ooey-gooey deliciousness can get a little sticky! But see all of those caramelly drips? They are what make this so sinfully good. Exactly what you'll want to dig into when you sit down to watch a scary movie tonight, or what you'll want to munch on between answering the door for trick-or-treaters.

But they're also not a Halloween exclusive--if you ask me, caramel and chocolate fit well with just about any holiday you name, even if that holiday is I-just-freakin-want-a-treat-right-now day. (Note: they are really good on those days. I know, because I had a few recently.) 

Paleo Chocolate Turtle Bars with Honey Caramel

Paleo Chocolate Turtle Bars with Honey Caramel

Published October 31, 2017 by

Serves: 20   |    Total Time: 1 hour 15 minutes


Ingredients:


    For the Crust:
  • 2 cups almond flour 
  • 1/4 cup coconut flour
  • 1/4 cup cocoa
  • 1/4 teaspoon salt 
  • 1/4 cup honey
  • 1/4 cup butter

  • For the Caramel:
  • 1 can (14 ounce) coconut milk
  • 1/2 cup mild flavored honey 
  • Pinch salt
  • 1 tablespoon butter
  • 1 teaspoon vanilla 

  • For the top:
  • 1 cup chocolate chips 
  • 1 tablespoon butter
  • 20 whole pecans 
  • 1 teaspoon sea salt or flake sea salt

Directions:

  1. Preheat oven to 375°F and line a 9x9 glass baking dish with parchment paper.
  2. Then, make the crust. In a medium mixing bowl, combine dry crust ingredients and whisk to minimize clumps. Then, in a small bowl, melt honey and butter. Pour melted butter and honey into dry mixture and stir with a spatula until a crumbly dough forms. It should stick together when you squeeze it between your pointer finger and thumb. Press the dough into the bottom of the prepared 9x9 pan in an even layer. Then, bake for 8-9 minutes, until fragrant. Set aside to cool.
  3. Next, make the caramel. Add coconut milk and honey to a heavy-bottomed sauce pan. Bring to a gentle boil. While the stove heats, pour cold water into a medium side bowl or glass and set near by. Cook caramel at a gentle boil, and stir constantly, until it reaches the soft ball stage. Then, remove from heat, and stir in vanilla, butter and salt. Allow caramel to cool 5 minutes.
  4. Once the caramel has cooled for about 5 minutes (careful, it will still be a bit warm), pour 1/2 to 3/4 cup caramel over the crust, and spread into an ever layer. Place in fridge to allow caramel to set further.
  5. While caramel sets, make the chocolate topping: heat chocolate chips and butter in the microwave for 30 seconds, and stir, and then heat again for 30 seconds, repeating process until chocolate is smooth and no chips remain (You can also do this in a double boiler). Working quickly, remove caramel bars from fridge, and drizzle chocolate over top (see note below). Spread in an even layer using a spatula. While chocolate is still setting, arrange pecans on top and sprinkle with salt. Return to fridge until chocolate has set (about 10 minutes), and then slice into 20 rectangles to serve.
  6. Note: if your caramel is a bit runny, you can place it in the freezer to help it set more before you add the chocolate. When you do add the chocolate, the cold caramel will make it set even quicker, so work in small batches, spreading on part of the chocolate at once.

Paleo Chocolate Turtle Bars with Honey Caramel
10 Comments

Chocolate Vanilla Pinwheel Cookies (Gluten-free and Paleo)

Chocolate Vanilla Pinwheel Cookies (Gluten-free and Paleo)

My dad taught me to make pinwheel cookies when I was young. We'd make checkerboard cookies too, the same contrast between vanilla and chocolate shortbread dough, but shaped into squares with a checkerboard pattern. 

I revamped this recipe to use almond flour, and the result was soft, chewy and delicious. The chocolate dough is my favorite of the two (go figure), but swirled together the chocolate and vanilla make a perfect pair. They say opposites attract or something, I guess it's true! 

Chocolate Vanilla Pinwheel Cookies (Gluten-free and Paleo)

Having made pinwheel cookies dozens of times, I thought this might be a good opportunity to test my skills at making a how-to video of how to roll up the cookies and make a swirl. Well. I think I need to work on my videography skills: I wasn't even 20 seconds in to recording when I realized I had no idea where the rolling pin was, or where I had decided to store it in the new kitchen. I left the camera rolling for a good 5 minutes while I rushed from cupboard to cupboard trying to find it. 

The errors didn't end there and let's just jump to the end of the story because there's no video to share. Cleary I'm going to need to take on a class on videography before I try to make any recipes videos! 😂

Chocolate Vanilla Pinwheel Cookies (Gluten-free and Paleo)

Chocolate Vanilla Pinwheel Cookies (Gluten-free and Paleo)

Paleo, Primal, Gluten-Free, Grain-Free    |       

Chocolate dough and vanilla dough are layered and then rolled into a log before being sliced into rounds to create a pretty chocolate vanilla pinwheel.

Yields: 12   |    Total Time:


Ingredients:

  • 2 cups almond flour
  • 1/4 teaspoon salt
  • 1/4 teaspoon baking soda
  • 1/4 cup coconut oil or butter, melted
  • 1/4 cup honey
  • 1 tablespoon vanilla extract
  • Scant 1/4 cup cocoa

Directions:

  1. First, make the vanilla dough: Whisk together HALF each of the almond flour, salt, and baking soda. Then, pour in HALF each of the melted butter, melted honey, and vanilla. Use your hands or a spatula to stir until a sticky, even dough is formed. Roll into a ball and wrap in plastic wrap. Place in fridge.
  2. Second, make the chocolate dough: Whisk together the remaining almond flour, salt, and baking soda. Add in the cocoa, whisking in. Then, pour in the remaining melted butter, melted honey, and vanilla. Again, use a spatula or your hands to work into a sticky dough. Roll into a ball and wrap in saran wrap.
  3. Allow both dough balls to chill in the fridge for at least 30 minutes.
  4. Preheat oven to 325°. Prepare your work station: Place 1 sheet of parchment paper on the counter (18 inches long should be sufficient), and then cut two additional pieces of the same size.
  5. Unwrap the vanilla dough from the saran wrap and place on the first piece of parchment on the counter. Place the second piece of parchment over top, and begin to roll out the dough to a 1/8 of an inch thick. The parchment keeps the dough from sticking while you roll it out.
  6. Once the dough is in an even, thin layer, peel back the top layer of parchment. Leaving the dough on the bottom piece, move it aside (carefully). Place the third piece of parchment in front of you place the chocolate dough ball on it. Place the free piece of parchment over top and roll the dough out just the same. Once rolled, peel back the top layer.
  7. Now, move carefully: lift one of the rolled out pieces of dough (still attached to the parchment) and place it dough-side down against the other flavor of dough. You should now have a parchment dough sandwich: parchment, chocolate dough, vanilla dough, parchment. Peel off the top piece of parchment.
  8. Working from one edge of the dough, begin rolling both layers together into a log. I like to lift the parchment with the dough as a roll it (then pulling it back so as not to roll it into the cookie) in order to keep the dough from crumbing or cracking. Make the log tight, shopping it as you roll by gently squeezing it. Once the entire log is rolled up, us a piece of thread (or floss) to cut off the first inch of the log by holding on to the two ends, left and right and pulling the floss down through the log (the ends of the log of dough is usually uneven and does not have a great swirl— you can still bake and eat it, it just won’t be as pretty). Use the floss again to slice each cookie, about 1/4 of an inch thick. Place each sliced cookie round on a baking sheet.
  9. Bake for 9 minutes, until just golden. Allow to cool for at least 5 minutes.