Chewy Tahini Chocolate Chip Cookies (Gluten-Free & Grain-Free)

Chewy Tahini Chocolate Chip Cookies (Gluten-Free & Grain-Free)

If you make any cookie from this blog, let it be this one. I might regret saying that later, but it's how I feel now and what's a blog if not in-the-moment. 

While I've used a lot of nut and seed butters in baking before, tahini is something special in a cookie. 

Chewy Tahini Chocolate Chip Cookies (Gluten-Free & Grain-Free)

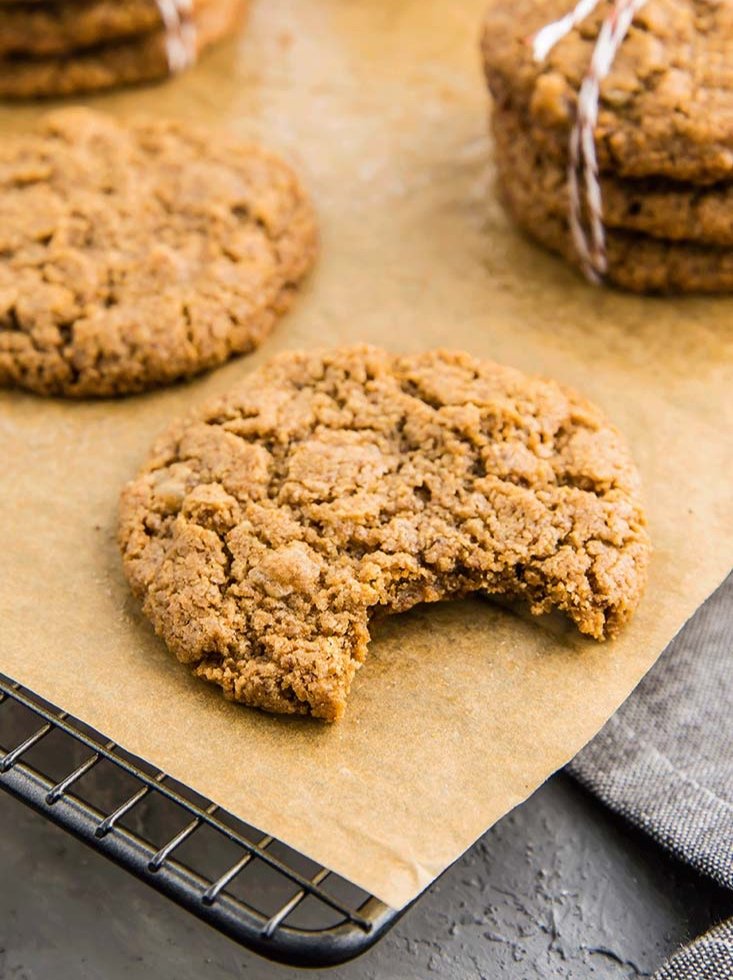
First let me say that I love thin, chewy, fresh-out-of-the-oven-soft cookies. Gooey. Warm. Indulgence. That what makes tahini ideal: its consistency and fat content allows it to spread out into a thin cookie, and even as the cookies cool they never get crispy. They maintain that soft, chewy bite for days. 

Coconut sugar is also necessary here -- it's not something I usually use, opting for maple syrup or honey in most of my baking - but a crystalized sugar helps to glue the cookies together, so that everything doesn't just fall apart when you pick them up. So you can dip your cookie in a shot of espresso, or a glass of milk or cup of tea. 

Chewy Tahini Chocolate Chip Cookies (Gluten-Free & Grain-Free)

Chewy Tahini Chocolate Chip Cookies

Published May 17, 2018 by

Serves: 20   |    Total Time: 30 minutes


Ingredients:

  • 1 cup coconut sugar
  • 1/4 teaspoon baking soda
  • 1/4 teaspoon salt 
  • 1 cup tahini (stirred well)
  • 1 tablespoon vanilla 
  • 1 egg
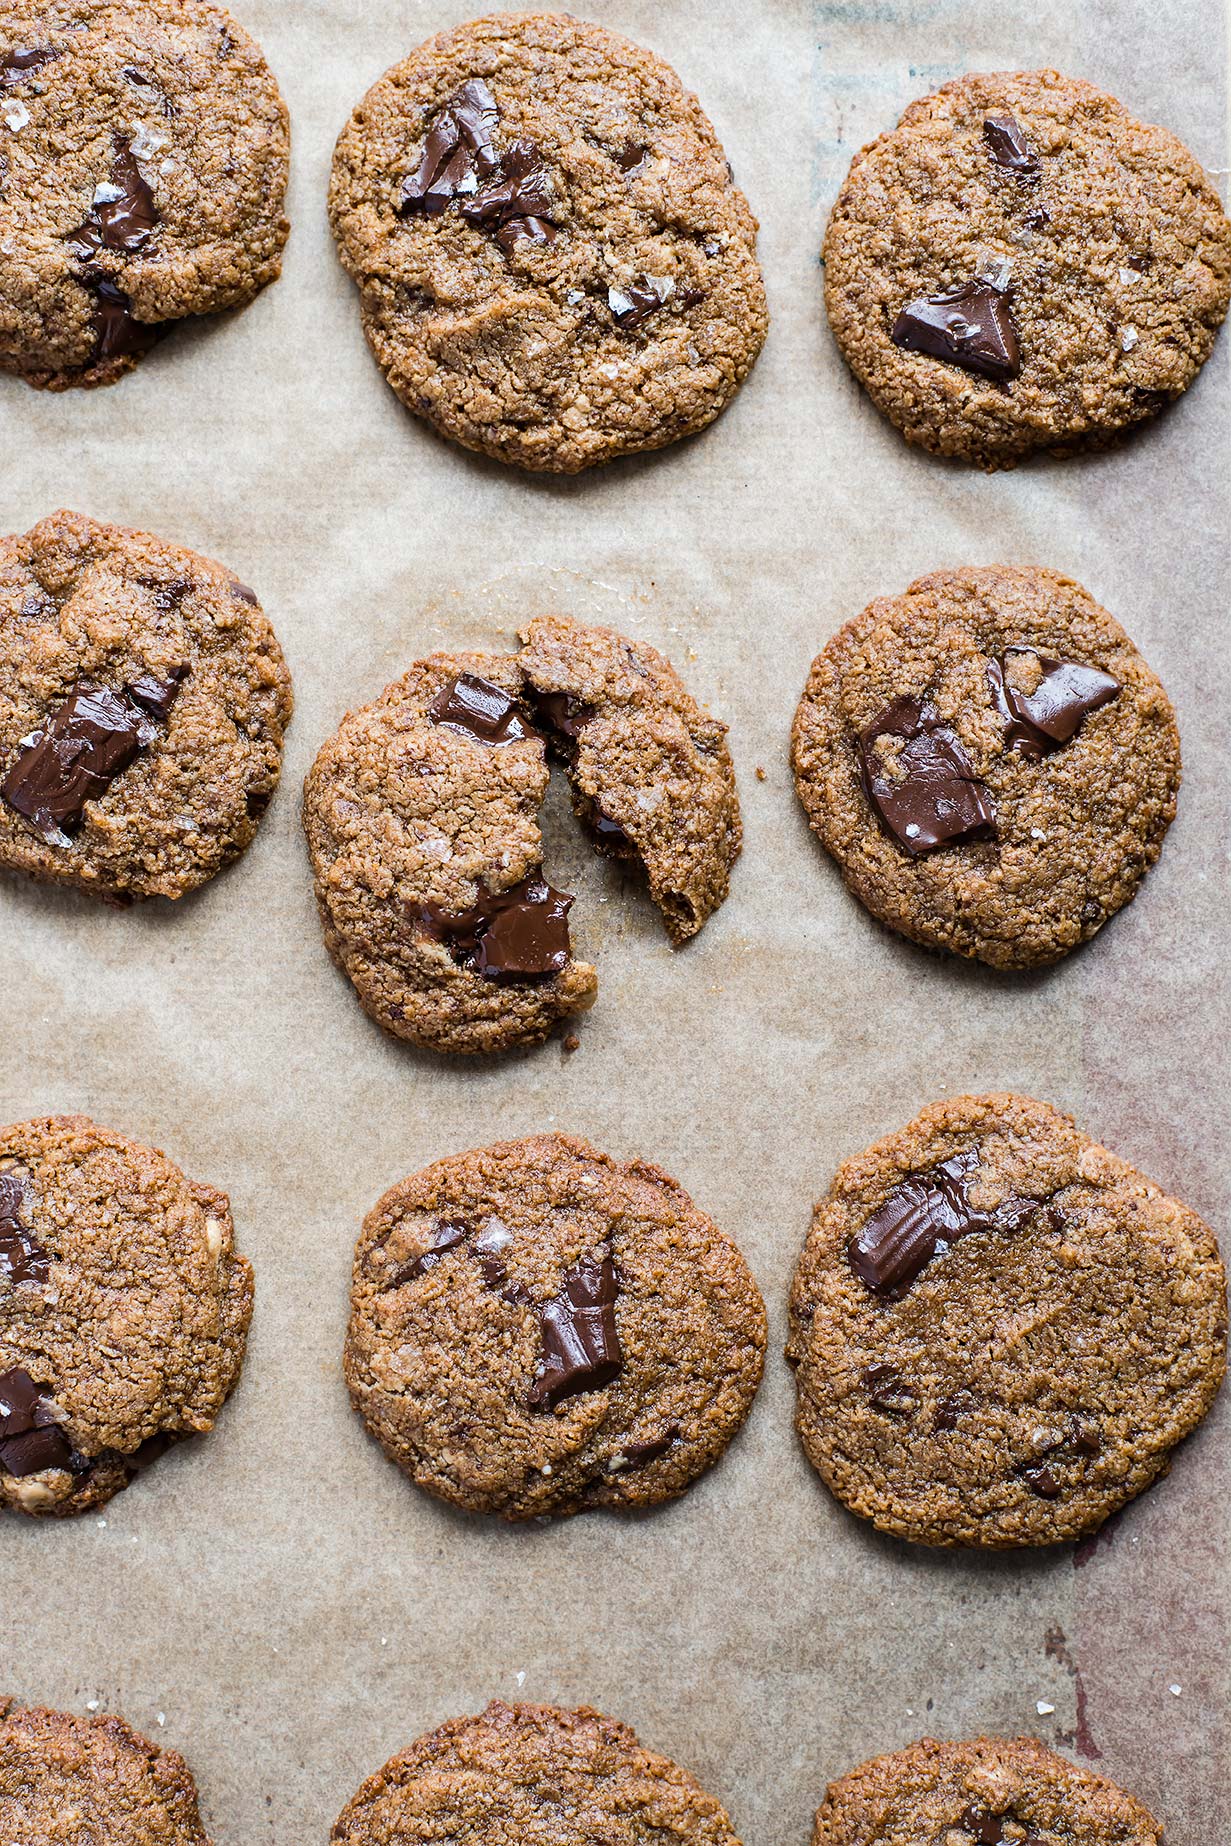
  • 1/2 cup chopped dark chocolate bar (about 2 ounces)

Directions:

  1. Preheat oven to 350°F.
  2. In a medium sized mixing bowl, combine coconut sugar, baking soda, and salt. Whisk briefly.
  3. Add tahini, vanilla, and egg to bowl, and use a spatula to stir until a stiff, sticky batter forms. Fold in chopped chocolate.
  4. Optional: place bowl of batter in the fridge for 10 minutes to allow dough to stiffen a bit more.
  5. Using your hands, roll dough into spheres by the heaping tablespoonful. Place spheres 2 inches apart of a baking sheet lined with parchment paper, and flatted slightly with your fingers.
  6. Bake for 10-12 minutes, until cookies have spread and are golden. Cookies will still be quite soft when you remove them from the oven. Allow them to cool at least 10 minutes before attempting to move them to a cooling wrack or a plate.

4 Comments

Grain-Free Butternut Squash Pie with Pecan-Crumble Crust

Grain-Free Butternut Squash Pie with Pecan-Crumble Crust

My good friend had a butternut squash pie making craze last year, and while he seems to now be over that caramelly, cinnamon-y flavor, I'm still stuck on it. 

What I needed though, to really make the ultimate butternut squash pie, was an alternate crust. I've always been partial to graham cracker crusts (the kind you find on many cheesecakes) but wanted to keep this recipe from-scratch and grain-free.

Grain-Free Butternut Squash Pie with Pecan-Crumble Crust

Pondering this crust dilemma brought me to pecans. It wasn't sure pecans would work in place of graham crackers, but I had a hunch. I was nervous about it, putting the pie into the oven. A few friends stopped by and I explained to them it was just an experiment and could go terribly wrong. 

Out of the oven it came and I was, even then, a little nervous. I took pictures, serving everyone else, and then grabbed the last piece for myself, topping it with an oversized dollop of whipped cream.

Grain-Free Butternut Squash Pie with Pecan-Crumble Crust

It was my butternut-pie-making-friend who said it first: a crust made of pecans is like a butternut pie inside of a pecan pie. A custardy filling nestled inside a crunchy, sweet, nutty shell. The butter and sugar caramelized in the oven while the pecans toasted, making something so delicious it stole the show, even from the pie filling itself. 

In this pie, crust is no longer just a vehicle for transporting filling. It's a part of the experience, as must as every other ingredient. 

Grain-Free Butternut Squash Pie with Pecan-Crumble Crust

Grain-Free Butternut Squash Pie with Pecan-Crumble Crust

Published December 15, 2017 by

Serves: 8   |    Total Time: 1 hour 15 minutes


Ingredients:


    For the crust:
  • 2 cups pecans 
  • 1/3 cup packed light brown sugar or coconut sugar
  • 4 tablespoons butter, melted
  • 1/2 teaspoon ground cinnamon 

  • For the filling:
  • 10 ounces frozen cubed butternut squash, thawed
  • 1/4 cup packed light brown sugar or coconut sugar
  • 1/4 cup wildflower honey
  • 2/3 cup half-and-half 
  • 1-1/2 teaspoon ground cinnamon
  • 1/4 teaspoon ground nutmeg
  • 1/4 teaspoon ground ginger
  • 1/4 teaspoon salt 
  • 3 eggs
  • 1 tablespoon butter, melted 
  • 1 teaspoon vanilla extract 

  • To serve:
  • 1/2 cup heavy whipping cream
  • 1/2 teaspoon vanilla extract

Directions:

  1. Preheat oven to 350°F, and grease an 9-inch ceramic or glass pie pan .
  2. Put pecans in a food processor and pulse to grind them into a fine crumb. Scrape sides frequently to ensure even chopping. Few larger chunks should remain (several are ok but for the most part you are looking for an even, fine crumb). Scrape pecan crumbs into a bowl, and add sugar and melted butter. Use a spatula to stir until everything is combined and crumb should stick together when squeezed between two fingers. Now, press crumb mixture into prepared pie pan, working it up the sides and into an even layer along the bottom to form a crust. Tip: use the flat bottom of a glass to make a smooth bottom. Make sure there are no gaps or cracks, and then set aside.
  3. In a blender, combine: thawed butternut squash, sugar, honey, half-and-half, cinnamon, nutmeg, ginger, salt, eggs, melted butter, and vanilla. Puree until completely smooth, scraping sides down as needed. Then, allow mixture to rest for 5 minutes so any air bubbles have time to float to the top.
  4. Pour butternut mixture into prepared pie shell, filling it until almost—but not quite- full (shoot for 90-95% full). Place in oven and bake for 45-55 minutes, until custard filling jiggles slightly in the middle but not at the edges. Turn heat off, and allow pie to cook in oven with the door open for 10-15 minutes. This super slow cooling method will prevent the custard filling from cracking.
  5. While the pie cools, make the whipped cream. Add heavy cream to a bowl and whip with an electric mixture until it beings to hold peaks. Add vanilla, and beat 30 more seconds.
  6. Serve pie with dollops of whipped cream (ice cream would be good as well!).

10 Comments

Maple Sweetened Eggnog (No Refined Sugar!)

Maple-Sweetened Eggnog (No Refined Sugar!)

Eggnog is a surprisingly polarizing drink. Surprising to me, because of how much I love it. It is creamy, sweet, and lightly spiced (which you know I love if you read my recent gingerbread post). 

When drinking eggnog I try--try so hard- to make it last, sipping slowly the way you would with a glass of wine. It never really works, going down far too easy. 

This eggnog is just how I like it: creamy, sweet, with a hint of spice. There are a lot of variations on eggnog so if you would like to customize yours, here are some tips! 

On Spiking Your Eggnog: I prefer not to tamper with my eggnog, and let it stay like it was when I was a kid. Alcohol free. That's just me. There's likely a time and a place that spiked eggnog would fit into my life well, but regular old eggnog drinking isn't it. This recipe works either way: my friends stirred in whiskey, which adds to that sharp spicy flavor. Rum would be good as well! No matter what, top with fresh nutmeg (advice from my grandmother). 

To Cook or Not to Cook: This recipe will ask you to cook your eggnog on the stove-top. It doesn't take long, and it helps you get a thick, creamy eggnog. I've made it in the blender (i.e., skipped cooking), and the flavor is there but the creaminess falls a bit short (Plus, without adding alcohol, this makes drinking the raw eggs a little risky). Lots of recipes will ask you to whip your egg whites to stiff peaks and fold them in to get that creamy texture, but that is just too much work (...in my opinion 😉) considering you could also just stir everything on the stove for a few minutes. And while eggnog is usually enjoyed cold, warm eggnog straight from the stove is something else (and an experience worth having).

Maple-Sweetened Eggnog (No Refined Sugar!)

Maple Syrup > Sugar: This recipe calls for maple syrup rather than sugar. It does have a subtle maple flavor, but it's quite nice, and I'm surprised you don't see more maple sweetened eggnogs around. It might sound odd, but really, has maple syrup ever messed up anything?? Plus, it's an unrefined sugar. Three cheers for maple syrup! 

What's All the Fermentation Talk? Fermenting eggnog is the traditional way, and does several things. First, it mellows out any alcohol you may have put in. Second, whatever alcohol you have added kills off any bacteria (or so I've heard). Third, it gives flavors time to meld together. Have you heard of leaving your cookie dough in the fridge over night? Same idea. Key to fermentation: use booze. The alcohol is what kills off any bacteria. I wanted my eggnog now, so this recipe is a drink-it-right-away recipe. You can try adding booze and fermenting it for a few weeks if you're that sort of daring (use a 1/4 cup cognac and 1/4 cup rum).

Maple-Sweetened Eggnog (No Refined Sugar!)

Published December 7, 2017 by

Serves: 12   |    Total Time: 30 minutes


Ingredients:

  • 3 cups whole milk
  • 1 cup heavy cream 
  • 4 whole cloves
  • 1/2 teaspoon ground cinnamon
  • 1/2 teaspoon ground nutmeg, plus more for serving
  • 1/2 teaspoon vanilla 
  • 6 egg yolks 
  • 1/2 - 3/4 cup maple syrup
  • Pinch of salt

Directions:

  1. Combine milk, cream, cloves, cinnamon, nutmeg, vanilla, and pinch of salt in a sauce pan and heat until almost simmering. Stir frequently to avoid scalding. 
  2. While the milk heats, whisk together the egg yolks and 1/2 cup maple syrup until frothy and golden.
  3. Ladle 1 scoop of the hot milk into the egg mixture, while whisking it quickly to avoid curdling. Do this two more times to temper the eggs and then pour the egg mixture into sauce pan with milk, whisking while you pour. Cook for 3-5 minutes while whisking constantly. Do not allow mixture simmer (or boil), as this will cause the eggs to curdle. 
  4. Once eggnog begins to thicken, remove from heat. At this point, you may add extra maple syrup if you would like, just taste it and adjust, stirring between each addition. (for me, the 1/2 cup we added in step 2 is enough, but if you are accustomed to store-bought you might want a bit more).
  5. Pour the eggnog through a fine mesh sieve to remove the whole cloves and ensure a silky smoothy eggnog.
  6. Pour in an air-tight container and chill in the fridge. Serve topped with freshly ground nutmeg. (I'm often impatient and drink it while it's still warm -- yummy that way, too!)

2 Comments