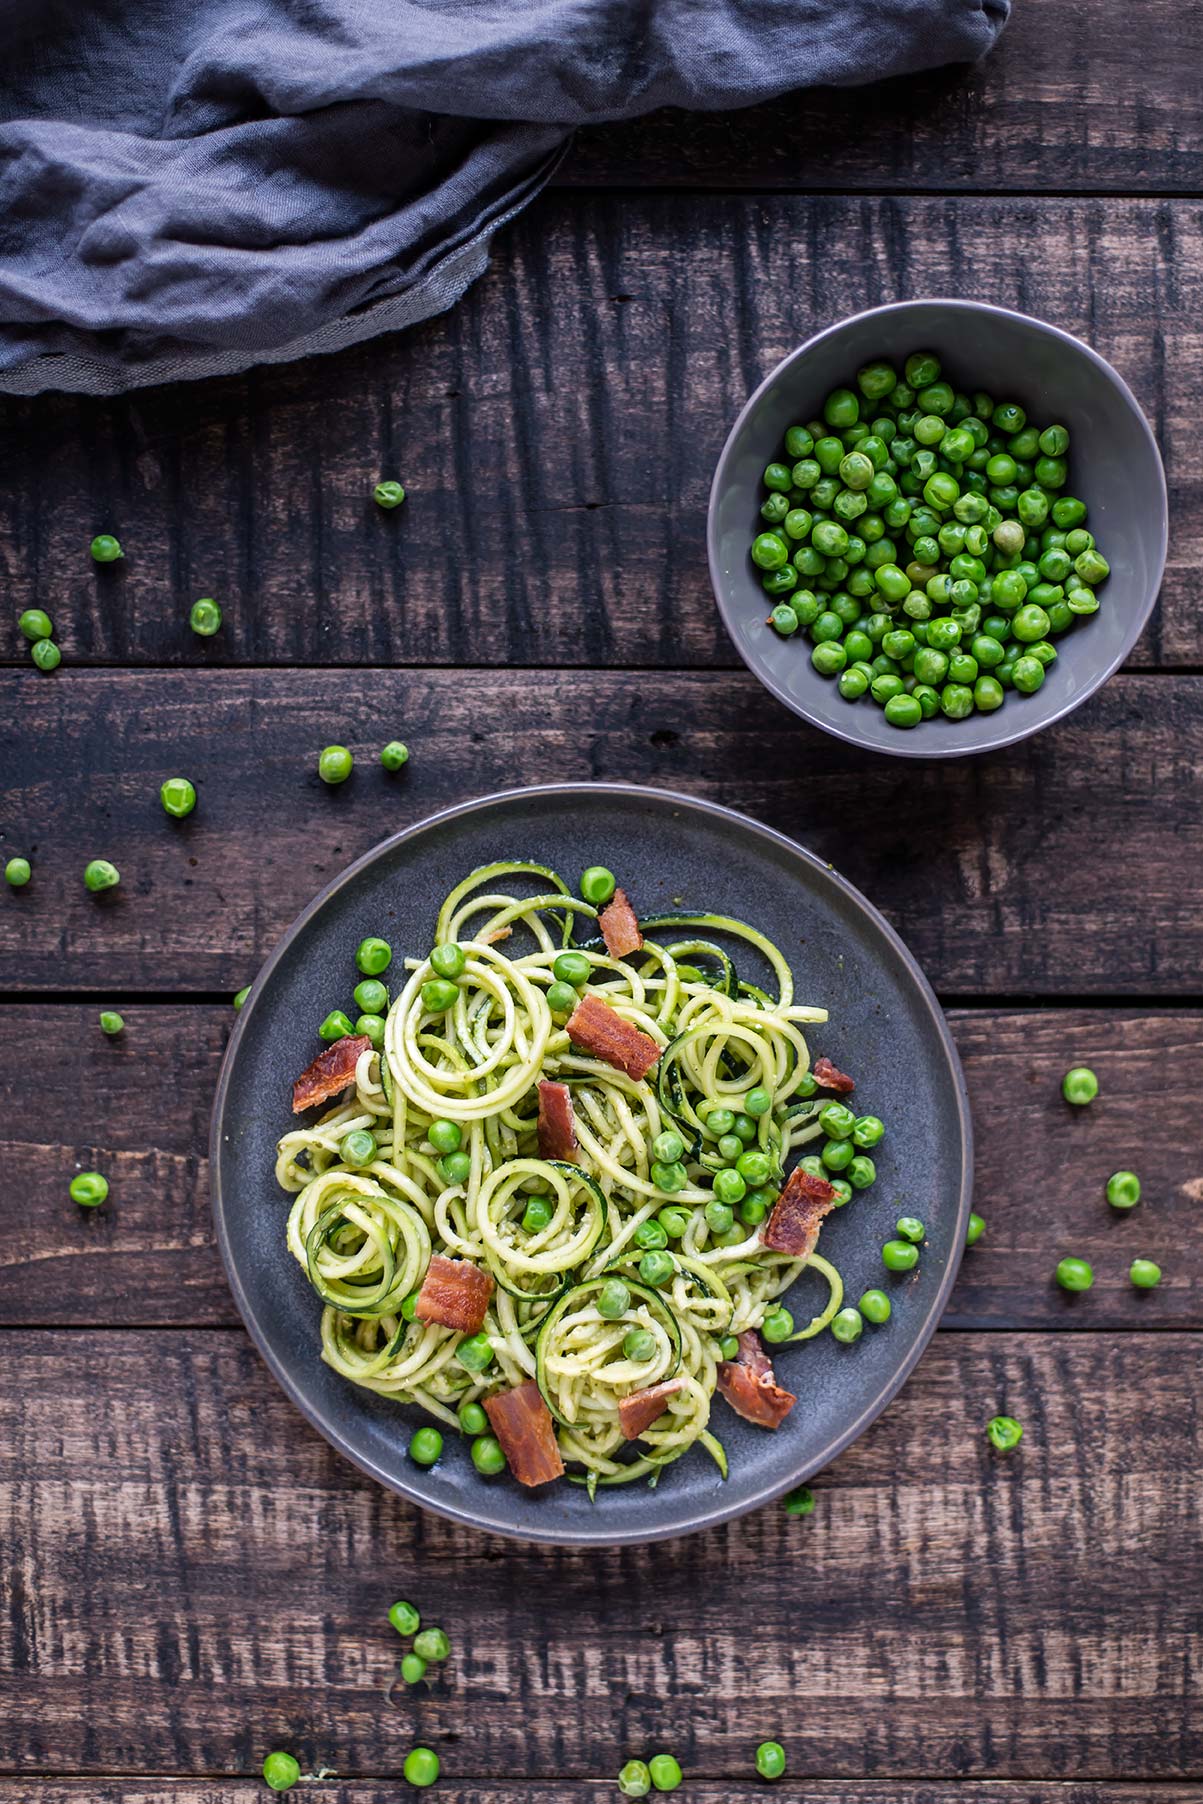
Pesto Zoodles with Fresh Peas & Bacon

Update: I added new pictures to this post on 5/11/2018. The recipe is the same :) So yummy! 

Pesto Zoodles with Fresh Peas & Bacon

Around this time of the year, every year, I go on a pesto rampage. Last year it was this cheesy pesto scramble and this pesto chicken salad. This year it's pesto zoodles with fresh peas and bacon. 

And it's the best thing I’ve eaten all month

Is there anything not to love about long, slurpy noodles coated in pesto? Crunchy bits of bacon and starchy peas? This is the best thing I’ve eaten all month, and I’m not exaggerating. 

Normally, noodles drenched in this much pesto and served with generous amounts of bacon would be quite a heavy dish, but this is where the zoodles come in: hellooooo zoodles! (Have you noticed I love zoodles yet?) Since zoodles are made of zucchini, you can smother them in pesto and toss in the bacon and still end your meal without that heavy I-just-ate-is-it-nap-time-now feeling. 

Jump into pesto season with me while it's here! 

Pesto Zoodles with Fresh Peas & Bacon

Pesto Zoodles with Fresh Peas & Bacon

Published June 22, 2017 by

Serves: 4   |    Total Time: 30 minutes


Ingredients:

  • 3 medium zucchini
  • 1 teaspoon coconut oil
  • 1/4 cup pesto sauce (homemade or store bought)
  • 1 cup green peas (frozen or fresh)
  • 8 ounces bacon, cooked and crumbled into bite sized pieces

Directions:

  1. Heat 1 teaspoon coconut oil in a skillet over medium heat. When the oil glistens, add the peas, and cook for 3 minutes, stirring occasionally, until bright green.
  2. Spiralize the zucchini into zoodles with a Spiralizer. Pile the zucchini noodles into a skillet and place the lid on (they will cook down). Cook for 5 minutes, and then add the pesto, stirring and turning the noodles to coat them in pesto. Top with bacon, and toss everything one more time to combine.
  3. Serve hot (leftovers are also good cold!)

Looking for fresh, healthy recipes? Sign up for the Foraged Dish newsletter, and you'll get a copy of our go-to grain-free banana bread recipe, and lots more! 

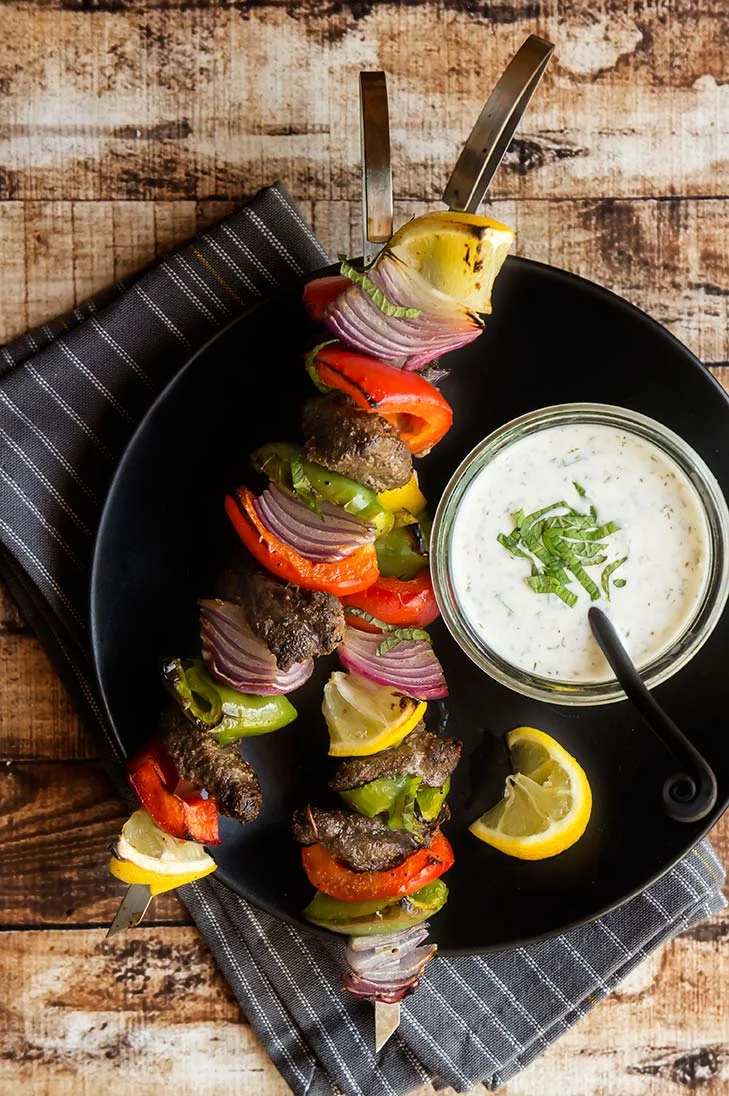
Moroccan Beef Kabobs with Mint Yogurt Sauce

Moroccan Beef Kabobs with Mint Yogurt Sauce

Head down, I coach myself up and over the next hill. This is the first time my road bike has made it out of the garage this season, so I go easy on myself (I have to). 

Where the hill crests, I lift my head up. Across the road is an expanse of green, and behind that a big brown barn, and then a row of tall trees--maybe birch- and even beyond that the Rocky Mountains, towering over it all. From here, the mountains are a royal blue color. 

Moroccan Beef Kabobs with Mint Yogurt Sauce

I ride 30 more feet and find a small herd of cattle sleeping in the grass, and a rancher in the fields behind them. Oh what a view they all have! For a moment I envy the rancher: he is shoveling hay into a pickup. It's a job that could use 2 of 3 people, though he seems to have it covered on his own. I imagine him there at 6 in the morning, when the sun is just starting to crack the horizon. In my mind he stops to watch, the crickets chirping and maybe the murmur of a cow in the distance.

Later I think back on that moment: me, looking at the view, and extrapolating an entire story around it. I wonder if that farmer does ever stop to look our across the Rockies... if he thinks he has the time. The cows likely don't notice the view, but they sure did look comfy there in the grass. 

Moroccan Beef Kabobs with Mint Yogurt Sauce

These kabobs (kebab, kabob, however you want to say it) are roasted in a Moroccan inspired spice blend, and dipped in a cool mint yogurt sauce. At one point, I had given up dairy in favor of nut-milks and coconut creams. If you're a long-time reader of this blog, you might remember a time when most of my recipes used dairy substitutes rather than milk, but that is certainly not the case anymore! Flavor-wise and texture wise, I much prefer regular milk. So when I can find high quality, grass-fed dairy products they go straight into my shopping cart with out a second thought. 

Moroccan Beef Kabobs with Mint Yogurt Sauce

This post may contain affiliate links.

Moroccan Beef Kabobs with Mint Yogurt Sauce

Published May 4, 2017 by

Beef kabobs with ras el hanout, a Moroccan spice blend. Served with minted yogurt sauce.

Serves: 4   |    Total Time: 30 active minutes


Ingredients:

  • 1 pound beef chuck, cubed
  • 1 tablespoon ras el hanout (I used this recipe, feel free to use store bought too!)
  • 1 tablespoon olive oil
  • 2 bell peppers
  • 1 red onion
  • 2 lemons
  • 1/2 cup plain greek yogurt
  • 1/2 teaspoon salt
  • 1/4 teaspoon ground black pepper
  • 2 tablespoons fresh mint leaves, minced
  • 1/4 teaspoon garlic powder
  • 1/2 teaspoon onion powder
  • 1 tablespoon fresh parsley

Directions:

  1. Preheat oven to 450°F.
  2. Place beef in a bowl and toss with spice blend and 1/4 teaspoon salt (optional: do this in the morning and marinate for 6-8 hours to infuse the flavors).
  3. Dice the onion, pepper, and one lemon into 1-inch pieces. String beef, peppers, onion, and lemon onto kabob skewers in alternating pattern. Place kabobs on a baking sheet. Brush olive oil over kabobs, and place in oven. Bake for 10-15 minutes, depending on how you like your meat (10 minutes for more rare, 15 for well-done). Remove from oven.
  4. Make the yogurt sauce while the kabobs cook: combine yogurt, remaining salt, juice of remaining lemon, minced mint, garlic powder, onion powder, parsley, and ground black pepper and stir until well mixed. Serve kabobs hot with a small bowl of yogurt sauce on the side for dipping.

We are a participant in the Amazon Services LLC Associates Program, an affiliate advertising program designed to provide a means for us to earn fees by linking to Amazon.com and affiliated sites.

4 Comments

Roasted Cauliflower with Olives & Oregano

Roasted Cauliflower with Olives & Oregano

Cauliflower is one of those humble vegetables that can take on almost any flavor. It plays a supporting role in curries and stir fries. Even in a Cauliflower Gratin or Casserole, where one would think it would take center stage, the focus tends to be on the cheese or sauce or breadcrumbs on top. 

Whole, a head of cauliflower is heavy and hard to cut into. Once dismantled, it's florets are delicate and easy to break apart. 

Oregano, while less of a "blank slate," is similarly humble. Basil grows taller and lavender blossoms into soft purple blooms. Thyme and rosemary seem to get all of the attention, compared to oregano. But oregano is there, just as important in making Italian Seasoning and Herbs De Provence. 

Roasted Cauliflower with Olives & Oregano

Roasted together, the cauliflower and oregano become my favorite part of this dish. Kalamata Olives are like little savory salty jewels in between, and lemon adds a fresh pop. But in the end, I would make this even if I didn't have any olives or lemon in the house. They may be simple, but I could eat this dish even if it was just roasted cauliflower and oregano. They are the center piece, the protagonist, the lead role. For once, the other ingredients here (Kalamata olives and lemons) lift them up. 

"A great man is always willing to be little.”  ― Ralph Waldo Emerson, on humility

Roasted Cauliflower with Olives & Oregano

A simple, 5-ingredient recipe for roasted cauliflower with kalamata olives and oregano. Full recipe: Music: www.bensound.com

Roasted Cauliflower with Olives & Oregano

Published May 6, 2017    |       

Roasted cauliflower with herbs and Kalamata olives.

Serves: 4   |    Total Time: 50 minutes


Ingredients:

  • 1 head of cauliflower
  • 1/2 cup Kalamata olives
  • 1 tablespoon oregano
  • 1 teaspoon salt
  • 1/2 lemon 
  • 2 tablespoons avocado oil

Directions:

  1. Preheat oven to 425°F. Chop the cauliflower into florets, and spread in a single layer on a cookie sheet.
  2. Scatter olives across pan, and drizzle with avocado oil. Toss to coat vegetables. Sprinkle with oregano and salt.
  3. Cut the lemon into wedges. Gently squeeze a few of the wedges over the cauliflower, and place wedges on cookie sheet.
  4. Bake for 40 minutes, until cauliflower is browning. Allow to cool 5 minutes before serving.

Let's hang out! Find me on social:

2 Comments