Crustless Peach & Blackberry Bakewell Tart (Gluten-Free & Paleo)

Crustless Peach & Blackberry Bakewell Tart (Gluten-Free & Paleo)

It is 8pm, and I am just walking out of the climbing gym. My tummy has been rumbling for the last 30 minutes. It is Tuesday, but it feels like Thursday and exhaustion sinks in. I can only blame myself; I stayed up late last night finished season two of the Great British Bake Off (GBBO). 

A soft breeze picks up and that's when it finds me, wraps around me, and gives me a hug: the smell of cinnamon rolls as they bake. Our climbing gym is no more than one block from an industrial bakery, and this happens more than once a week. It's not always cinnamon rolls, though that's what I smell most often. Some days a batch of sourdough fills the air with it's toasty aroma instead, and occasionally I catch a whiff of something I can't quite place. 

Crustless Peach & Blackberry Bakewell Tart (Gluten-Free & Paleo)

My stomach whines again. Can you blame it? Between the GBBO marathons and the ill-timed smell of cinnamon rolls, my subconscious mind wants nothing more than to bake. It will take everything in me to make something "real" for dinner, instead of something cinnamon-y and sweet. 

That was last week (and I did manage to make a real dinner that night!). This week, I'm dealing with the issue at hand: I'm baking! It is a holiday weekend after all. This Bakewell tart is inspired by the famous Mary Berry (host of the GBBO), who is so well known for her Bakewell tart. This version has a few twists, however: I use coconut sugar instead of white sugar, and bake the whole thing with out a crust. For a final touch, fresh fruit is baked right into the tart, giving it color and a summery vibe. Mary Berry probably wouldn't even call this a Bakewell tart, but I'm in love with it. Bring on the seconds (and thirds and fourths!) 

Crustless Peach & Blackberry Bakewell Tart (Gluten-Free & Paleo)

Crustless Peach & Blackberry Bakewell Tart (Gluten-Free & Paleo)

Published July 4, 2017 by

Serves: 8   |    Total Time: 60 minutes


Ingredients:

  • 150 grams butter, softened
  • 100 grams coconut sugar ground fine
  • 150 grams almond flour
  • Pinch of salt
  • 1 egg
  • 1 teaspoon almond extract
  • 1 peach
  • 1/4 cup blackberries

Directions:

  1. Preheat oven to 375°F.
  2. Melt the butter in a thick-bottomed sauce pan. Once fully melted, remove from the heat and stir in the coconut sugar. Then, add the almond flour, a pinch of salt, the egg and almond extract, and stir until combined. Pour into pie plate or tart pan.
  3. Slice the peach in half, and then cut each half into 10 thin slices. Pick up 5 slices at a time and fan them. Place on top of batter, and repeat with the remaining three sets of five slices. Then, place the blackberries around the peaches.
  4. Bake for 35 minutes, until the tart is golden on top. It still make jiggle in the center a small amount. (Tip: check on the tart after 20 minutes, and cover the outside edges with foil is they are browning too fast. This will help it bake more evenly). Allow tart to cool for 10-15 minutes before serving. (Ice cream is a definitely yes!)

We are a participant in the Amazon Services LLC Associates Program, an affiliate advertising program designed to provide a means for us to earn fees by linking to Amazon.com and affiliated sites.

4 Comments

Macedonia de Frutas (Chilean-Style Fruit Salad)

Macedonia de Frutas (Chilean-Style Fruit Salad)

¿Quien Quiere Ser Millonario? (the Spanish version of Who Wants To Be A Millionaire?) played on the little TV in the corner of the kitchen. My host mom stood at the counter, preparing ceviche, answering every trivia question before the multiple choice options were even displayed on the screen.  

Manzana. Pera. Naranja. (Apple. Pear. Orange.)

Tienes muchas paciencia, hija, you have so much patience chopping all of those fruits so small. I had just returned from a trip to Los Lagos region in Chile, where I, along with a heard of other students, had picked fresh oranges, visited a Mapuche village, and dined on food fresh from the Fagón. Dessert? The best damn fruit salad I had ever had.   

Macedonia de Frutas (Chilean-Style Fruit Salad)

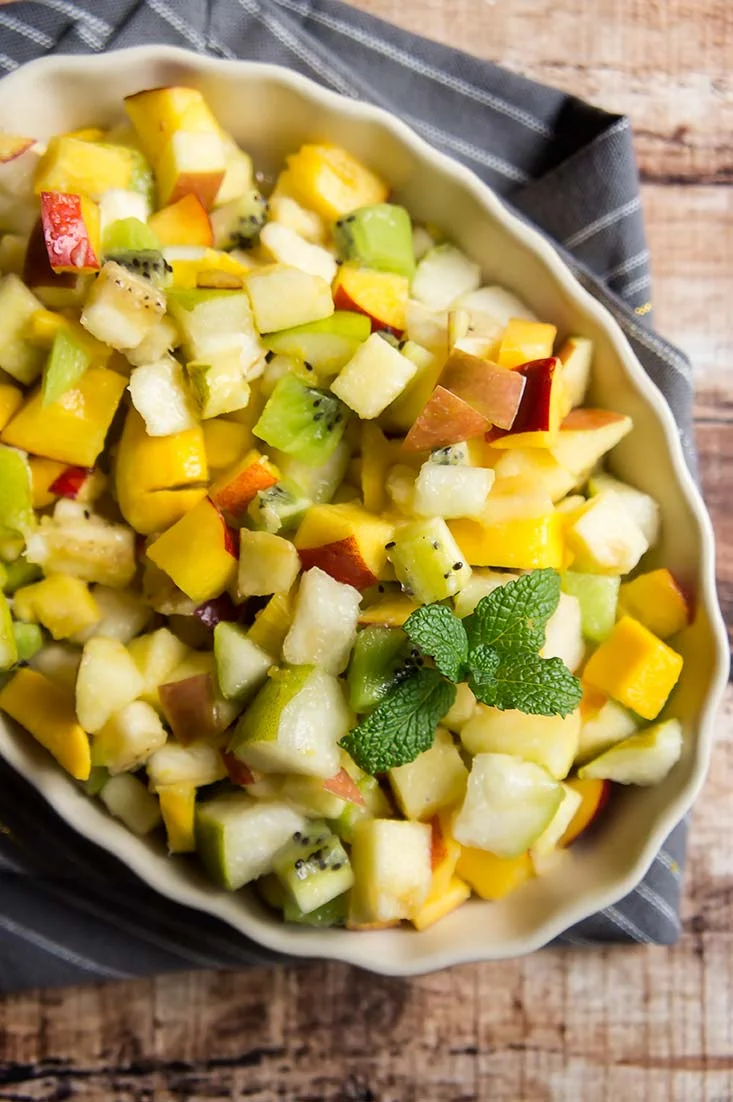
Fruit salad. Such a blah dish. It's the sort of dish your grandma served as a "healthy dessert" when you really just wanted a cookie (mine did at least). But this fruit salad. This fruit salad! You’d never see fruit salad the same way again. Served in a crystal goblet, it looked like something well beyond the fruit salad I knew. A far cry from the plastic container of pineapple, under ripe melon, and grapes you’d buy at an American grocery store. In Chile, fruit salad like this is called Macedonia De Fruta. 

The fruit was chopped so small, you could hardly tell what each bite contained. A hint of lemon. A bouquet of nature’s sweets. A medley of sorts. It must’ve had some effect on me, as the day I returned to my host families home, I volunteered to make the fruit salad for the asado (barbecue) happening that afternoon. I knew exactly what I was going to do.  

Slicing and dicing didn’t feel like patience. My mind was far away, the TV just a sound in the background. Chopping each piece of fruit was meditation. I could’ve zoned out for hours. 

Macedonia de Frutas (Chilean-Style Fruit Salad)

Macedonia de Frutas (Chilean-Style Fruit Salad)

Published June 20, 2017 by

This fruit salad is chopped fine so you get a little bit of everything in each bite.

Serves: 4   |    Total Time: 20 minutes


Ingredients:

  • 1 nectarine 
  • 1 banana
  • 1 apple
  • 1 pear 
  • 2 kiwi
  • 1 yellow mango 
  • 1 teaspoon lemon zest
  • Juice of 1/2 an orange 
  • Sprig of mint 

Directions:

  1. Chop fruit, removing pits and seeds as you go (remove peels from banana, mango, and kiwi), into 1/2 inch cubes. Place in bowl.
  2. Sprinkle with lemon zest and squeeze orange juice over fruit. Toss to combine, and top with a spring of mint. Serve immediately or allow flavors to marinate together for 30 minutes, covered, in the fridge to prevent oxidization.

Pistachio Butter Chocolate Cups

Pistachio Butter Chocolate Cups

Usually, pistachios just taste like nuts to me (roasted, salted, a bit crunchy) but when they are churned into smooth nut butter, they take on a whole new personality: slightly citrusy — or floral? - bold, and nutty. Pistachio butter isn't quite as thick as peanut butter or almond butter, lacking the "glue your mouth shut" characteristic you know well if you've ever eaten a PB&J sandwich. 

Still, it's rich and creamy, and pairs well with my favorite ingredient. Chocolate. 

Pistachio Butter Chocolate Cups

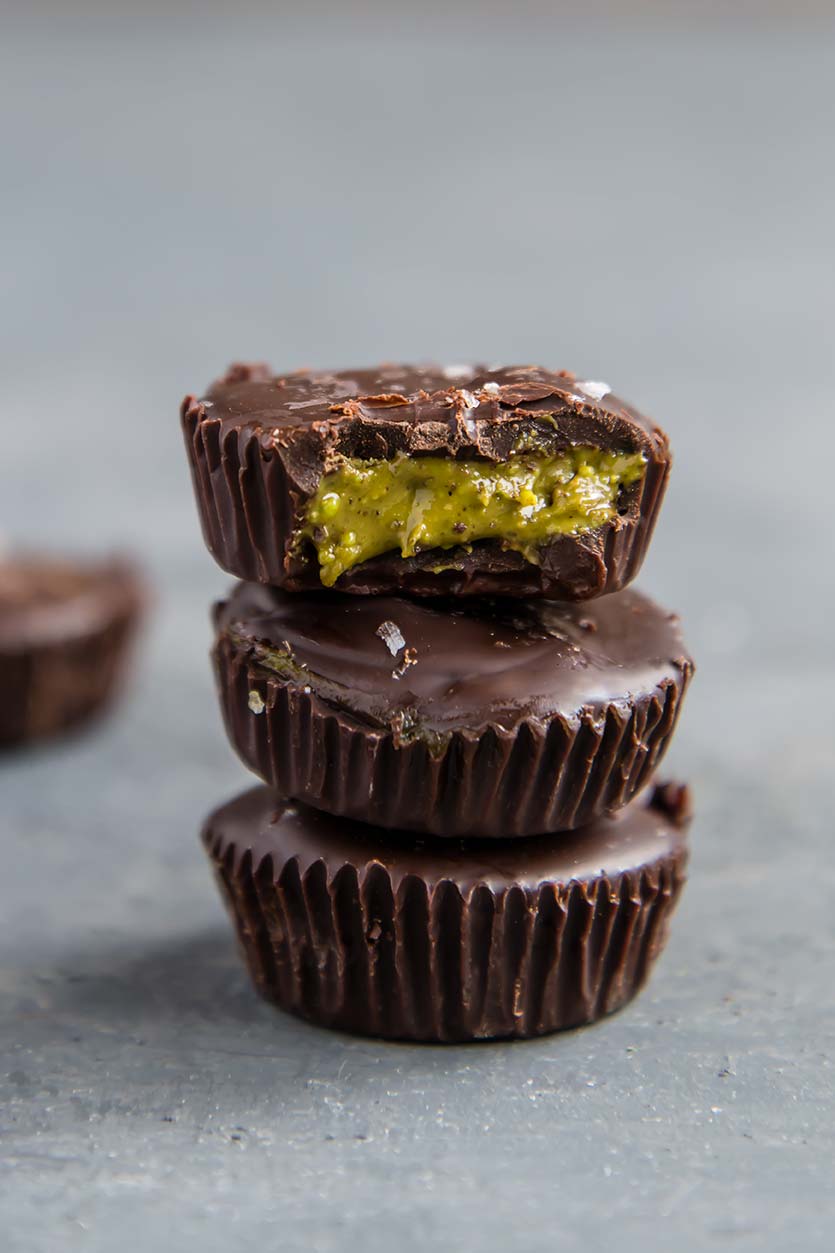
Plus it makes chocolate cups so pretty when you bite into them!

I made these with Oliver in mind because he loves pistachios, but they're becoming my favorite chocolate nut butter cup quickly, too. In part because they are just different — not something you can find the store! It's a little unexpected, and feels special, knocking peanut butter cups out of the way and showing up almond butter cups with their bold green filling. 

I add a sprinkle of sea salt for good measure — it makes everything “pop” a little more, and adds a bit of sparkle. Perfect around the holidays!

Pistachio Butter Chocolate Cups

This post may contain affiliate links. 

Pistachio Butter Cups

Published June 13, 2017 by

Pistachios make a colorful filling for these chocolate cups!

Serves: 12   |    Total Time: 15 minutes


Ingredients:

  • 12 small cupcake liners or 6 regular cupcake liners
  • 3/4 cup dark chocolate chips 
  • 1/4 cup pistachio butter (Make this by blending 1/2 cup shelled, unsalted pistachios in a high speed blender until creamy) 
  • 1/2 teaspoon coconut oil
  • Sprinkle of sea salt or fleur de sel
  • Optional: 12 pistachios (shelled) for topping

Directions:

  1. Melt the chocolate: place chocolate and coconut oil in a small bowl. Microwave for 30 seconds, and stir. Repeat 2-3 times, until chocolate is almost entirely melted (if small clumps remain, they should melt from residual heat). By heating for only 30 seconds at a time, you will avoid overheating the chocolate.
  2. Spoon chocolate into the cupcake liners (2 teaspoons for small liners and 4 for standard size). Then, while the chocolate is still warm, tilt the liners one at a time from side to side so that the chocolate goes about half way up the sides of the liners. Place on a tray and transfer to the fridge to set.
  3. When the chocolate is set, use a teaspoon to scoop pistachio butter into each chocolate cup (1 teaspoon for small cups, 2 for standard sized). Then, pour 1 teaspoon of the remaining chocolate over the pistachio butter and use the back of a spoon to gently spread it over the top. Sprinkle each cup with a small amount of seas salt and top with a pistachio. Allow to set in the fridge.

4 Comments