Warm Gruyère, Roasted Garlic & Thyme Dip

Warm Gruyère, Roasted Garlic & Thyme Dip

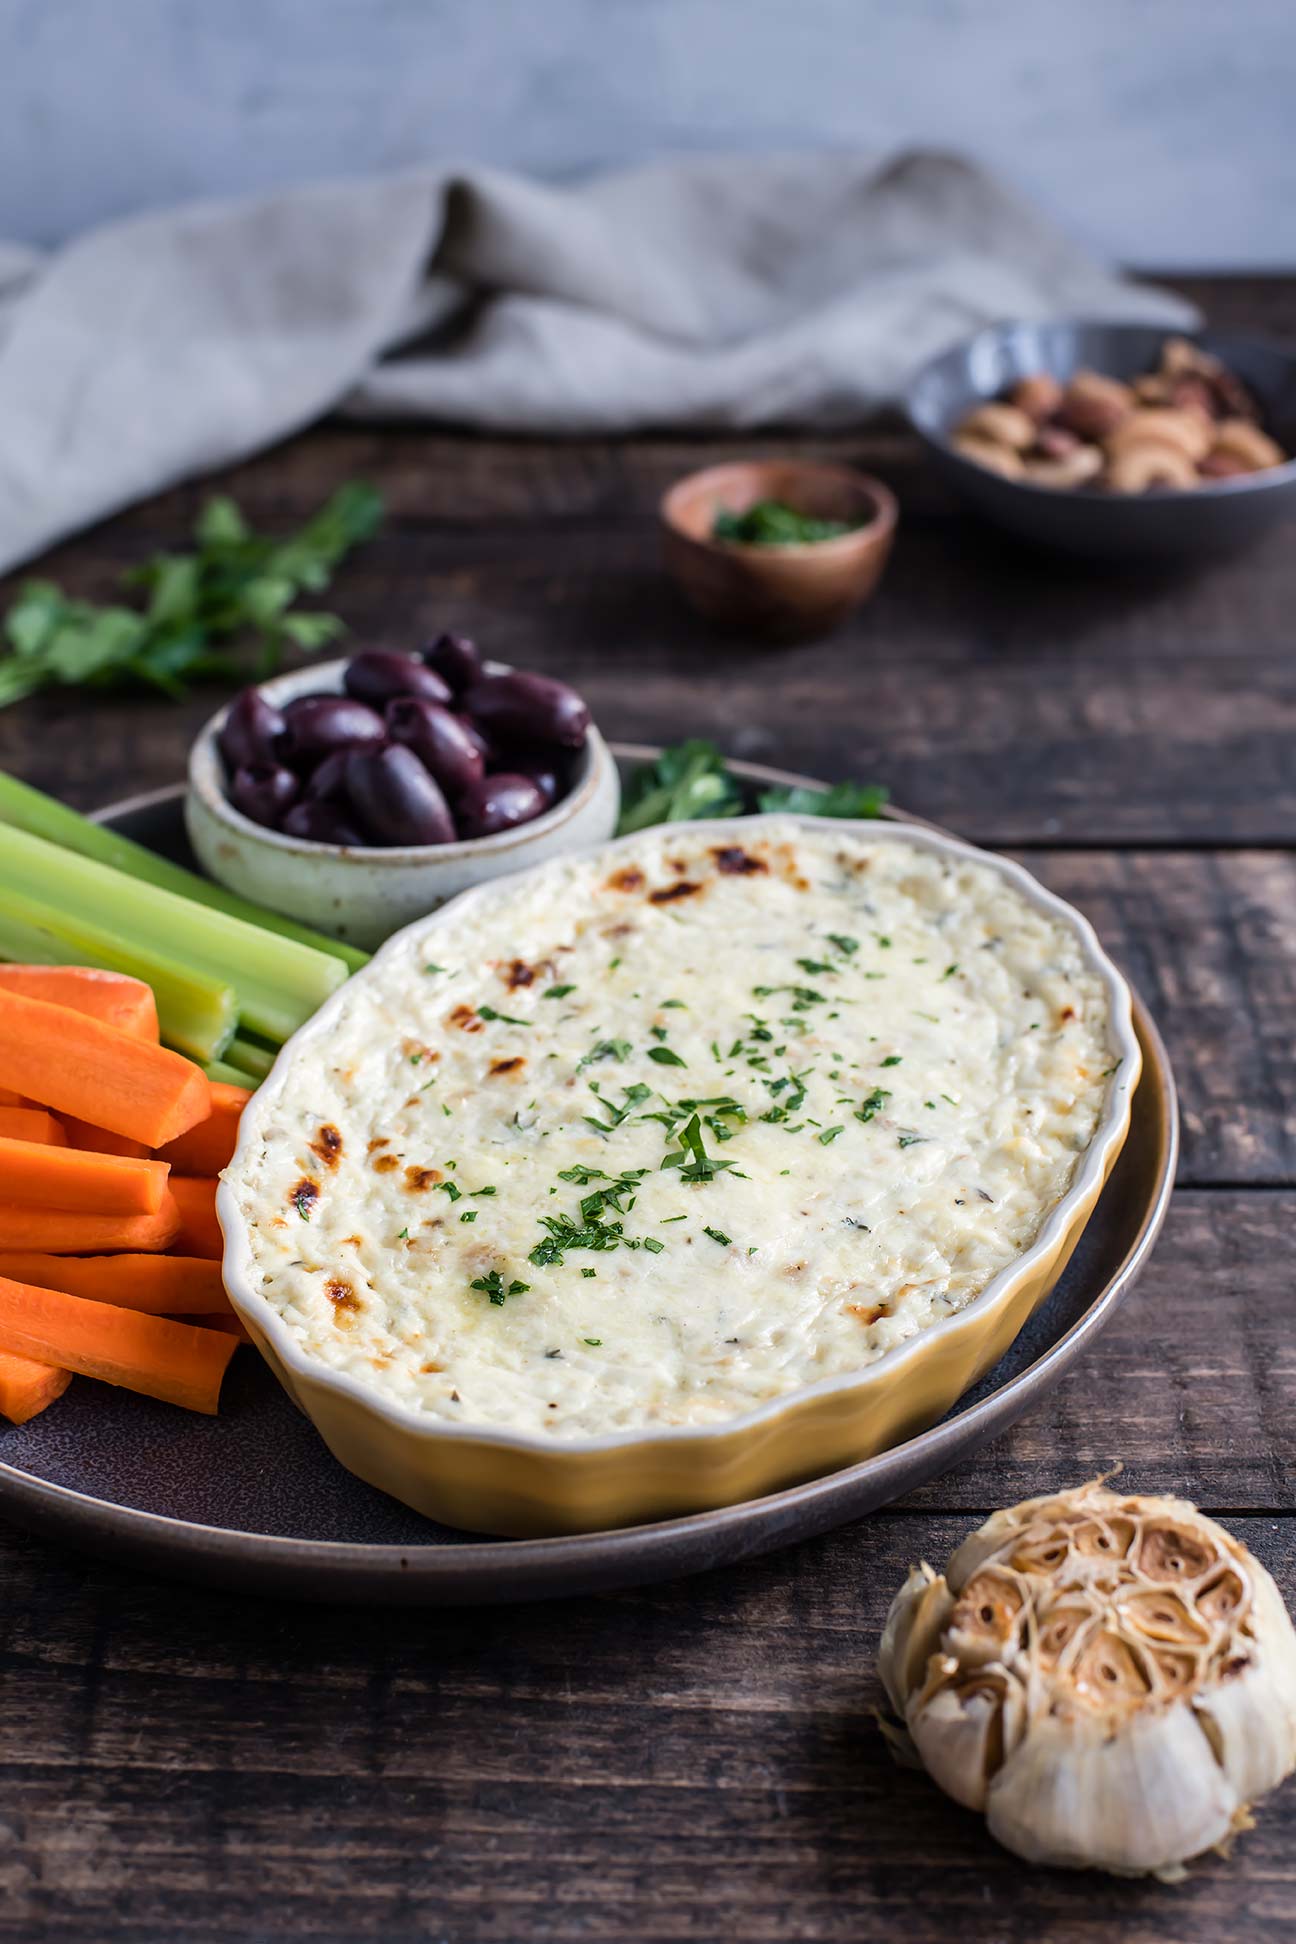
It is about 21°F this morning. The cold always me makes me crave crave warm, cozy dishes. This gruyère, roasted garlic and thyme dip  is just the thing to take to a New Years Eve cocktail party, or simply enjoy on the sofa after a long day, with your feet kicked up (build a fire in that fireplace, while you’re at it!).

I went to a cocktail party this fall (potluck style), and there were at least three different spinach and artichoke dips! Tasting and comparing them all was fun, but really? Three versions? Seems everyone was on the same page that night. I LOVE spinach artichoke dip, and this dip hits the same craving but mixes it up a bit.

Warm Gruyère, Roasted Garlic & Thyme Dip

The first step in this recipe is to roast a whole head of garlic. Have you roasted garlic before? YUM. It becomes golden and soft and spreadable. I roasted an extra head of garlic while I was making the one for this dip just so we could have it. It makes the best garlic garlic bread or compound butter. You may as well make the most of having the oven on!

Surprisingly, even with a whole head of garlic in this dip, it’s a subtle flavor — not a “I’m going to be breathing garlic for the rest of the night,” flavor. The gruyère and cream cheese soften it. Thyme adds an herbaceous note. The leftovers (if you have leftovers — in the realm of cheese that’s a rare story) do well as a sandwich spread or tucked inside of an omelette with sautéd mushrooms.

Warm Gruyère, Roasted Garlic & Thyme Dip

The new year is almost here! Wishing everyone a joyful 2019!

Warm Gruyère, Roasted Garlic & Thyme Dip

Published December 7, 2018 by

Serves: 6   |    Active Time: 75 minutes


Ingredients:

  • 1 head of garlic
  • 1 teaspoon olive oil or avocado oil
  • 8 ounces sour cream, at room temperature
  • 2 ounces cream cheese
  • 2 ounces gruyère, finely grated, plus 2 tablespoons for topping
  • 1/8 teaspoon salt
  • 1/4 teaspoon freshly cracked black pepper
  • 1 teaspoon fresh thyme leaves
  • 1 tablespoon minced parsley for garnish
  • For serving: crudités, crackers, crusty bread, etc.

  • Directions:

    1. First, roast the garlic: preheat oven to 350° F. Chop the very top off of the head of garlic. Place on a baking sheet and drizzle with the olive/avocado oil. Place in oven and roast 45 minutes, until cloves are golden and soft.
    2. Allow garlic to cool until you can easily touch it without burning your hands, about 15 minutes. Squeeze garlic cloves into a medium-sized mixing bowl, discarding of the garlic papers. Mash garlic.
    3. Add sour cream, cream cheese, 2 ounces gruyère, salt, black pepper, and thyme to bowl. Use a fork to mix until well combined.
    4. Spread cheese mixture in a ramekin or cocotte dish. Do not over fill—make sure there is at least 1/4-inch of extra room in the dish to avoid bubbling over. Top with remaining 2 tablespoons gruyère, and place in oven and bake for 20-25 minutes, until cheese is bubbling and just starting to brown in spots on the top.
    5. Remove from oven and allow to cool 10 minutes before sprinkling with minced parsley and serving with crudités, crackers, or crusty bread.
    6. Leftovers? Eat them cold as a spread on toast, sandwiches, etc, or re-warm the dip in the microwave for 30-second intervals or in an oven until warmed through.

    Gluten-Free Chocolate Pecan Thumbprint Cookies

    Gluten-Free Chocolate Pecan Thumbprint Cookies
    Gluten-Free Chocolate Pecan Thumbprint Cookies

    Happy holidays! Hoping everyone is having a beautiful day, where ever you are and whatever you are up to. We’re taking it easy, with no fancy plans, aside from maybe making a fresh batch of eggnog. I am so thankful to have a break from the hustle and bustle of the rest of the year — time to slow down, get outside (fingers crossed for some warmer weather later this week! 🤞), and even some creative recipe development without the time constraints of the normal work week (been working on lots of videos! Check out this one for homemade loose leaf chai! Also still trying to use up all of the spaghetti squash harvest from the garden). And, eating these gluten-free chocolate pecan thumbprint cookies!

    These cookies.

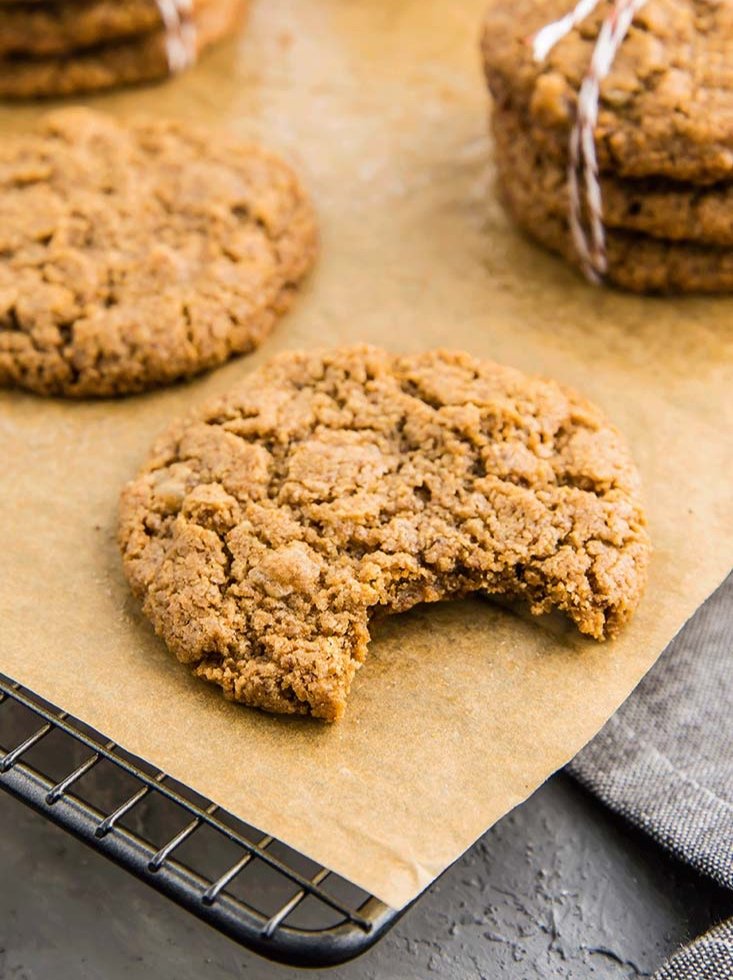
    Just almond flour, honey, butter, salt and baking soda combine to make a surprisingly soft but sturdy and satisfying cookie, something I discovered when I made these Paleo chocolate vanilla pinwheel cookies two years ago (2016 seems like so long ago! We had just moved into our house, I remember rolling out the cookie dough next to the wall between our kitchen and dining table. Just a few weeks later, we removed the wall and the house looks about 1,000x better! But I digress...)

    Thumbprint cookies — a Swedish treat traditionally made with a raspberry filling - have always looked festive to me. When filled with raspberry jam, they gleam in the light like little gems. But raspberry is a very summery flavor, and my inner chocoholic screamed “ganache!!” and I gave in easily, filling each with a melted 85% Dark Chocolate Lindt Bar.

    Gluten-Free Chocolate Pecan Thumbprint Cookies
    Gluten-Free Chocolate Pecan Thumbprint Cookies

    The result is similar to those chocolate kiss-topped peanut butter cookies we’ve all had at many a Christmas party, but with more delicate flavors. Toasted pecans with chocolate is an unparalleled combo in desserts in my book, one that fills your kitchen with the smells of caramelly nuts and fruity cacao scent.

    The cookie dough in this recipe is fairly flexible when it comes to flour. I tested using 1/2 cup gluten-free measure for measure flour (King Arthur flour) in place of 1/2 cup of almond flour and the result was almost the same as using all almond flour. That’s not to say I’ve tested everything! But I’m confident you’ll love these. The dough will crack a bit when you go to make the thumbprints, but that doesn’t impact the cookie much. We’re not going for perfect here — once you add the chocolate and the pecans, they’ll look (and be) absolutely delicious!

    Gluten-Free Chocolate Pecan Thumbprint Cookies
    Gluten-Free Chocolate Pecan Thumbprint Cookies

    Gluten-Free Chocolate Pecan Thumbprint Cookies

    Published December 25, 2018 by

    Yield: 15   |    Active Time: 40 minutes


    Ingredients:

  • 2 cups almond flour
  • 1/4 teaspoon salt
  • 1/4 teaspoon baking soda
  • 1/4 cup coconut oil or butter, melted
  • 1/4 cup honey
  • 1/2 teaspoon vanilla extract

  • For the filling:
  • 1/3 cup chocolate chips (or a chopped up dark chocolate bar)
  • 1 tablespoon coconut oil or butter
  • 1/2 cup pecan halves, toasted

  • Directions:

    1. Preheat oven to 325°F. Line a cookie sheet with parchment paper and set aside.
    2. In a medium-sized mixing bowl, combine almond flour, salt, and baking soda and whisk briefly to combine.
    3. Add melted oil/butter, honey, and vanilla and stir dough with a spatula until a stiff dough forms.
    4. Shape cookies: scoop cookie dough by the tablespoonful into the palm of your hand. Shape into a sphere, and then place on a prepared cookie sheet. Using a smaller spoon or you thumb, make an indent in the center of the cookie. The dough may crack a bit around the edges, which is fine; if you like, you can carefully press it together with your fingers.
    5. Repeat step 4 until all of the dough is used. Leave at least 1/2 inch between each cookie on the baking sheet.
    6. Place cookies in oven on middle rack and bake for 10-13 minutes. Cookies should be golden and fragrant. Set aside to cool.
    7. While cookies cool, make the filling. Melt chocolate and 1 tablespoon butter/oil in a microwave safe bowl in the microwave by heating at 30-second intervals, stirring between each round, or in a double boiler.
    8. When cookies have cooled enough to be easily handled, carefully spoon chocolate into the center of each, and place a single pecan half in the center of each. Allow chocolate to set for 10-15 minutes, and then serve or store in an air-tight contain for a week.

    Slow Cooker Mole Chicken Tacos

    Slow Cooker Mole Chicken Tacos

    There is a lot of folk lore surrounding the creation of mole poblano — the chocolate chili sauce Mexico is so known for.

    One theory is that a convent of nuns invented mole for an archbishop in an effort to impress him, when no other ingredients could be found. Another story says that it was all a mistake, that a monk (rather than a nun) first made the dish for the archbishop when he accidentally knocked several stray spices into the pot. Either way, both versions tie the sauce back to over 300 years ago!

    It’s no wonder there is so much speculation over the dish’s origins… mole sauce recipes typically call for a hefty list of seemingly random ingredients. But that’s part of the magic: it may not strike you that raisins and tomatoes and chili powder and cocoa will blend well together, but sure enough, the result is stellar. Spicy, tangy, with a rich backdrop, thanks to the chocolate.

    Slow Cooker Mole Chicken Tacos
    Slow Cooker Mole Chicken Tacos

    Something else stays consistent across almost every origin story, and that’s that mole is for special occasions. My dad will slave over a batch of mole for Christmas dinner; and me? I usually save it for a day when I know I can sit down and really take the time to enjoy the meal.

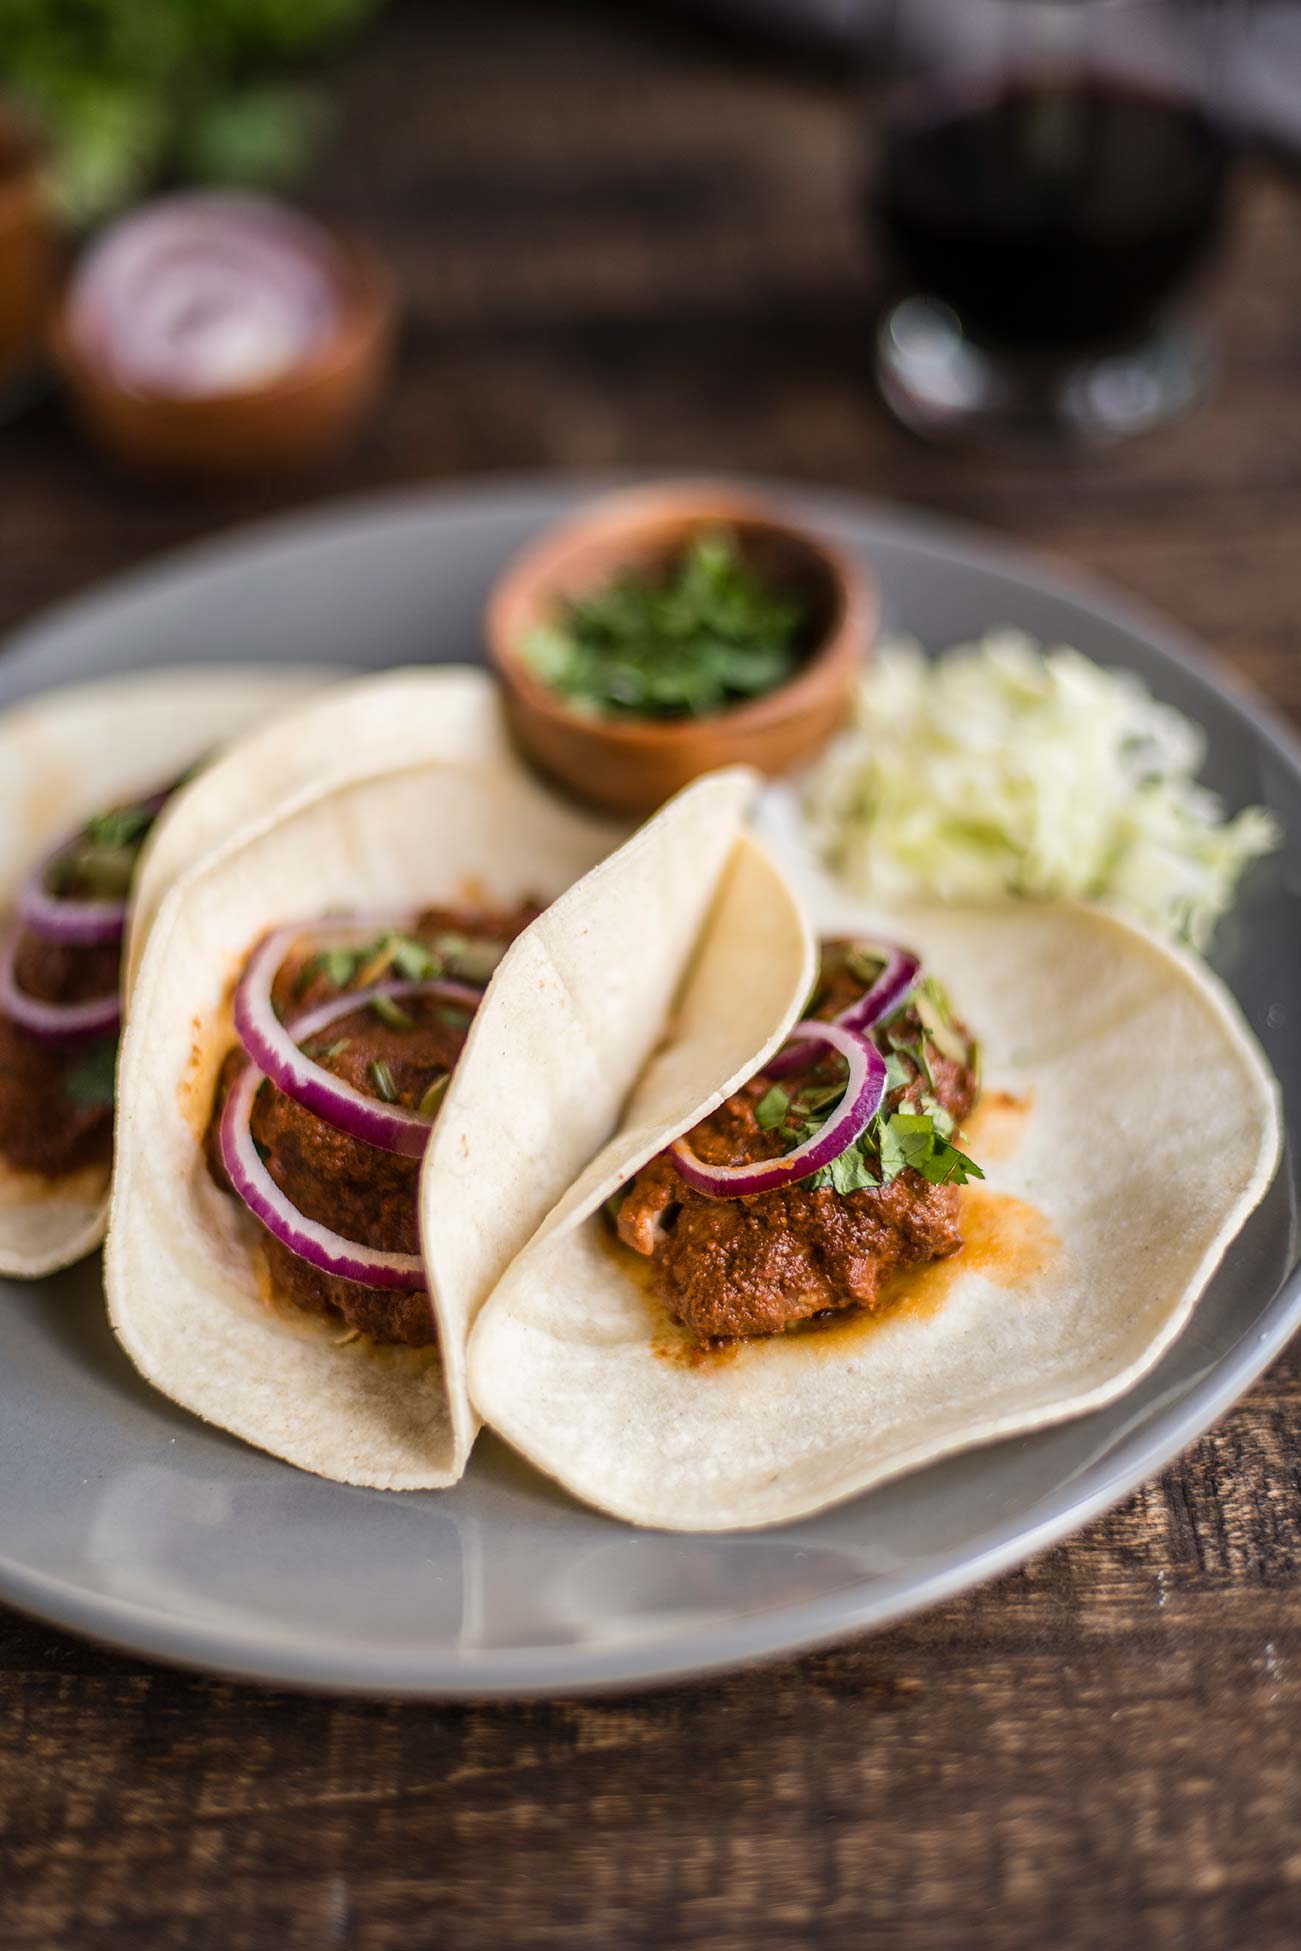
    Such a complex sauce does not need many frills. Simmer some chicken (or turkey, or pork, or black beans, or whatever you have) until tender, and then serve simply. All you need for a fancy taco is a corn tortilla, some chicken in mole sauce and a sprinkle of cilantro. A few thin slices of red onion certainly brighten it up, and why not — a few pepitas on top for crunch (you have them out from making the sauce, anyhow). Now, this isn’t the traditional way to serve mole, which is over a bed of rice, but it’s easy nonetheless, and everything is delicious as a taco.

    Slow Cooker Mole Chicken Tacos

    Slow Cooker Mole Chicken Tacos

    Published December 18, 2018 by

    Serves: 6-8   |    Active Time: 60 active minutes


    Ingredients:

  • 2 pounds boneless skinless chicken (breasts or thighs)
  • 1 white onion, diced
  • 2 cloves garlic, minced
  • 1 tablespoon coconut oil
  • 2 tablespoons cocoa powder
  • 2 tablespoons ancho chili powder
  • 2 chipotle chile peppers in adobo sauce, plus 1 teaspoon of the adobo sauce from the can (find canned chipotles in adobo in the Mexican section of your grocery store. Most canned have quite a few peppers, use a spoon to scoop out two)
  • 1 16-oz can of diced tomatoes
  • 1/8 teaspoon ground cumin
  • 1/8 teaspoon ground coriander
  • 1/8 teaspoon ground anise
  • 1/4 teaspoon ground black pepper
  • 1/2 teaspoon salt
  • Pinch ground cloves
  • 1/4 cup pepitas, plus more for garnish
  • 2 tablespoons sesame seeds
  • 2 tablespoons raisins
  • 1 cinnamon stick (about 2-3 inches long)
  • For serving: corn tortillas, cilantro, finely sliced red onion

  • Directions:

    1. In a skillet, or the bottom of you Instant Pot/Slow Cooker (set to the Sauté setting), heat coconut oil and sauté onion and garlic until onion is transparent. Turn off heat once onions are cooked.
    2. Transfer the onion mixture to a blender, and add cocoa, chili powder, chipotles and adobo sauce, canned tomatoes, cumin, coriander, anise, black pepper, salt, ground cloves, pepitas, sesame seeds, and raisins. Place lid on blender and purée until smooth.
    3. Place chicken in the bottom of your Instant Pot/Slow Cooker. Pour sauce over top, and add cinnamon stick. Place lid on pot and set to slow cook on “medium” for 6 hours or “high” for 4 hours.
    4. When timer goes off, cut chicken into bite-sized pieces (should fall apart easily) and serve in warm tortillas topped with fresh cilantro, red onion, and pepitas.

    2 Comments